2.The uniqueness of the printer Ethernet ID address:All the Ethernet ID addresses of printers
connected with the network must be unique that is the Printer Ethernet ID addresses must be
different from the PC Ethernet ID addresses.If the Printer has the same Ethernet ID address as the
PC, the printer can't connect to the network or print properly. In that case, users need to change the
printer Ethernet ID address through ( Printersetting tool-Ethernet ) which is on the attached CD with
the printer . We will introduce the operation later.
3.The default IP address of the printer is: 192.168.1.87. In order to connect the printer with the PC
successfully, users need to change the PC IP address so that the IP addresses of PC and Printer are
in the same network segment .For example, if the printer IP address is: 192.168.1.87, users can set
the PC IP address as 192.168.1.60 so these two IP addresses are in the same network segment. See
the following picture.
After set the PC IP address in the same network segment with the Printer IPaddress, users can check
the network connection situation on the power-on self-test page through "ping" instruction. If the
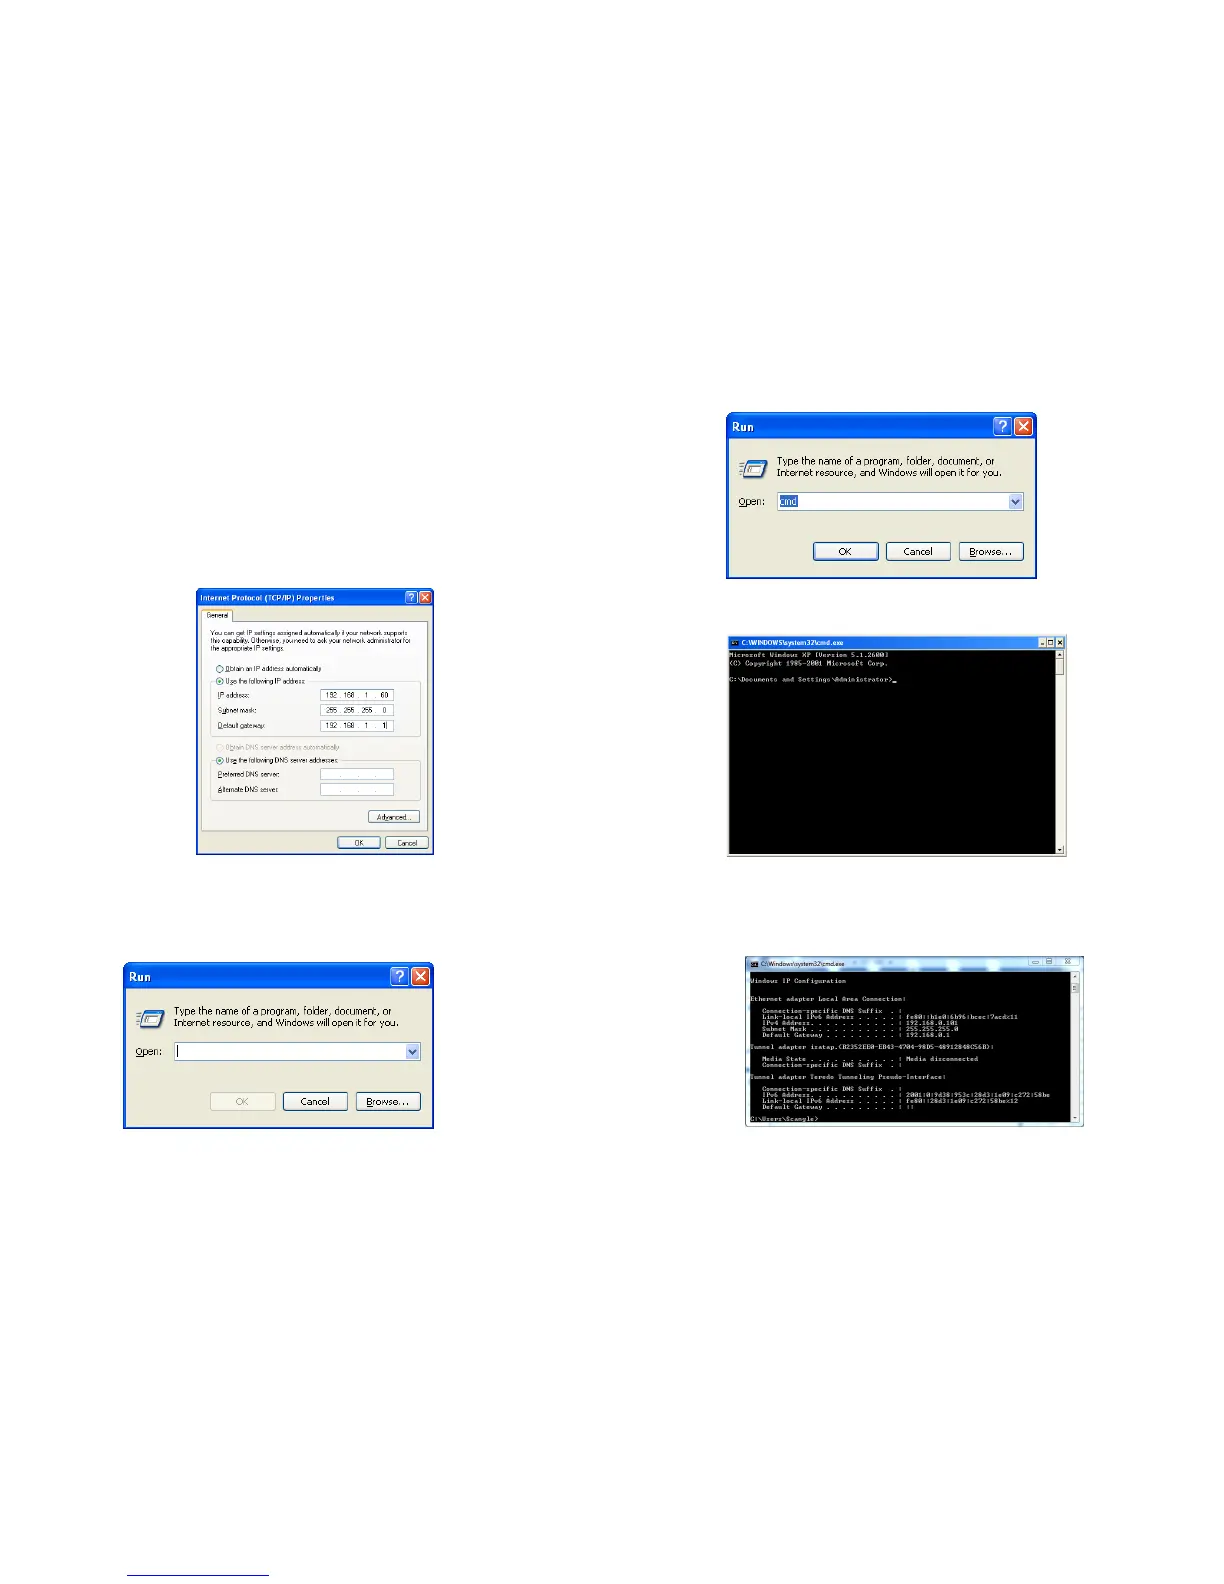
power-on self-test page shows the IP address as:192.168.1.87, then click "windows" "Run".
See the following picture.
Input "cmd', see the following picture.
Click "OK", see the following picture.
Input ping instruction to test the network connection. The instruction is: ipconfig. the press “ Enter”
See the following picture, the IP of computer will be appear.
10 11
 Loading...