www.scheppach.com / service@scheppach.com / +(49)-08223-4002-99 / +(49)-08223-4002-58
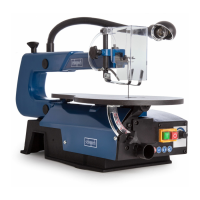
Blade guard assembly, Fig. 4
Install the blade guard to the holder as shown in the dia-
gram. Secure the screws with a nut and washer.
• Lift the saw onto the frame and base and push it onto
the workbench.
• Familiarize yourself with the saw operating elements
and features.
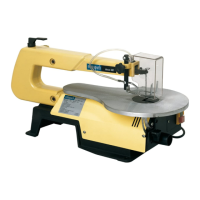
Mounting the saw on a work bench, Fig. 5
• A workbench made from solid wood is betier than one
made of plywood, as interfering vibrations and noise
are more noticeable with plywood.
• The necessary tools and small parts for assembling
the saw on a workbench are not supplied with the saw.
However, use equipment of at least the following size:
E Saw body
F Foam rubber base
G Work bench
H Flat seal
I Washer
J Hexagonal nut
K Lock nut
L Hexagonal bolt
Ouantity Description
4 Hexagonal bolts (6mm) 1/4-20 x length
4 Flat seal (7mm) 9/321.0
4 Washers (7mm) 9/321.0.
8 Hexagonal nuts (6 mm) 1/4-20
First of all, drill holes into the seating surface and then
insert the screws.
• A foam rubber base for reduction of noise is not sup-
plied with the saw either. However, we expressly rec-
ommend that you use such a base to keep vibration
and noise to a minimum. Ideal size 400 x 240 mm.
CHANGING THE SAW BLADES
Warning: Switch off the saw and remove the mains
supply plug before installing saw b!ades in order to
avoid injuries caused by unintentiona! activation of
the saw.
A. Flat saw-blades Fig. 6
Use the adapter with at saw-blades.
The saw-blade is xed with Allen screws.
A 1 Saw-blade removal, g. 7+8, 10
• Extract the saw-blade by sliding the table’s inlay up,
then unscrew the tightening screw (1).
• Slightly press the upper arm (M) down (g. 10).
• Then remove the sawblade by pulling it forward out
of the supports and through the access perforation
in the table.
A 2 Inserting the saw-blade:
• Put the saw-blade with the two adapters into the lower
support, the other end into the upper support.
• Slightly press the upper arm (M) down (g 10) before
hooking it in.
6. Technical data
deco-flex
Extent of delivery
Scroll saw
Flexible Wave
Accessories kit
Operating instructions
Technical data
Dimensions
L x W x H mm
630 x 320 x 380
Bench size mm
ø 255 x 415
Saw blade
length mm
133
Cutting height
max. mm
50
Working depth mm
405
Lifting
movement mm
15
Lifting speed 1/min
(electronical)
550 – 1650
Bench diagonal
adjustment left degrees
0 – 45
Weight kg
15,0
Suction connection
piece ø mm
35
Motor
Electrical motor
230-240 V~/50 Hz
Power consumption
P1 W
90
Sound pressure level on
oper at or’s ear measured
in accordance with DIN
45635 with max. speed
during idle running
77,3 dB (A)
7. Installation
Setting the saw bench, Fig. 2
Setting the angle scale
• Release the star button (A and bring the saw bench
(B) to a right angle (C) in relation to the saw blade.
• Use a 90° angle tc measure the right angle between
the blade and the bench. The saw blade be 90° to
the angle.
• Close the star button again when the distance be-
tween the blade and the 90° angle is at a minimum.
The bench should then be at 90° to the saw blade.
• Release the lock screw (D) and bring the indicator to
the zero position. Fasten the screw. Please note: the
angle scale is a useful piece of supplementary equip-
ment, but should not be used for precision work. Use
scrap wood for saw tests, adjust the bench if neces-
sary.
Note: The bench should not be on the motor block,
this can cause undesireable noise.
Horizontal saw bench and diagonal cuts, Fig. 2+3
• The saw bench can be positioned into a 450 diagonal
position or be left in the horizontal position.
• You can read off the approximate slope angle by us-
ing the angle scale located under the work bench. For
more exact adjustment, use scrap wood for some saw
tests; adjust the bench if necessary.
20 / 136
EN