22 GB
www.scheppach.com / service@scheppach.com / +(49)-08223-4002-99 / +(49)-08223-4002-58
• Precision work/engraving: hold the drive unit like a
pen.
• Rough work: hold the drive unit like the handle of a
hammer.
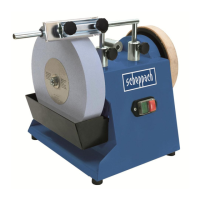
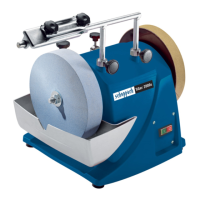
8.5 Grinding
• Place the workpiece onto the workpiece support (8)
and slowly guide the workpiece towards the grind-
ing wheel (5) at the desired angle to the point where
workpiece and grinding wheel make contact.
• Move the workpiece slightly back and forth to pro-
duce an optimal grinding result. This way the grind-
ing wheel (5) will be evenly worn. Allow the work-
piece to cool down occasionally.
Important!
If the grinding wheel becomes jammed during op-
eration, remove the workpiece and wait until the tool
reaches its top speed again.
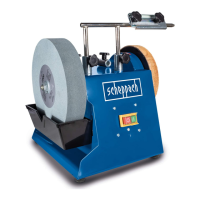
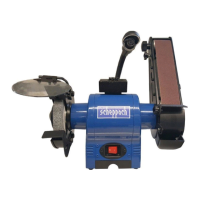
8.6 Polishing
• Apply a thin coating of polishing paste to the grind-
ing surface of the polishing wheel (6) (Fig. 18/ Item
3).
• Press on the workpiece in the polishing direction
and move back and forth from left to right in a pen-
dulum action.
• Always carry out polishing work in the direction of
rotation of the polishing wheel (6).
Important!
Polishing in the opposite direction to the direction
of rotation of the polishing wheels can cause damage
to the polishing wheels, which in turn can
result in injuries.
9. Cleaning, maintenance
Always pull out the mains power plug before starting
any cleaning work.
9.1 Cleaning
• Keep all safety devices, air vents and the motor
housing free of dirt and dust as far as possible.
Wipe the equipment with a clean cloth or blow it with
compressed air at low pressure.
• We recommend that you clean the device
immediately each time you have nished using it.
• Clean the equipment regularly with a moist cloth
and some soft soap. Do not use cleaning agents
or solvents; these could attack the plastic parts of
the equipment. Ensure that no water can seep into
the device. The ingress of water into an electric tool
increases the risk of an electric shock.
9.2 Maintenance
There are no parts inside the equipment which require
additional maintenance.
when you tighten the nut (D).
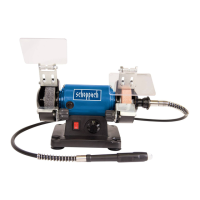
7.6 Installing the exible shaft (Fig. 10)
• Insert the internal axle (a) of the exible shaft (12)
into the guide shaft of the equipment.
• Secure the fastening nut of the exible shaft to the
equipment thread by hand (left-hand thread).
Important!
When you work with the exible shaft (12), the
safety glass (2) must be placed right up against
the workpiece support (8) in order to prevent uncon-
trolled touching of the wheels.
7.7 Inserting the various tools into the exible
shaft (Fig. 11)
1. Press the supplied locking pin (13) into the hole in
the exible shaft (12) and turn the shaft until the
pin latches in place.
2. Now undo the collet chuck nut.
3. Insert the required tool into the sleeve as far as the
stop and screw the collet chuck nut tight.
8. Operation
8.1 On/Off switch (1)
• To switch on the equipment set the On/Off switch
• (1) to position I.
• Move the On/Off switch (1) to position 0 to switch
• off the equipment.
Important!
When you are not working with the exible shaft (12),
it is not allowed to be mounted on the equipment be-
cause it could then y around out of control.
After switching on, wait for the equipment to reach its
maximum speed of rotation. Only then should you be-
gin with the grinding.
8.2. Speed selector (Fig. 1)
The required speed can be set with the speed control
(11).
8.2.1 Speed of the exible shaft
The correct speed depends on the tool used and
the type of material being processed.
8.3. Information on speed settings
• Small cutters/grinding pins: High speed
• Large cutters/grinding pins: Low speed
8.4. Work practice
• Exert only moderate pressure on the workpiece so
that it can be machined at constant speed.
• Instead of accelerating your work, high pressure will
cause the drive unit to slow down and even stop,
thus overloading the motor.
• For your own safety, it is essential to secure small
workpieces with a screw clamp or vise.
 Loading...