www.scheppach.com / service@scheppach.com / +(49)-08223-4002-99 / +(49)-08223-4002-58
30 GB
8-13 Accessories bag enclosed, containing:
29x lenticular ange head screw M8x16 (Fig. 8a)
29x locking nut M 8 (Fig. 8b)
2x hexagon screw M6 (Fig. 9a)
2x locking nut M6 (Fig. 9b)
2x washer D 20 mm (Fig. 10)
2x lock washer without cap D 18 mm (Fig. 11)
2x locking nut M 4 (Fig. 12a)
2x llister head screw M 4x610 (Fig. 12b)
1x cover panel with clinch stud (Fig. 13a)
2x plastic wascher (Fig. 13b)
1x pivot bushing, galvanised (Fig. 13c)
1x hexagon nut, self-locking M 6 (Fig. 13d)
1x hexagon screw M 5x12 (Fig. 13e)
1x collar bushing (Fig. 13g)
1x hexagon nut, self-locking M5 (Fig. 13h)
4x mushroom head screw M6x12 (Fig. 17a)
4x washer D6 (Fig. 17b)
4x hexagon nut, self-locking M6 (Fig. 17c)
Additional accessories bag enclosed for protective ap with handle (Fig. 18)
2x saw guard (Fig. 18a)
1x tension spring (Fig. 18b)
2x hexagon screw M8x35 (Fig. 18c)
2x hexagon nut M8 (Fig. 18d)
6x hexagon nut, self-locking (Fig. 18e)
1x hexagon screw M8x12 (Fig. 18f)
6x Philips screw M4x10 (Fig. 18g)
6x locking nut M4 (Fig. 18h)
3x hexagon screw M8x20 (Fig. 18j)
3x collar bushing D 8mm (Fig. 18k)
3x washer D 8mm (Fig. 18m)
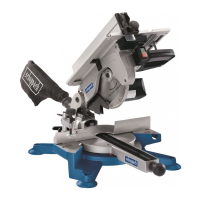
8. Assembly
For packaging reasons, the swivel log saw does not come fully assembled. It must be assembled on a com-
pletely level surface.
A. Place the packaging, cardboard or similar on the oor to prevent damage. Remove the base frame from the packaging
and position the machine with the swivel side on top (Fig. A).
B. Lift wheel axle slightly, slide one washer (10) and one wheel (7) (for external side see Fig. B3, B4) onto the axle on
each side. Fit lock washer (11) on the axle with the saw blade wrench and knock onto the shaft with the hammer.
(Secure lock washer against falling with adhesive tape) (Fig. B1 - B4).
C. Mount foot left and right (4 a, b) on the base frame, each with 4 lenticular ange head screws M8x16 (8 a) and locking
nut M8 (8 b) (Fig. C1 - C4). Lightly tighten all frame screws by hand.
D. Screw rear strut (3) onto the mounted feet with 4 lenticular ange head screws M8x16 (8 a) and locking nut M8 (8 b).
Mount strut left and right (6 a, b) on the side of the feet (4 a, b), each with 5 lenticular ange head screws M8x16 (8 a)
and locking nut M8 (8 b). (Fig. D1, D2, D3).
E. Place machine on the feet, cut the cable tie, release the locking lever and tilt the swivel out. (Fig. E1, E2). Tighten
all frame screws well. It is important here that the swivel log saw stands on a level surface. Mount swivel protection
(17) on the inside of the swivel with 2 mushroom head screws M6 x 12, 2 washers 6mm and 2 self-locking nuts M6
respectively and tighten securely. Make sure that the mushroom head screws are guided in from the outside. (Fig. E3).
F. Mount guard bracket (15) on the right rear foot with 2 lenticular ange head screws M8x16 (8 a) and locking nut M8
(8 b). (Fig. F)