ww w.scheppach.com
28
|
GB
• The grinding/sanding belt (11) must run centrally on
the grinding/sanding surface. If not, you can use the
knurled screw (14) to make adjustments.
8.5. Fasten stop (12) (Fig. 12)
• Insert the workpiece stop (12) with the recess in the
groove on the table and fasten with the xing screw
(C).
9. Operation
m WARNING!
Always make sure the device is fully assembled
before start-up!
9.1. Mounting sander to work bench
If your belt/disc sander is to be used in a permanent lo-
cation, it is recommended you secure it to a workbench
or other stable surface.
• Mark holes on workbench where belt/disc sander is
to be mounted using holes in the base as a template
for hole pattern.
• Drill holes through workbench.
• Place belt/disc sander on workbench aligning holes
in the base with holes drilled in the workbench.
• Insert bolts (not included) and tighten securely with
lock washers and hex nuts (not included). Note: All
bolts should be inserted from the top. Install the lock
washers and hex nuts from the underside of the
workbench.
9.2. Clamping sander to work bench
If your sander is to be used as a portable tool, it is rec-
ommended you fasten it permanently to a mounting
board that can easily be clamped to a workbench or
other stable surface.
The mounting board should be of sucient size to
avoid tipping while belt/disc sander is in use. Any good
grade plywood or chipboard with a 3/4 in. (19 mm)
thickness is recommended.
• Mark holes on board where belt/disc sander is to be
mounted using holes in the base as a template for
hole pattern.
• Follow last three steps in section Mounting Belt/Disc
Sander to Workbench.
If lag bolts are used, make sure they are long enough to
go through holes in belt/disc sander base and material
the belt/ disc sander is being mounted to. If machine
bolts are used, make sure bolts are long enough to go
through holes in belt/disc sander, the material being
mounted to, and the lock washers and hex nuts.
Be sure always to mount the correct parts when chang-
ing the abrasive sleeves. The table inlays have to be
bigger than the abrasive sleeves.
Note! The 13 mm abrasive sleeve is put directly onto
the spindle (1).
Table:
Abrasive sleeve
inside Ø
Table inlay
inside Ø
Spindle disc
size
13 mm 13 mm small 16 mm
19 mm 19 mm medium 22 mm
26 mm 26 mm medium 22 mm
38 mm 38 mm large 44 mm
51 mm 51 mm large 44 mm
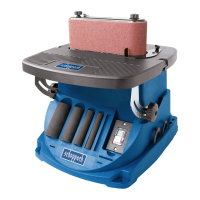
8.2. Installing the abrasive belt (Fig. 9, 10)
m ATTENTION! Switch o the machine and pull
out the mains plug.
• Remove the abrasive sleeve (9), rubber sleeve (7),
stage plate (8) and cover (6) if already mounted.
• Guide the grinding belt attachment (10) over the
spindle (1) and the stud (G) into the groove provided
for this purpose.
• Also make sure that the recesses (H) on the attach-
ment are inserted into the notches. If the recesses
do not engage immediately, turn the abrasive belt by
hand until they engage.
• Screw washer (B) and locking screw (A) onto the
spindle (1).
8.3. Changing the grinding/sanding belt (11)
(Fig. 11)
• Pull out the power plug.
• Turn the grinding/sanding tensioner (13) to the right
in order to reduce the tension on the grinding/sand-
ing belt (11).
• Remove the grinding/sanding belt (10).
• Mount and the new grinding/sanding belt in reverse
order. Important. Note the running direction: On the
housing and on the inside of the grinding/ sanding
belt!
8.4. Adjusting the grinding/sanding belt (11)
• Pull out the power plug
• Push the grinding/sanding belt (11) by hand slowly in
the running direction.
 Loading...