Initial Setup and Use
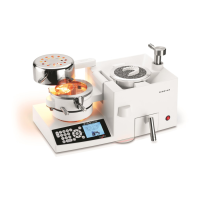
5. With pellets provided, ll cup (E) half full with pellets.
6. Pour remaining pellets in the pellet drawer (F) and close the drawer ush to the machine.
7. Place the platform on the inner lip of the pellet cup (white arrow), with the pellet level half full.
IMPORTANT: Make sure the inner lip of the cup is clear of pellets.
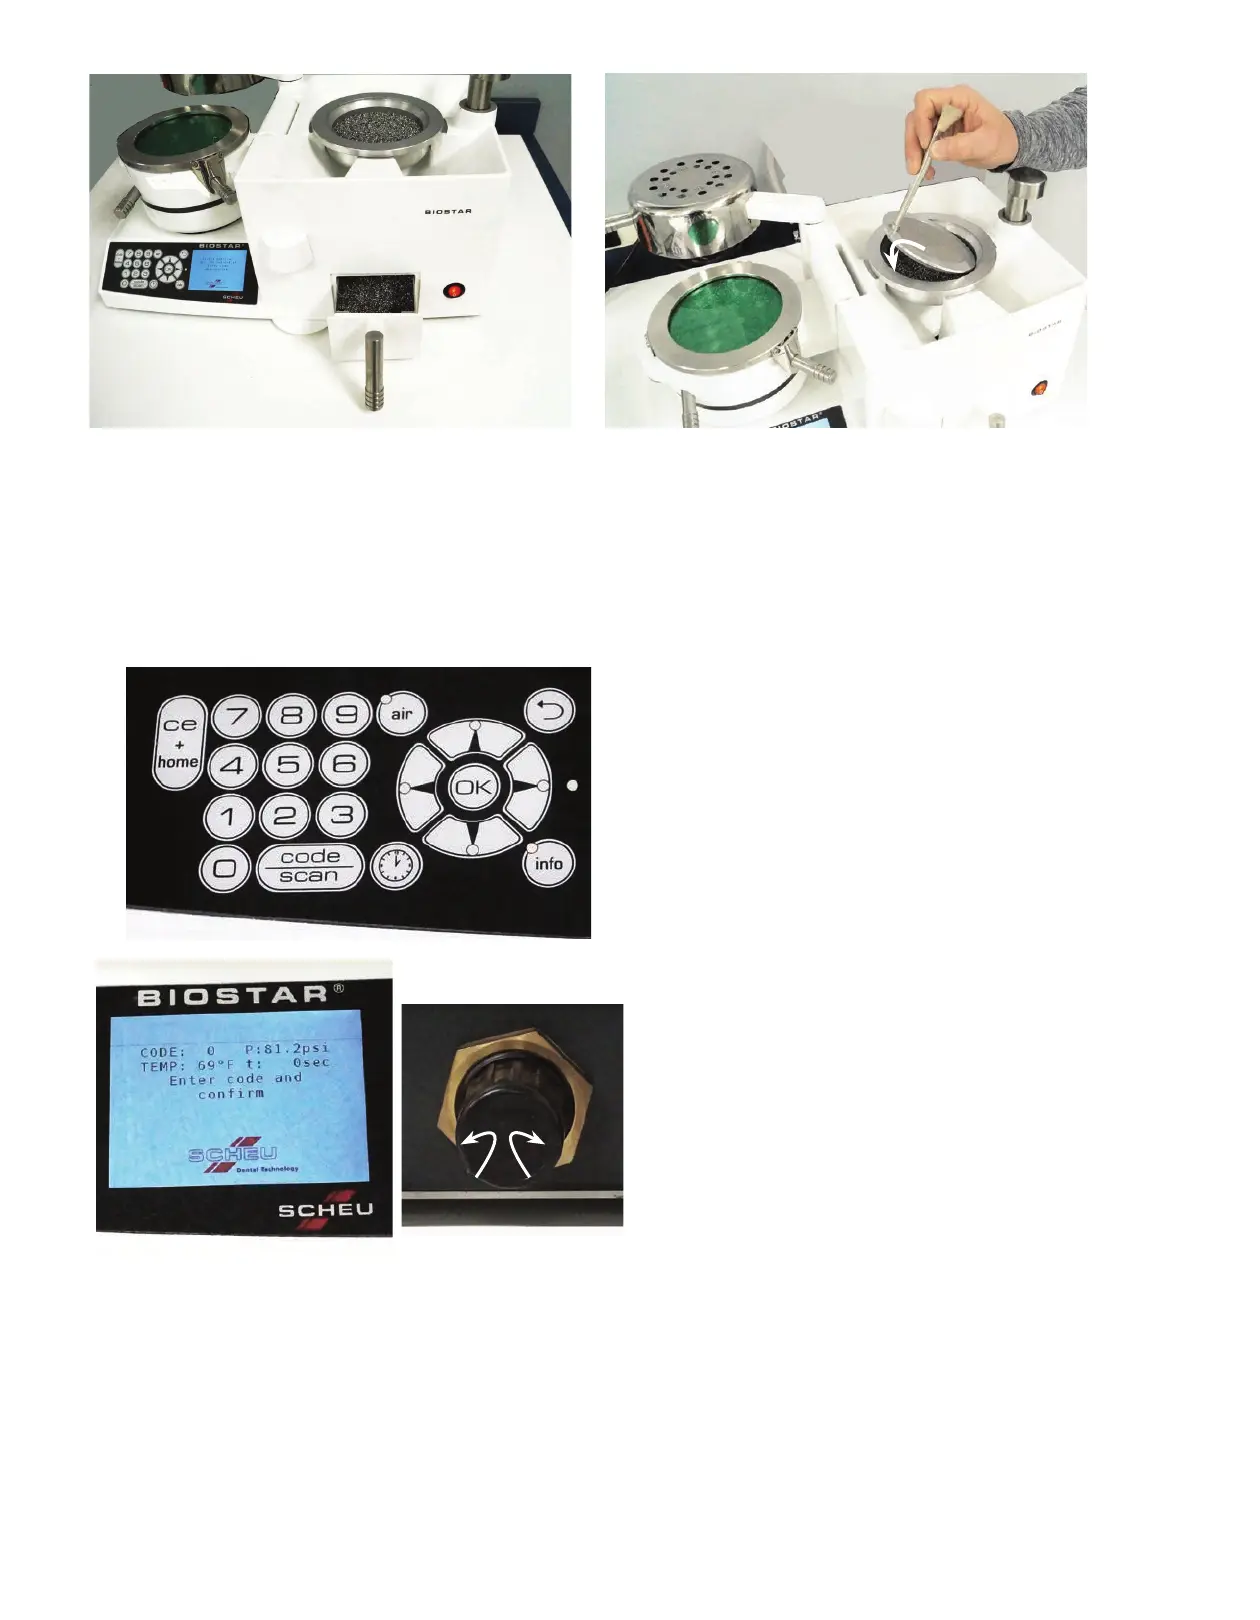
8. Working pressure of 80psi is pre-set in the
machine. With the power button in the ‘ON’
position, press the CODE/SCAN button (A).
The current pressure will show on the LCD
display. Conrm or adjust the Biostar air
pressure (B) if needed.
Reach behind the machine and release the
locking cap (C) on the regulator by pulling it
outward. Set the pressure by turning the regulator
dial on the back of the machine clockwise to
increase the pressure, counterclockwise to
decrease (D). The LCD display will show the
change in pressure (E). Once the desired pressure
is set, lock the regulator by pushing the cap in
towards the machine.
Maximum pressure can only equal what the
main line is capable of supplying.
• Reminder: DO NOT use material thicker than 5mm within the clamping mechanism. This may
cause the Biostar to malfunction while pressure is in the chamber, and damage the internal
chamber springs.
• ALWAYS wear safety glasses when using this machine and during all fabrication procedures.
E
F
B
A
E
C
D
-
+