Do you have a question about the Schlage KING COBRA and is the answer not in the manual?
Details on how to confirm all necessary items are present in the package.
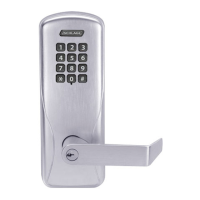
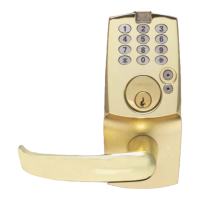
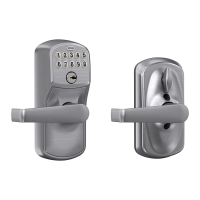
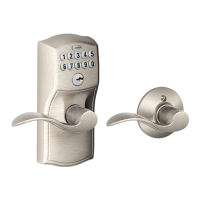
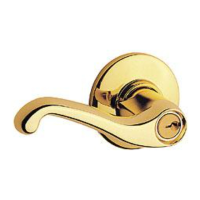
Overview of the KC9111/KC9111-2 and KC9321/KC9321-2 trims and their compatibility.
Lists all required tools and materials for the installation process.
Provides contact details for Schlage Lock Company for technical assistance.
Discusses door conditions and cover plate usage for installation.
Lists compatible Schlage parts for the clover leaf cam required for the KC9000 trim.
Information on small and full-size IC cores and their required blocking rings.
Details cylinder length requirements and how to select blocking rings.
Instructions on how to loosen baseplate screws without removing them.
Specifies the minimum required length for the key cylinder to be installed.
Procedure to move the dead latch to make space for the key cylinder.
How to hold the dead latch in position while turning the trim.
Verifies correct alignment of the dead latch with the baseplate holes.
Instructions for installing the key cylinder, including alignment.
How to center the interface for interchangeable cores.
Step-by-step instructions for tightening the four baseplate screws.
Identifies the "critical edge" of the dead latch for proper alignment.
Instructions on aligning the dead latch's critical edge with the baseplate hole.
Guidance on fully tightening the set screw and troubleshooting.
Instructions on how to determine the correct handing (Right/Left) of the door.
How to adjust the stop screw for correct lever or turnpiece rotation.
How to verify the correct orientation of the interface for RHR and LHR installations.
Instructions on how to carefully pry off the retaining ring from the interface.
Steps to remove, flip, and reinstall the hook assembly for reversing.
How to install the retaining ring for RHR and LHR installations.
Instructions for determining orientation and installing the lever onto the shaft.
How to place the lever cover onto the inside of the lever.
How to secure the lever cover using Phillips head screws.
Instructions for both retrofit and new installations involving Adams Rite products.
Guidance on applying the template and drilling/tapping holes for installation.
How to orient the interface posts and hook for proper latch mechanism engagement.
Steps to insert the interface into the cylinder hole while keeping the latch pushed in.
How to check the interface installation from the inside for LHR setup.
How to center and position the interface flush with the door surface.
Instructions for tightening set screws and mounting screws to secure the interface.
Steps to peel the paper backing off the exterior gasket.
How to apply the exterior gasket to the back of the trim.
Instructions for installing the interface spacer and prep cover plate.
How to line up and slide the trim onto the door for proper engagement.
How to partially tighten the top mounting screw in the trim.
Steps to remove the battery cover to access the batteries.
Instructions for installing and tightening the lower mounting screws and finishing the top screw.
How to install the four AAA batteries, observing polarity and reusing the battery bag.
How to install the battery pack into the compartment, ensuring correct wiring.
Steps to slide on and secure the battery compartment cover and handle the key.
How to place and secure the face plate onto the latch mechanism.
Instructions for inserting the water plug into the top mounting screw hole.
Test to ensure the lever can be pushed down but not pulled up.
Test for correct clockwise/counterclockwise rotation of the turnpiece based on handing.
Test to check if the lever/turnpiece retracts the latch when the key is turned counterclockwise.
Confirm that the lever/turnpiece no longer retracts the latch after removing the key.
Test of keypad entry with the default access code to check LED feedback and latch retraction.
Verification of the proper operation of the inside egress device.
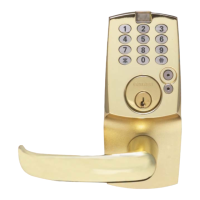
| Finish | Bright Brass |
|---|---|
| Strike Plate Included | Yes |
| Keyed Alike | No |
| Keyway | C |
| Type | Deadbolt |
| Bolt Throw | 1" |