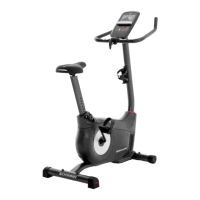


A
Amber FullerSep 23, 2025
How to fix seat post movement on Schwinn Fitness Equipment?
- Ddaniel65Sep 23, 2025
Ensure the adjustment pin is locked into one of the seat post adjustment holes, and the knob is securely tightened.
How to fix seat post movement on Schwinn Fitness Equipment?
Ensure the adjustment pin is locked into one of the seat post adjustment holes, and the knob is securely tightened.
What to do if Bluetooth HR is not displayed on Schwinn Exercise Bike?
If your Schwinn Exercise Bike isn't displaying Bluetooth® HR, follow the troubleshooting instructions provided with your HR monitor. If your monitor has replaceable batteries, install new batteries. Try moving the unit away from potential sources of interference like TVs or microwaves. If the issue persists after eliminating interference, replace the HR monitor. If HR still does not function, replace the Console.
What to do if resistance does not change on Schwinn 130/510U?
If the resistance on your Schwinn Exercise Bike isn't changing, start by checking the data cable for any crimped or cut wires and replace it if damaged. Next, check the data cable connections and orientation, making sure the small latch on the connector snaps into place. If the issue persists, you may need to check the Servo Motor (requires shroud removal). If the magnets move, adjust them until they are within the proper range, otherwise replace the Servo Motor if it is not functioning correctly. Finally, inspect the console for any signs of damage and replace it if necessary.
How to stop Schwinn Exercise Bike from rocking?
To stop your Schwinn Exercise Bike from rocking, adjust the levelers until the bike is level. If the surface is extremely uneven, you may need to move the bike to a more level area.
What causes loose pedals on a Schwinn 130/510U?
Loose pedals on a Schwinn Exercise Bike are typically caused by a loose pedal-to-crank arm connection. Ensure the pedal is tightened securely to the crank, and verify that the connection is not cross-threaded.
Why is my Schwinn Fitness Equipment Bluetooth HR displayed incorrectly?
The console might still be connected to the previous user. Disconnect from them by pushing the Connect Bluetooth® button and then push it again to connect to your device.
Why is Contact HR not displayed on my Schwinn Fitness Equipment?
Ensure the cable is securely connected to the console and that the cables from the handlebars and the cable to the console are secure and undamaged. Make sure your hands are centered on the HR sensors and kept still with relatively equal pressure applied to each side. A conductive electrode cream may improve contact. If these steps don't work, the static handlebar should be replaced.
What to do if my Schwinn Fitness Equipment Bluetooth HR is not displayed?
Follow the troubleshooting instructions provided with your Bluetooth device. If the monitor has replaceable batteries, install new batteries. Try moving the unit away from sources of interference like TVs or microwaves. If eliminating interference doesn't work, replace the HR monitor. If the HR still doesn't function, replace the console.
Why does my Schwinn 130/510U Exercise Bike say 'Contact HR'?
If your Schwinn Exercise Bike operates but displays 'Contact HR', ensure the HR cable is securely connected to the console and the base of the mast. Check the HR cable box connection, ensuring the cables from the handlebars and to the console are secure and undamaged. Make sure your hands are centered on the HR sensors and kept still with equal pressure. If your hands are dry or calloused, use a conductive electrode cream. If these steps don't resolve the issue, the Static Handlebar should be replaced.
Why does my Schwinn 130/510U console shut off during use?
If your Schwinn Exercise Bike console shuts off during use, first ensure the unit is properly plugged into a functioning wall outlet and check the connection at the front of the unit, replacing the adapter if damaged. Inspect the data cable for any damage and ensure it's correctly connected and oriented. Try resetting the machine by unplugging it from the electrical outlet for 3 minutes, then reconnecting it. Also, check the magnet position and speed sensor alignment (requires shroud removal).
Information regarding compliance with FCC regulations for the machine and power supply.
Guidance on selecting an assembly area and basic assembly tips.
Details about tools included with the machine and those that are not included but recommended.
Instructions for attaching the front and rear stabilizers to the main frame.
Steps to install the console mast, gasket, and top shroud onto the main assembly.
Procedure for installing the handlebars onto the console mast, including cable routing.
Instructions for connecting the console to the console mast, ensuring proper cable connection.
Guide to inserting and securing the seat post into the main frame of the bike.
Steps for attaching the seat to the seat post, ensuring it is straight and secure.
Instructions for installing the left and right pedals, noting reverse threading.
How to attach the water bottle holder to the console mast.
Steps for connecting the AC adapter to power the machine.
Final checks to ensure all hardware is tight and components are properly assembled.
Instructions for adjusting the levelers to ensure the bike is stable and level.
Guidance on how to safely tilt and move the upright bike to a desired location.
Explanation of the functions of each button on the console keypad for navigation and control.
Details on how the program display shows workout information and course profiles.
Information on how the heart rate display works and how to interpret the BPM readings.
Explanation of Speed, Distance, Time, and Calories displayed during a workout.
Recommendations for appropriate clothing and footwear for exercising on the machine.
Advice on exercise frequency and duration, including consultation with a physician.
Instructions for adjusting the seat height for optimal comfort and safety during workouts.
How to position feet on pedals and secure the straps for efficient pedaling.
Description of the console's power states and how it enters idle or welcome modes.
Information on the console's automatic shut-off feature to save power.
How to start and use the basic manual workout program for immediate exercise.
Details on the HIIT Interval Program, including sprint and recover periods.
Overview of automated workout programs with varying resistance and levels.
How to use the Heart Rate Control program to maintain a target heart rate during workouts.
Instructions on how to change the displayed workout metrics like speed and RPM.
How to adjust the resistance level during any workout program using the console buttons.
Steps for pausing an active workout or stopping it to enter workout summary mode.
Procedure to disable or enable audible cues from the console.
Information about the workout summary displayed after completing an exercise session.
Daily checks and cleaning procedures for the exercise machine to ensure proper function.
Weekly cleaning and lubrication recommendations for machine parts and operation.
Monthly checks for bolt tightness and screw security to maintain machine integrity.
Troubleshooting steps for issues with the console display or power.
Steps to resolve issues where contact heart rate sensors are not functioning.
Troubleshooting for problems with Bluetooth® heart rate monitor connectivity or display.
Steps to fix incorrect or erratic Bluetooth® heart rate displays on the console.
Solutions for when the machine is not registering speed or RPM, showing a 'Please Pedal' error.
Steps to fix issues where the resistance level does not change during operation.
Troubleshooting for the console shutting off unexpectedly during a workout.
Solutions for instability or rocking of the unit, including leveling adjustments.
Steps to fix loose pedals or difficulty pedaling the machine.
Troubleshooting advice for resolving clicking noises experienced while pedaling.
How to ensure the seat post is securely locked and does not move during use.
Defines who is eligible for the warranty coverage and its non-transferable nature.
Details the warranty coverage for defects in materials and workmanship for the product.
Actions required by the owner to maintain warranty coverage and obtain service.
Lists conditions and damages that are excluded from the warranty coverage.
Instructions on the process for contacting Nautilus for warranty service and repairs.
Legal disclaimers and limitations on implied warranties and express warranties.
Defines the exclusive remedies available to the purchaser for warranty claims.
Information on how state laws may affect warranty rights.
Details on what happens to warranty coverage after the expiration period.
Specific warranty information for products purchased outside the United States.
| Brand | Schwinn |
|---|---|
| Model | 130/510U |
| Category | Exercise Bike |
| Language | English |