70
Note: Your machine may not match the following images
exactly.
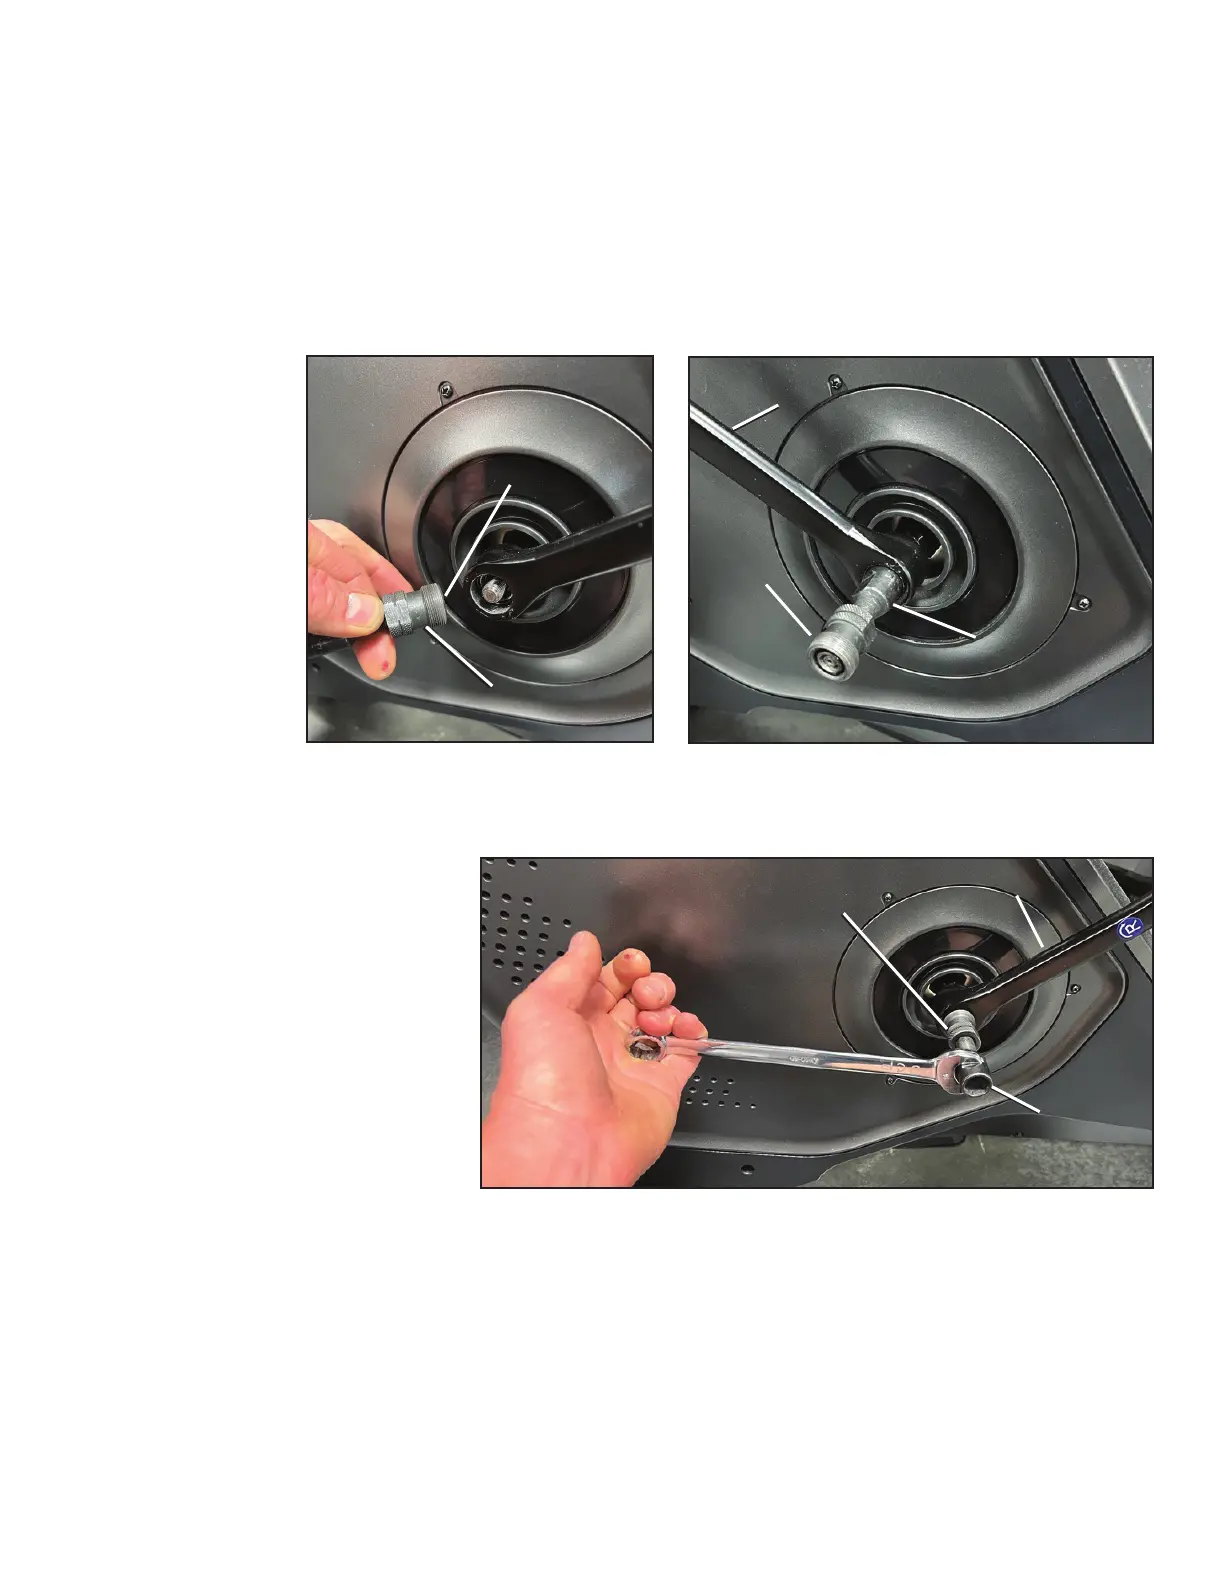
9. Thread the Crank Puller into the Crank Arm (B). When
the Crank Puller is in the correct position, only 1-2 threads
on the outer portion (CP2) of the Crank Puller should show.
Note: Be sure the end of the Bolt (CP1) of the Crank
PullerisushwiththeNut(CP2)asshown,
before use.
10. Using a wrench, turn the inner portion (CP3) of the
CrankPullerclockwise.TheCrankArm(B)willslideoasit
is tightened.
CP2CP2
CP3CP3
BB
CP3
CP2CP2
BB
CP2CP2
CP1CP1
Crank puller nut and inner bolt