ASSEMBLY
SCIFIT • Scientific Solutions for Fitness • SCIFIT • Scientific Solutions for Fitness • SCI FI T
12
Tools Required:
5/ 16 Hex bit
Torque w rench set for 480 in/ lbs (5.54 Kg/m)
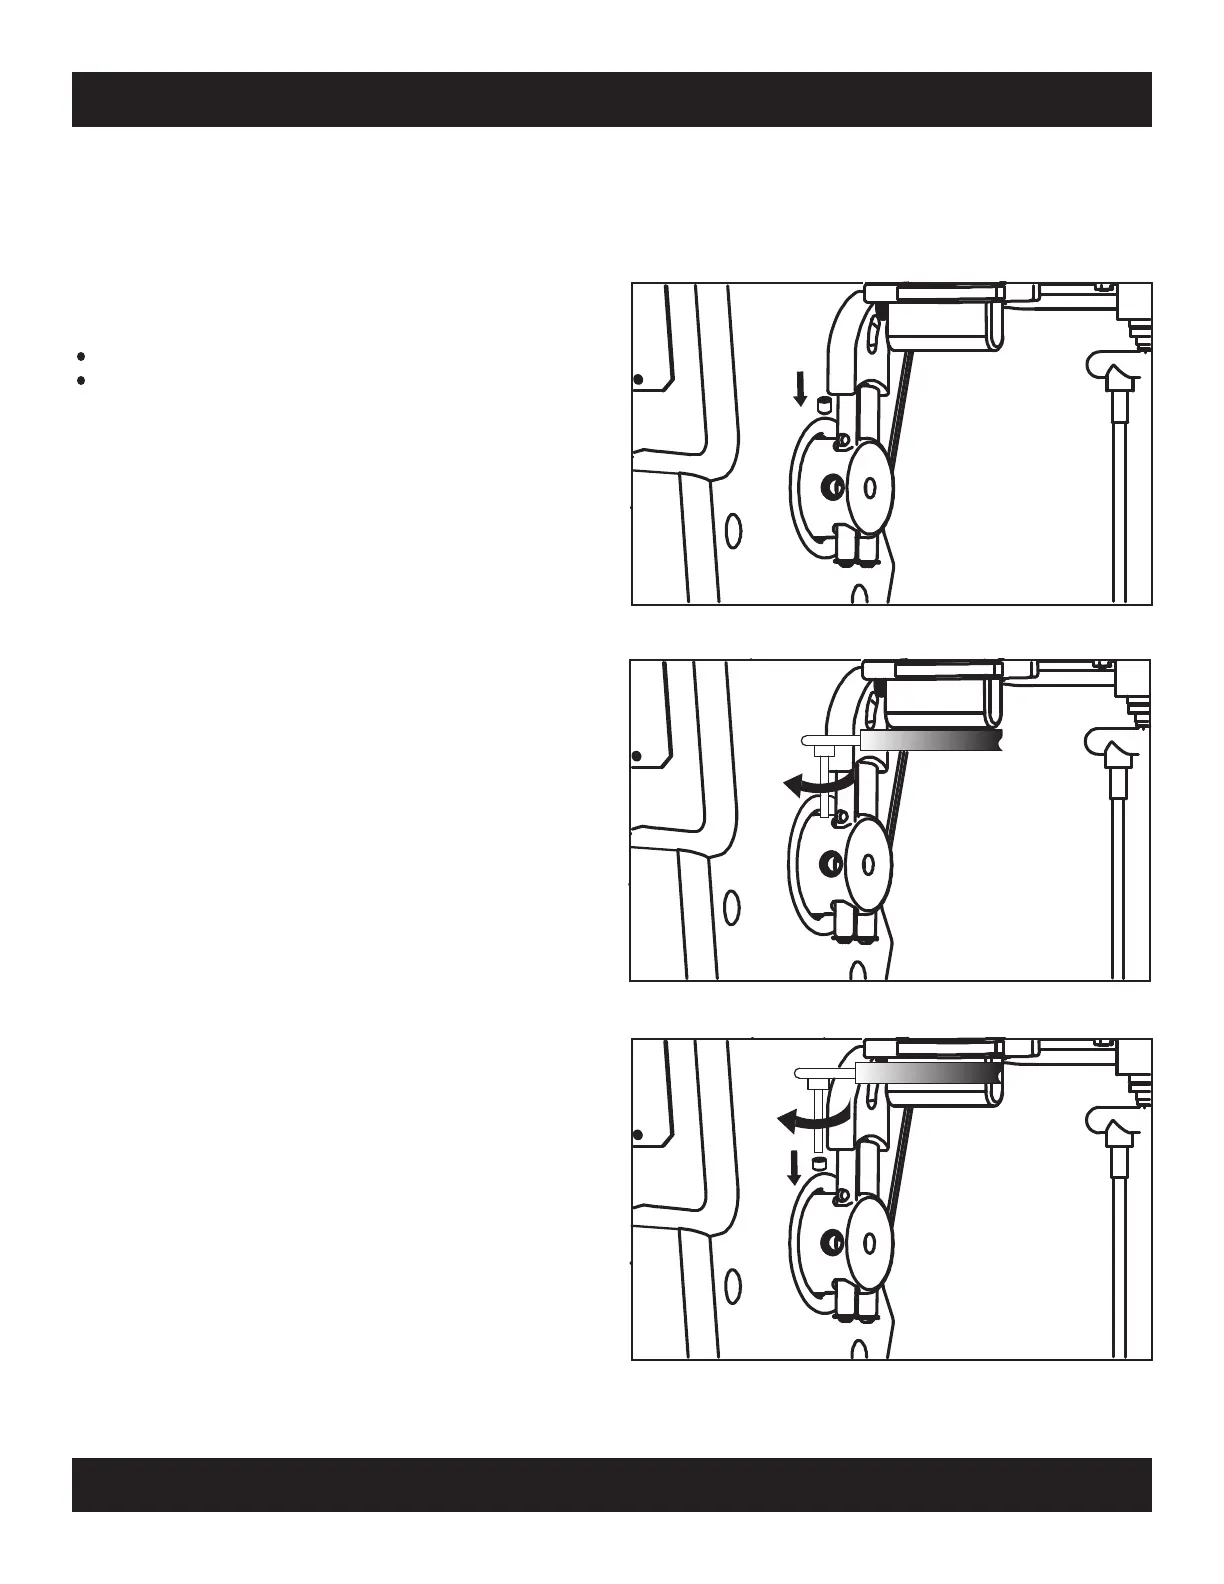
Step 1:
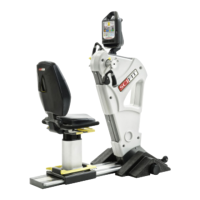
Step 2:
Note: The w rench w ill click w hen it has reached the
480 in/ lb (5.54 Kg/m) setting.
Step 3:
Step 4:
Verify LWR Fixed Cranks Are Secure (PRO2)
Your machine may have the lower fixed crank hub option, these
hubs are usually removed for shipment purposes. If this is the
case, attaching them is very simple. The following will explain
the steps necessary to attach the hubs.
Starting on the left side, slide the hub onto the lower shaft
of the machine, allowing 3/4” between the frame and the
end of hub. Align the set screw hole over the flat
surface area of the shaft, then use a 5/16 hex bit to secure
#P3111 (5/8-18 x .75 Socket) set screw as shown in the
drawing.
Using a 5/16 Hex bit and Torque wrench set at 480 in/lbs,
TIGHTEN the set screw to this setting.
Using a 5/16 Hex bit insert and secure #P3110
(5/16-18 x .5) set screw on top of the set screw #P3111
previously inserted in steps 1 and 2.
Note: The w rench w ill click w hen it has reached the
480 in/ lb setting (5.54 Kg/m)
Tehn using a 5/16 Hex bit and Torque wrench set at 480 in/lbs,
TIGHTEN the set screw as done in step 2.
Step 5:
Repeat steps 1 thru 4 for the under side of the hub.
Step 6:
Repeat steps 1 thru 5 for the right side of the machine.
Step 1
Step 2
Step 3 & 4