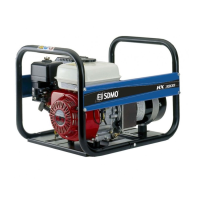
This document is a user manual for the SDMO HX 6000 C generator, providing comprehensive information on its function, technical specifications, usage, and maintenance.
The SDMO HX 6000 C is a portable generator designed to provide electrical power. It is powered by a Honda GX 390 engine and has a maximum output of 6000 W (4800 W nominal). The generator operates on unleaded petrol and has a fuel tank capacity of 6.1 liters. It features a single-phase alternating current output of 230V - 20.9A, with options for 1 x 2P+T 230V 10/16A and 1 x 2P+T 230V 32A sockets. The oil capacity is 1.1 liters, and the recommended oil is SAE 10W30. The generator's dimensions are 71.5 x 57 x 59 cm, and it weighs 75 kg. It is equipped with a spark plug (NGK BPR6ES / DENSO - W20 EPR-U) and has a sound pressure level of 87 dBA.
Usage Features:
Before starting the generator, it is crucial to read the manual thoroughly and understand all safety instructions. The generator should be placed on a flat, horizontal surface in a well-ventilated area, away from any flammable materials.
Starting the Generator:
- Check the oil level: Ensure the engine oil level is correct using the dipstick.
- Check the fuel level: Fill the fuel tank with unleaded petrol, making sure not to overfill.
- Open the fuel tap: Turn the fuel tap to the "ON" position (number 14, diag. A).
- Move the choke lever: If the engine is cold, move the choke lever to the "ON" position (number 10, diag. A). If the engine is warm, set it to "OFF."
- Move the engine switch: Set the engine switch to "ON" (number 10, diag. A).
- Start the engine: Pull the starter handle (number 13, diag. A) until resistance is felt, then pull it briskly to start the engine. Once the engine starts, gradually return the choke lever to "OFF."
- Connect appliances: Once the engine is running smoothly, you can connect electrical appliances to the generator sockets.
Stopping the Generator:
- Disconnect appliances: Unplug all electrical appliances from the generator sockets.
- Turn off the engine switch: Set the engine switch to "OFF" or "O" (number 10, diag. A).
- Close the fuel tap: Turn the fuel tap to the "OFF" position (number 14, diag. A).
Safety Precautions:
- Never operate the generator in an enclosed space due to the risk of carbon monoxide poisoning.
- Do not refuel while the engine is running or hot.
- Always ensure proper ventilation.
- Do not touch the hot engine or muffler to avoid burns.
- Keep children and pets away from the generator.
- Always use appropriate personal protective equipment.
Maintenance Features:
Regular maintenance is essential for the longevity and safe operation of the generator. The manual provides a detailed maintenance schedule based on operating hours.
Maintenance Schedule Overview:
| Part |
Maintenance Task |
Each time it is used |
After the first 20 hours of use |
Every 3 months or 50 hours |
Every 6 months or 100 hours |
Every 12 months or 300 hours |
| Engine oil |
Check the level, Change |
● |
|
|
|
● |
| Air filter |
Check, Clean |
● |
|
● (1) |
|
|
| Sediment bowl |
Clean |
|
|
|
● |
|
| Spark plugs |
Check / clean |
|
|
|
● |
|
| Spark arrester |
Clean |
|
|
|
● |
● (*) |
| Valve clearance |
Check / adjust |
|
|
|
|
● (*) |
| Strainer and petrol tank |
Clean |
|
|
|
|
● |
| Fuel line |
Check (replace if necessary) |
|
|
|
|
Every 2 years (*) |
(1) Perform air filter maintenance more frequently for operation in dusty locations.
() This operation should be carried out by one of our agents.*
Detailed Maintenance Procedures:
Cleaning the air filter:
- Remove the wing nut (no. 1, fig. C) and the air filter cover (no. 2, fig. C).
- Remove the wing nut attaching the filter.
- Remove the air filter assembly (no. 3, fig. C) and paper element (no. 4, fig. C).
- Wash the foam element (no. 5, fig. C) in a solution of household cleaning product and warm water, then rinse thoroughly.
- Soak the element in clean engine oil and squeeze out the excess oil.
- Tap the paper element (no. 4, fig. C) to remove dirt. Replace if heavily soiled.
- Reassemble in reverse order.
Cleaning the sediment bowl:
- Close the fuel tap (no. 14, diag. A).
- Position a suitable container under the carburetor.
- Unscrew the plug (no. 1, diag. D) to drain the fuel.
- After draining, refit the plug.
- Remove the sediment bowl (no. 1, diag. E) and the seal (no. 2, diag. E).
- Wash the bowl with a non-flammable solvent or solution with a high flash point. Dry it completely.
- Refit the seal and the bowl.
- Open the fuel tap and check for leaks.
Draining the motor oil:
- Place a container under the drain plug (no. 3, diag. B).
- Unscrew the drain plug and the dipstick/filler plug (no. 1, diag. B) to drain the oil.
- Once drained, screw in and tighten the drain plug.
- Fill the engine oil sump with the recommended oil, then check the level.
- Reposition the dipstick/filler plug and tighten.
- After filling, check for leaks.
- Wipe off any trace of oil with a clean cloth.
Cleaning the spark arrester:
- Loosen the three mounting bolts (no. 1, fig. F) and (no. 2, fig. F) from the exhaust silencer (no. 3, fig. F), then remove the latter.
- Loosen the four bolts (no. 4, fig. F) and (no. 5, fig. F) holding the silencer guard (no. 6, fig. F) and then remove the silencer guard.
- Remove the mounting bolt (no. 7, fig. F) from the spark arrester (no. 8, fig. F) and place it down.
- Using a wire brush, remove carbon deposits from the spark arrester screen.
- Note: The spark arrester must have no holes or cracks. Replace if necessary.
- Refit the spark arrester, the guard, and the exhaust silencer in reverse order.
Checking the spark plug:
- Remove the spark plug cap and use a spark plug spanner to remove the spark plug.
- Visually inspect the spark plug and discard it if the electrodes are worn or if the insulation is split or chipped. If it is to be re-used, clean the spark plug with a wire brush.
- Measure the electrode gap with a feeler gauge. The electrode gap should be 0.70 to 0.80 mm. Check that the spark plug washer is in good condition and screw the spark plug in by hand, in order to avoid damaging the threads.
- After fitting the spark plug, tighten it with a spark plug spanner to secure the washer.
- Note: when fitting a new spark plug, tighten it by 1/2 turn after it is in place; in order to press the washer tightly. For the installation of an old spark plug, tighten it by a 1/8-1/4 turn after it is in place, in order to press the washer tightly.
Checking bolts, nuts and screws:
Daily, detailed checks of all auto bolts and screws are essential in order to prevent any accidents or breakdowns.
- Inspect the generating set as a whole before and after each use.
- Tighten any loose nuts or screws.
NB: the tightening of cylinder head bolts should be carried out by a specialist. Contact your local agent.
Cleaning the generating set:
- Remove all dust and debris from around the exhaust and clean the generating set using a cloth and a brush (cleaning with a water jet is not recommended, and cleaning with high-pressure cleaning equipment is forbidden).
- Carefully clean the motor air inlets and outlets and the alternator.
- Check the general condition of the generating set and, if necessary, replace any faulty parts.
Storing the generating set:
Generating sets which are to remain unused during a long period of time must undergo certain procedures, in order to keep them in good condition. Check that the storage area is not dusty or humid. Clean the exterior of the generating set and apply a rustproofing product.
- Close the fuel tap (OFF position), remove the sediment bowl and drain it.
- Open the fuel tap (ON position) and drain the petrol from the tank into a suitable container.
- Refit the sediment bowl and tighten fully.
- Drain the carburettor by loosening the drain screw. Collect the petrol in a suitable container.
- Change the engine oil.
- Remove the spark plug and pour approximately 15 ml of oil into the cylinder, then refit the spark plug.
- Turn the engine over without starting it to distribute the oil in the cylinder.
- Clean the generating set and cover the engine again to protect it from dust.
- Store the generating set in a clean, dry place.
This comprehensive manual ensures users can effectively operate and maintain their SDMO HX 6000 C generator for reliable power generation.