Do you have a question about the Seagull Models RENO AIR CARE YAK-11 PERESTROIKA and is the answer not in the manual?
| Brand | Seagull Models |
|---|---|
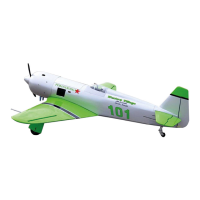
| Model | RENO AIR CARE YAK-11 PERESTROIKA |
| Category | Toy |
| Language | English |
Details wingspan, wing area, weight, length, engine size, and radio channels.
Lists all components included in the RENO AIR CARE YAK-11 "PERESTROIKA" model kit.
Lists items needed for assembly and operation not included in the kit.
Lists necessary tools and adhesives for building the model.
Step-by-step guide for attaching flap hinges using C/A glue.
Detailed instructions for properly hinging the ailerons with thin C/A glue.
Attaching the fiberglass control horn to the ailerons using epoxy.
Attaching the fiberglass control horn to the flap using epoxy.
Step-by-step process for securing servos in the aileron bay and routing leads.
Instructions for installing the flap servo and connecting the pushrod.
Connecting control horns to servos via pushrods for control surfaces.
Joining the wing halves and preparing for landing gear installation.
Step-by-step guide for assembling and attaching the main landing gear.
Guide for installing optional electric retracts, recommending specific models.
Mounting and securing servos for rudder, elevator, and throttle in the fuselage.
Installing the receiver switch and connecting the throttle servo arm.
Mounting the engine kill switch onto the fuselage.
Preparing the fuel tank stopper with fuel lines for installation.
Connecting the fuel tank lines to the engine and muffler.
Securing the engine mount to the firewall using bolts and threadlock.
Attaching the engine to the mount and connecting the throttle pushrod.
Fitting and securing the engine cowling to the fuselage.
Guidance on using a needle valve extension for the high-speed needle valve.
Steps for converting the model to electric power, including motor and ESC mounting.
Attaching the spinner backplate, propeller, and spinner cone.
Attaching elevator hinges using the same method as the ailerons.
Precise alignment and securing of the horizontal stabilizer to the fuselage.
Gluing the top rudder hinges in place using techniques similar to the ailerons.
Fitting and ensuring the vertical stabilizer is correctly aligned to the fuselage.
Installing elevator control horns and connecting pushrods.
Installing rudder pushrods and mounting the tail wheel assembly.
Positioning and securing the scale pilot figure and canopy.
Connecting servos, battery, and receiver, and securing them for vibration protection.
Securing the main wing to the fuselage using bolts and epoxy.
Instructions for applying precut or non-precut decals to the model.
Critical steps for achieving the correct center of gravity for safe flight.
Recommended throws for ailerons, elevator, rudder, and flaps for optimal control.
Checking the operation and direction of control surfaces and throttle.
Essential pre-flight checks for radio system, structure, and control surfaces.