Do you have a question about the Sealey 1015CX and is the answer not in the manual?
Essential safety checks before and during jack operation to ensure safe usage and prevent damage.
Critical warnings and prohibited actions to avoid damage, injury, and warranty invalidation.
Instructions for attaching the handle and operating the release valve for the trolley jack.
Technical details including capacity, heights, length, and weight of the trolley jack.
Initial setup procedure, including purging air from the hydraulic unit and lubricating moving parts.
Pre-jacking checks and preparation, ensuring safe operating environment and correct jack placement.
Step-by-step guide on how to safely lift the vehicle using the trolley jack.
Safe procedure for lowering a lifted vehicle, emphasizing controlled descent.
Proper methods for storing the jack and keeping it clean to prevent corrosion and wear.
Detailed inspection steps for identifying damage or wear before operating the jack.
Guidance on checking oil levels, replacing oil, and handling hydraulic fluid.
Guidelines for responsible disposal of the product and its components.
Common causes and solutions when the jack is unable to lift the intended weight.
Troubleshooting steps for when the jack does not maintain its lifted position.
Diagnosis and remedies for issues preventing the jack from fully retracting.
Identifying reasons why the jack cannot lift its maximum rated load.
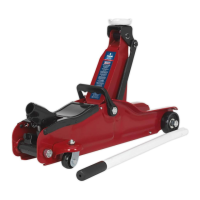
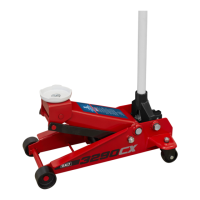
This document describes the Sealey 1015CX Trolley Jack, a piece of quality machinery designed for lifting purposes.
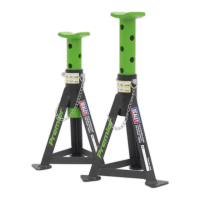
The Sealey 1015CX Trolley Jack is a hydraulic lifting device intended for raising vehicles. It operates by pumping a handle to extend a ram, which in turn lifts a saddle positioned under a vehicle's lifting point. A release valve allows for controlled lowering of the vehicle. The jack is designed for lifting only and should not be used for supporting a load; suitable capacity axle stands must be used for support.
The jack features a safety excess pressure valve that will open and stop the vehicle from lifting if it becomes overloaded, preventing damage to the jack and potential injury.
Before First Use: Before initial operation, the hydraulic unit must be purged to eliminate any trapped air. This involves placing the handle onto the release valve nut, opening the valve by turning it anti-clockwise, then placing the handle back into the jacking socket and pumping for 30 to 40 seconds. After purging, the release valve should be closed by turning the valve nut clockwise. A few drops of hydraulic jack oil should be placed onto the pump piston, and the handle pumped several times to distribute the oil, thoroughly lubricating all moving parts.
General Jacking: The jack should be used on level and solid ground, preferably concrete, avoiding tarmacadam. The vehicle's wheels should be wedged, the handbrake engaged, the engine switched off, and the transmission in gear (or "PARK" if automatic). A minimum distance of 0.5m between the vehicle and static objects should be maintained. The jack saddle must be positioned under the vehicle manufacturer's recommended lifting point, ensuring it is stable and centred.
Jacking the Vehicle: To raise the vehicle, close the release valve using the handle. Place the handle into the handle socket and pump it up and down using maximum strokes until the saddle reaches the vehicle jacking point. Confirm the jacking point is centrally located on the saddle, then continue to raise the vehicle.
Lowering the Vehicle: Before lowering, ensure no persons or obstacles are beneath the vehicle or in its descent path. If axle stands are in use, raise the jack high enough for them to be easily removed. To lower, place the handle onto the release valve nut and turn it anti-clockwise, very slowly, to open the valve. The lowering speed is controlled by the amount the handle is turned. Lowering should be done carefully to avoid sudden changes in descent rate that could shock load the hydraulic system.
Safety Precautions:
General Maintenance:
Checking Oil Level: To check the oil level, fully lower the jack and remove the oil filler plug. The correct level is just below the bottom of the plug. If the oil level is low, fill as required with good quality hydraulic jack oil (e.g., SEALEY HYDRAULIC JACK OIL). DO NOT use brake fluid or any fluid other than hydraulic jack oil, as this can cause severe damage and invalidate the warranty. When draining oil, ensure no dirt enters the hydraulic system.
Troubleshooting:
De-commissioning: If the jack becomes unserviceable and requires disposal, draw off the oil into an approved container and dispose of both the jack and the oil according to local regulations.