are plugged into a supply that is not protected by an RCCB. If in any doubt consult a qualified electrician. You may obtain a Residual Current
Device by contacting your Sealey dealer. You must also read and understand the following instructions concerning electrical safety.
1.3.1.TheElectricityAtWorkAct1989requiresallportableelectricalappliances,ifusedonbusinesspremises,tobetestedbyaqualied
electrician,usingaPortableApplianceTester(PAT),atleastonceayear.
1.3.2. TheHealth&SafetyatWorkAct1974makesownersofelectricalappliancesresponsibleforthesafeconditionofthoseappliances
andthesafetyoftheapplianceoperator.Ifinanydoubtaboutelectricalsafety,contactaqualiedelectrician.
1.3.3. Ensurethattheinsulationonallcablesandontheapplianceissafebeforeconnectingittothepowersupply.See1.3.1and1.3.2
and use a Portable Appliance Tester.
1.3.4. Ensurethatcablesarealwaysprotectedagainstshortcircuitandoverload.
1.3.5. Regularlyinspectpowersupplycablesandplugsforwearordamageandcheckall
connections to ensure none is loose.
1.3.6. Important:Ensurethatthevoltagemarkedontheappliancematchesthepowersupply
tobeusedandthattheplugisttedwiththecorrectfuse-seefuseratingatright.
1.3.7. DO NOT pull or carry the appliance by the power cable.
1.3.8. DO NOT pull the plug from the socket by the cable.
1.3.9. DO NOT use worn or damage cables, plugs or connectors. Immediately have any faulty
itemrepairedorreplacedbyaqualiedelectrician.WhenanASTA/BSapprovedUK3pin
plugisdamaged,cutthecablejustabovethepluganddisposeoftheplugsafely.
Ensure that the double insulated charger is correctly connected via a three-pin plug, as follows:
a)ConnecttheBrownlivewiretoliveterminal‘L’.
b)ConnecttheBlueneutralwiretotheneutralterminal‘N’.
c)Afterwiring,checkthattherearenobarewires,thatallwireshavebeencorrectlyconnected,thatthecableouterinsulationextends
past the cable clamp and that the clamp is tight. Note that the earth pin ‘E’ remains unconnected.
1.3.10.Ifanextensionreelisuseditshouldbefullyunwoundbeforeconnection.AreelwithanRCDttedispreferredsinceanyappliance
pluggedintoitwillbeprotected.Thecablecoresectionisimportantandshouldbeatleast1.5mm²,buttobeabsolutelysurethatthe
capacity of the reel is suitable for this product and for others which may be used in the other output sockets, we recommend the use of
2.5mm²sectioncable.Ifextensionreelistobeusedoutdoors,ensureitismarkedforoutdooruse.
1.4. Battery charger safety instructions
R WARNING! DO NOTattempttochargeanybatteryotherthanthatsuppliedforthewrench.Othertypesofbatteriesmayexplode!
Allmainselectricalsupplysafetyfeaturesmustbefollowedasdescribedin1.3above.
Disconnect the charger from the mains supply when not in use.
DO NOTchargebatteryifroomtemperatureisbelow10°C(50°F)orabove40°C(104°F).
DO NOTexposethechargertodamporwetconditions.
DO NOT pull or carry the charger by the power lead.
DO NOT operate the charger if it has been dropped, or has received a sharp knock, or is damaged. Take the charger to an authorised
agent for repair or obtain a replacement.
DO NOTdismantlethechargerasthismaycausedamageand/orpersonalinjuryandwillinvalidatethewarranty.
DO NOTinsertforeignobjectsormaterialintotheholereservedforthebatterypack.
DO NOTrechargeasecondbatterypackimmediatelyafterchargingtherst.Consecutivechargingwilloverheatthecharger.Allowthe
unittocoolfor15minutesbeforechargingthenextpack.
DO NOT attempt to connect two chargers together.
Storethechargerinthesamemannerasthebatterypackin1.2.
2. INTRODUCTION
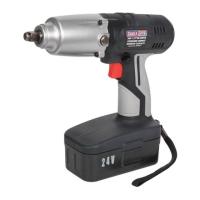
Powerful, compact, cordless impact wrench with forward and reverse control integrated into housing for ease of use. Produces torque up to
441Nm(325lb.ft)-enoughtoremovewheelnuts.Superblybalancedtoolwithsidehandleandvibrationreducinggrip.Suitableforworkshop
applications.Includes24VNi-Cdbatterypackand1-hourmainscharger.
3. INTRODUCTION
No-load Speed: .....................................................0-2000rpm
Impact Rate: ......................................................... 0-2600bpm
MaximumTorque: ...........................................441Nm/325ib.ft
Drive Size: .................................................................. 1/2”Sq.
Weight: .......................................................................... 3.3kg
Noise power: ............................................................. 99dB(A)
Noise Pressure: ........................................................ 88dB(A)
Battery Pack: .........................................................CP2400BP
Vibration: ................................................................ 13.48m/s²
Uncertainity: ............................................................... 1.5m/s²
4. OPERATION
R IMPORTANT WARRANTY INFORMATION:
Thebatterypackttedtothiscordlesstoolisconsideredtobeaconsumableitemanditsabilitytoacceptchargewillreduceovertime.
We will warranty it against mechanical and electrical defect for a period of one year - this does not cover fair wear and tear.
Ifthebatteryisnotproperlychargedbeforerstuse,orregularlyconditioned,itscapacitywilldiminish.Underthesecircumstanceswe
will not replace the battery pack even if it is less than one year old.
Remove battery pack from case and charge as below:
4.1. CHARGING THE BATTERY PACK
4.1.1. Removethebatterypack(g.1.5)fromthewrench,bydepressingthetwosidereleaseclips(g.1.4).
R WARNING! DO NOT touch metal terminals.
4.1.2. Place wrench in carry case and remove the battery charger.
4.1.3. Thebatterypackandchargerhavethepositive(+)andnegative(-)terminalsmarked.Alignthecorrectterminalsandinsertthebattery
intoslot(g.2).
RECOMMENDED
FUSERATING:5AMP
CP2400.V4|Issue2(L)15/04/15
Original Language Version
© Jack Sealey Limited
 Loading...