8.3. If the engine frequently works under high temperature or heavy load, change the oil every 25 hours.
8.4. Iftheenginefrequentlyworksunderdustyorotherseverecircumstances,cleantheairlterelementevery10hours;Ifnecessary,
changetheairlterelementevery25hours.
8.5. Themaintenanceperiodandtheexacttime(hour),theonewhichcomesrstshouldgovern.
8.6. If you have missed the scheduled time to maintain your engine, do it as soon as possible.
8 DO NOT operate the engine in a poorly ventilated room or other enclosed area. Be sure to keep good ventilation in working area. The
exhaust from the engine may contain poisonous CO, inhalation can cause shock, unconsciousness and even death.
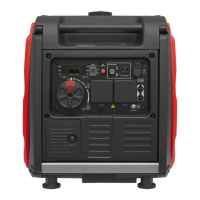
8.7. SPARK PLUG INSPECTION FIG.4
8.7.1. The spark plug is an important engine component, which should be checked periodically.
8.7.2. Remove the cover (two screws secure the top edge).
8.7.3. Remove the spark plug cap.
8.7.4. Insert screwdriver shaft into the spark plug box spanner and turn anticlockwise to remove the spark plug.
8.7.5. Check for discolouration and remove the carbon. The porcelain insulator around the centre electrode of spark plug should be a
medium-to-light tan colour.
8.7.6. Check the spark plug type and gap.
StandardSparkPlug:F6RTCSparkPlugGap(a):0.7-0.8mm.Thesparkpluggapshouldbemeasuredwithafeelergaugeand,If
necessary,adjusttospecication.
8.7.7. Installthesparkplug.SparkPlugTorque:28N.m
NOTE: Ifatorquewrenchisnotavailablewheninstallingasparkplug,agoodestimateofthecorrecttorqueis1/4-1/2turnpastnger
tight.However,thesparkplugshouldbetightenedtothespeciedtorqueassoonaspossible.
8.7.8. Install the spark plug cap and spark plug cover.
8.8. CARBURETTOR ADJUSTMENT
8.8.1. Thecarburettorisavitalpartoftheengineandanyadjustmentsshouldbeperformedbyproperlyqualiedpersons.
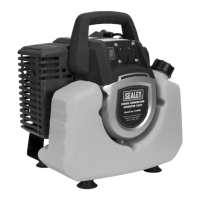
8.9. ENGINE OIL REPLACEMENT FIG’S 5 & 6
WARNING! Avoid draining the engine oil immediately after stopping the engine. The oil is hot and should be handled with care to avoid
burns.
8.9.1. Place the generator on a level surface and warm up the engine for several minutes. Stop the engine and turn the 3 in 1 switch
knob, fuel tank cap air vent knob to “OFF”.
8.9.2. Removethecover.Removetheoilllercap.
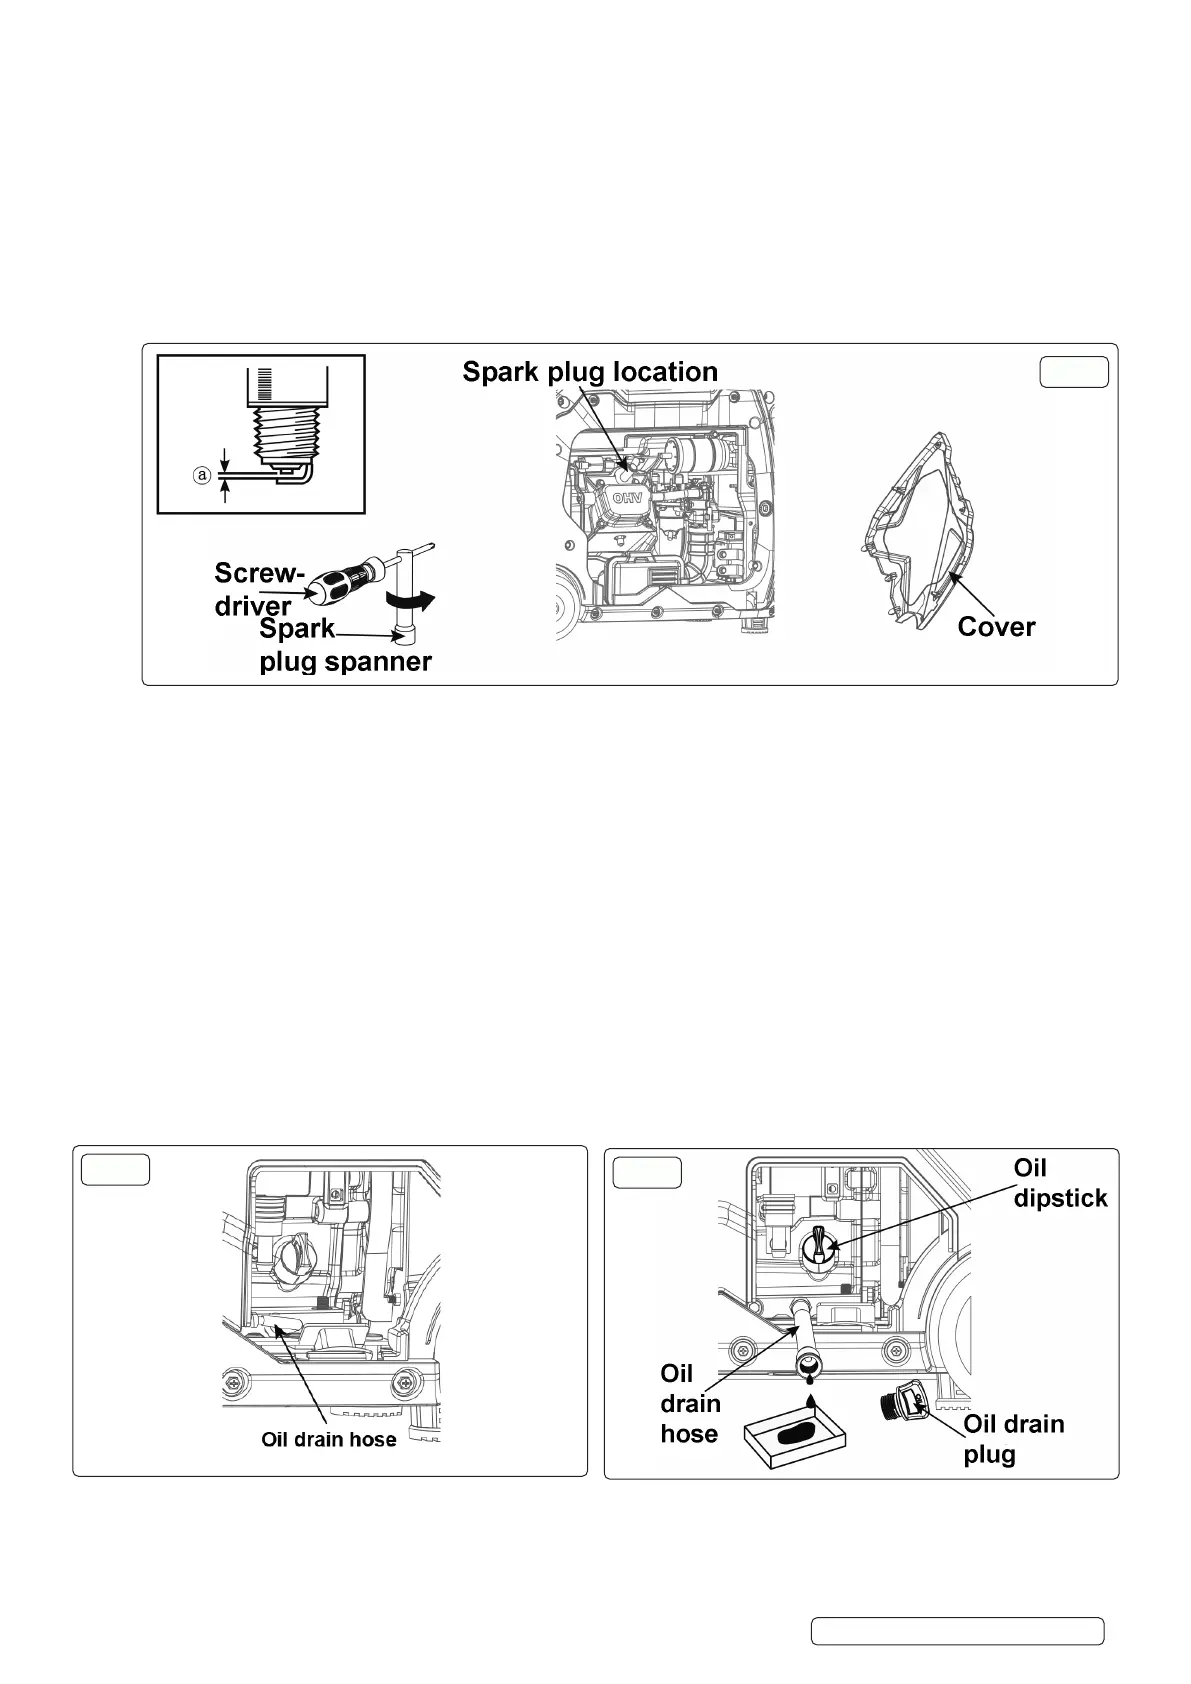
8.9.3. Place an oil pan under the engine. Tilt the generator to drain the oil completely.
8 DO NOT tiltthegeneratorwhilstaddingoil.Thiscouldresultinoverllinganddamagetotheengine.
8.9.4. Make sure no foreign material enters the crankcase.
8.9.5. Rettheoilllercap,installcoverandtightenscrews.
Original Language Version
© Jack Sealey Limited
g.4
g.5
g.6
G3500I Issue 1 10/02/23
 Loading...