Do you have a question about the Sealy Ease and is the answer not in the manual?
Guidelines for plugging the bed base into a surge protector for optimal safety and operation.
Warning against tampering with internal components to avoid voiding the warranty.
Disclaimer that the EASE® base is for in-home use and not a hospital bed.
Precautions regarding small children and pets using or playing with the bed base.
Description of free-release head and foot motors to minimize pinch points.
Electrical specifications for the adjustable base, including input and output.
Information on lift motor duty cycle and operation limitations to ensure product longevity.
Recommended weight limits for the adjustable base and considerations for frame compatibility.
Instructions for cleaning and maintaining the fabric of the adjustable base.
Statement regarding compliance with FCC rules for radio frequency emissions.
Lists the wireless remote control and required AAA batteries.
Details essential parts like mattress retainer bar, legs, power cord, and power supply.
Lists extra components included for King/Cal King size bases, like clamps and bolts.
Lists parts not included with the base, such as surge protectors and 9-volt batteries.
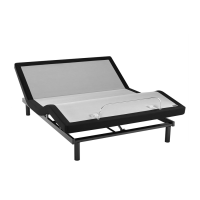
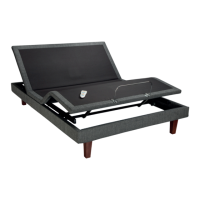
Identifies key components of the adjustable base, including head and foot motors and control box.
Explains the functions of the remote control buttons for adjusting the base.
Visual guide to the control box ports and connections.
Diagram illustrating the wiring of the adjustable base electronics.
Instructions for placing the bed base box and removing packing materials.
Guidance on removing the bed base from its packaging while keeping it upright.
Refers to bracket installation on page 14 and details leg assembly.
Instruction to refer to pages 12-13 for syncing two bases.
Steps for connecting the input power cord to the control box and power supply.
Instructions for connecting the power cord to the power supply and positioning it.
Instructions for safely flipping the bed base onto its legs, emphasizing the need for two people.
Instructions for plugging the main power cord into a power source, recommending a surge protector.
Guidance on testing remote functions after setup and before placing the mattress.
Steps for attaching the mattress retainer bar to the brackets on the base.
Instructions for aligning and pushing the head and foot sections of the base together.
Details on securing the middle frame using bolts, nuts, and washers.
Guidance on using C-clamps and bolts to secure the frames together.
Instructions for installing optional King/Cal King headboard brackets and attaching the legs.
Identifies and explains the functions of the remote control buttons for base adjustment.
Details on how to use buttons for head/foot position, flat position, and Zero G.
Steps for pairing the remote control to the adjustable base if necessary.
Instructions on activating and deactivating the Child Lock feature on the remote.
Instructions for positioning bases and loosening legs to attach the connecting strap.
Steps for sliding and securing the connecting strap onto the leg bolts.
Guidance on re-tightening legs after strap installation and repeating for the other end.
Initial step to unplug bases from the power source before syncing.
Instructions for disconnecting the Battery Backup Box cables from control boxes.
Steps for connecting the sync cord to the control boxes or splitter cable.
Instructions for connecting Battery Backup Box connections to the sync cord female connection.
Step to plug the bases back into the power source after syncing connections.
Confirmation that both bases are linked and will operate simultaneously via remotes.
Instructions for aligning and screwing the bracket to the base sleeve and securing with a bolt.
Guidance on measuring and attaching the plastic spacer and T-bracket to accommodate the headboard.
Steps for connecting the headboard to the attachment plates using remaining bolts and nuts.
Instructions for aligning and screwing the bracket to the base sleeve and securing with a bolt.
Guidance on measuring and attaching the plastic spacer and T-bracket to accommodate the headboard.
Steps for connecting the headboard to the attachment plates using remaining bolts and nuts.
Explains the purpose of the battery backup box for emergency power outages.
Instructions for installing two 9-volt batteries into the provided battery box.
Guidance on using the battery backup box button to return the base to a flat position.
Solutions for when one or more functions on the adjustable base have stopped operating.
Solutions for remote control problems, including battery and Child Lock checks.
Details the full coverage for parts and labor for the first three years of the warranty.
Outlines the warranty coverage for parts only for the fourth and fifth years.
Specifies the 25-year warranty coverage for the frame structure of the base.
Covers exclusions, limitations, and conditions that may void the warranty.
Details on warranty start date, proof of purchase requirements, and manufacturing date usage.
Lists damages, misuse, and conditions not covered by the warranty.
Information on how to contact customer service if warranty issues persist.
| Type | Adjustable Bed Base |
|---|---|
| Head and Foot Adjustments | Yes |
| Weight Capacity | 650 lbs |
| Sizes | Twin XL, Full, Queen, King, Split King |
| Massage | No |
| Height | 15 inches |
| Leg Height | Adjustable |
| Compatibility | Most mattresses |
| Remote | Wireless |
| Warranty | Limited warranty |
| Preset Positions | Flat, Zero Gravity |
| Material | Metal frame |