Operation
Replacing the battery
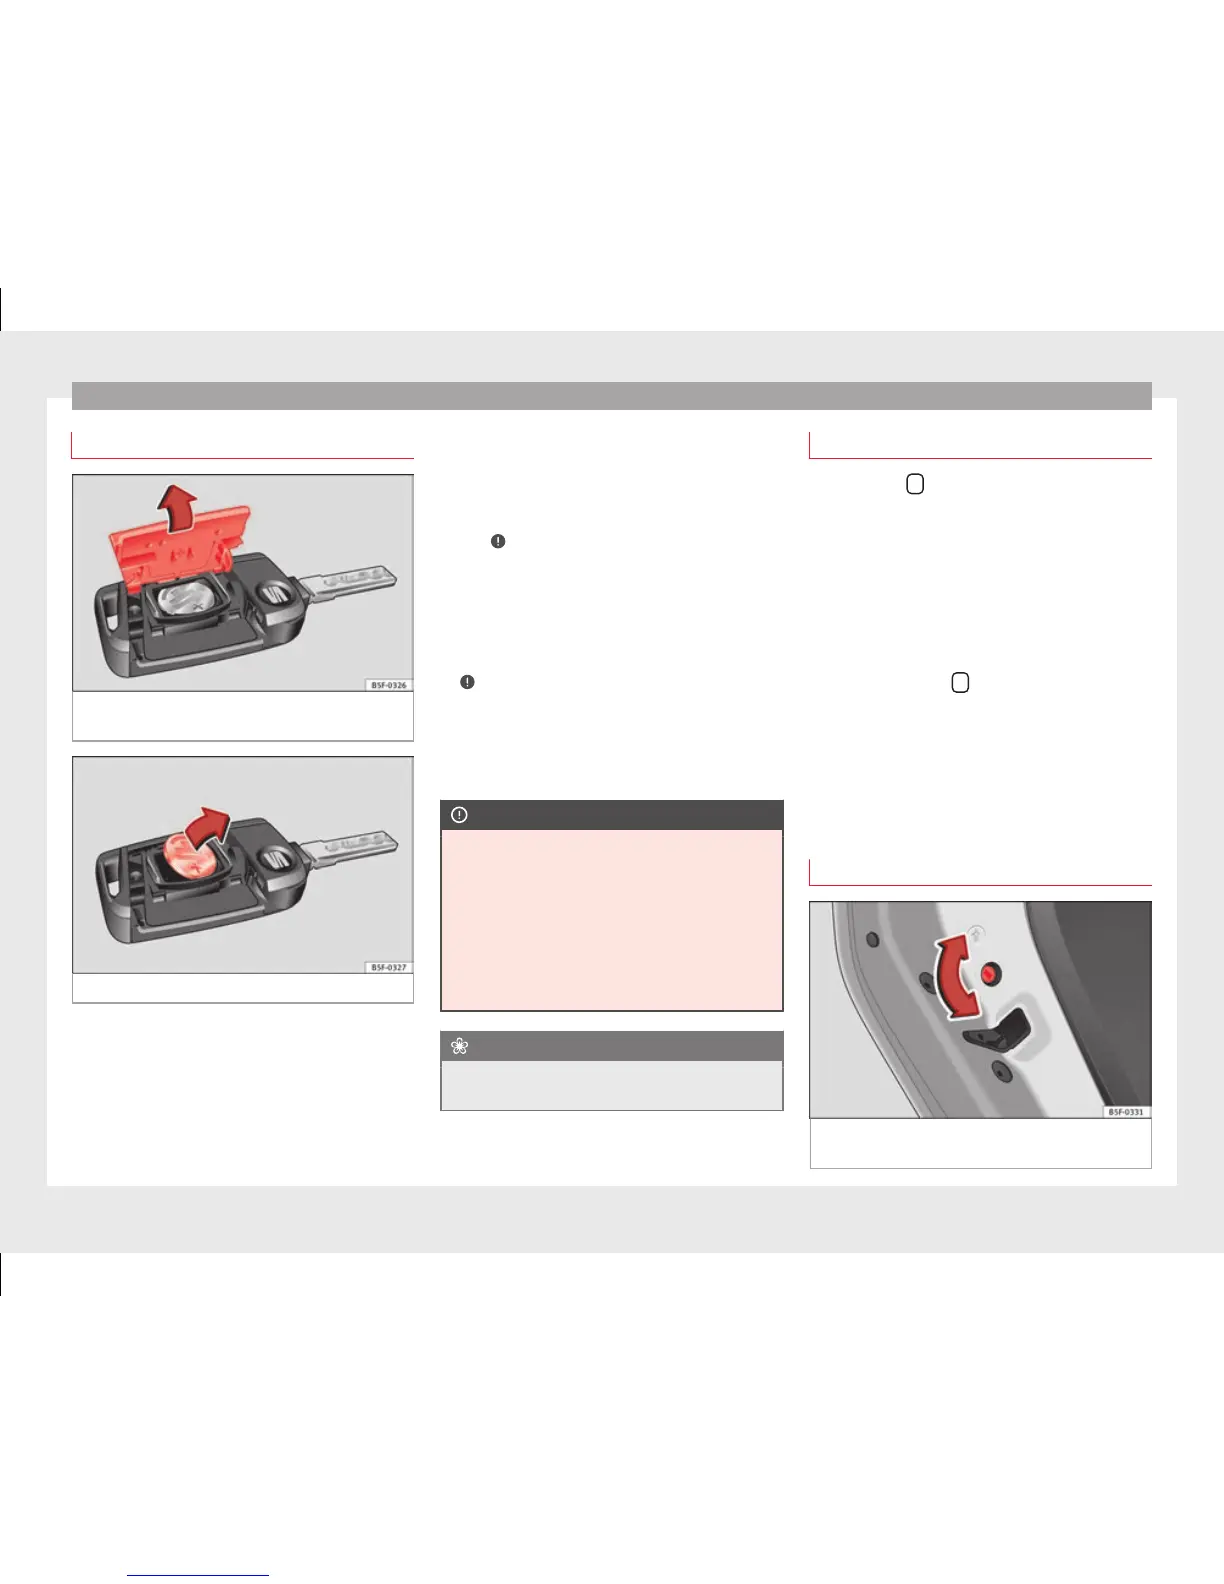
Fig. 125 Vehicle key: opening the battery
c
omp
artment
Fig. 126 Vehicle key: removing the battery
SEAT recommends you ask a specialised
w
ork
shop to replace the battery.
The battery is located to the rear of the vehi-
cle key, under a cover.
Changing the battery
●
Unfold the vehicle key blade ››› page 113.
●
Remove the cover from the back of the ve-
hicle key ››› Fig. 125 in the direction of the ar-
row ›››
.
●
Extract the battery from the compartment
u
s
ing a suitable thin object ››› Fig. 126.
●
Place the new battery in the compartment
as shown ››› Fig. 126, pressing in the oppo-
site direction to that shown by the arrow
›››
.
●
Fit the cover as shown ›
›
› Fig. 125, pressing
it onto the vehicle key casing in the opposite
direction to that shown by the arrow until it
clicks into place.
CAUTION
●
If the b
attery is not changed correctly, the
vehicle key may be damaged.
●
Use of unsuitable batteries may damage
the vehicle key. For this reason, always re-
place the dead battery with another of the
same voltage, size and specifications.
●
When fitting the battery, check that the po-
larity is correct.
For the sake of the environment
Please dispose of your used batteries correct-
ly and w
ith respect for the environment.
Synchronising the vehicle key
If the button
is pressed frequently outside
of the
vehicle range, it is possible that the ve-
hicle can no longer be locked or unlocked us-
ing the key. In this case, the key must be re-
synchronised as described below:
●
Unfold the vehicle key blade ››› page 113.
●
If necessary, remove the cover from the
driver door lever ›››
page 9.
●
Press the button
on the vehicle key. For
this, it
must remain with the vehicle.
●
Open the vehicle within one minute using
the key
blade. The key has been synchron-
ised.
●
If necessary, fit the cap.
Childproof lock
Fig. 127 Childproof lock on the left hand side
door
.
120



 To Next Page