Transport and practical equipment
Hooking the net bag into the luggage com-
p
ar
tment floor
●
As applicable, lift the front fastening rings
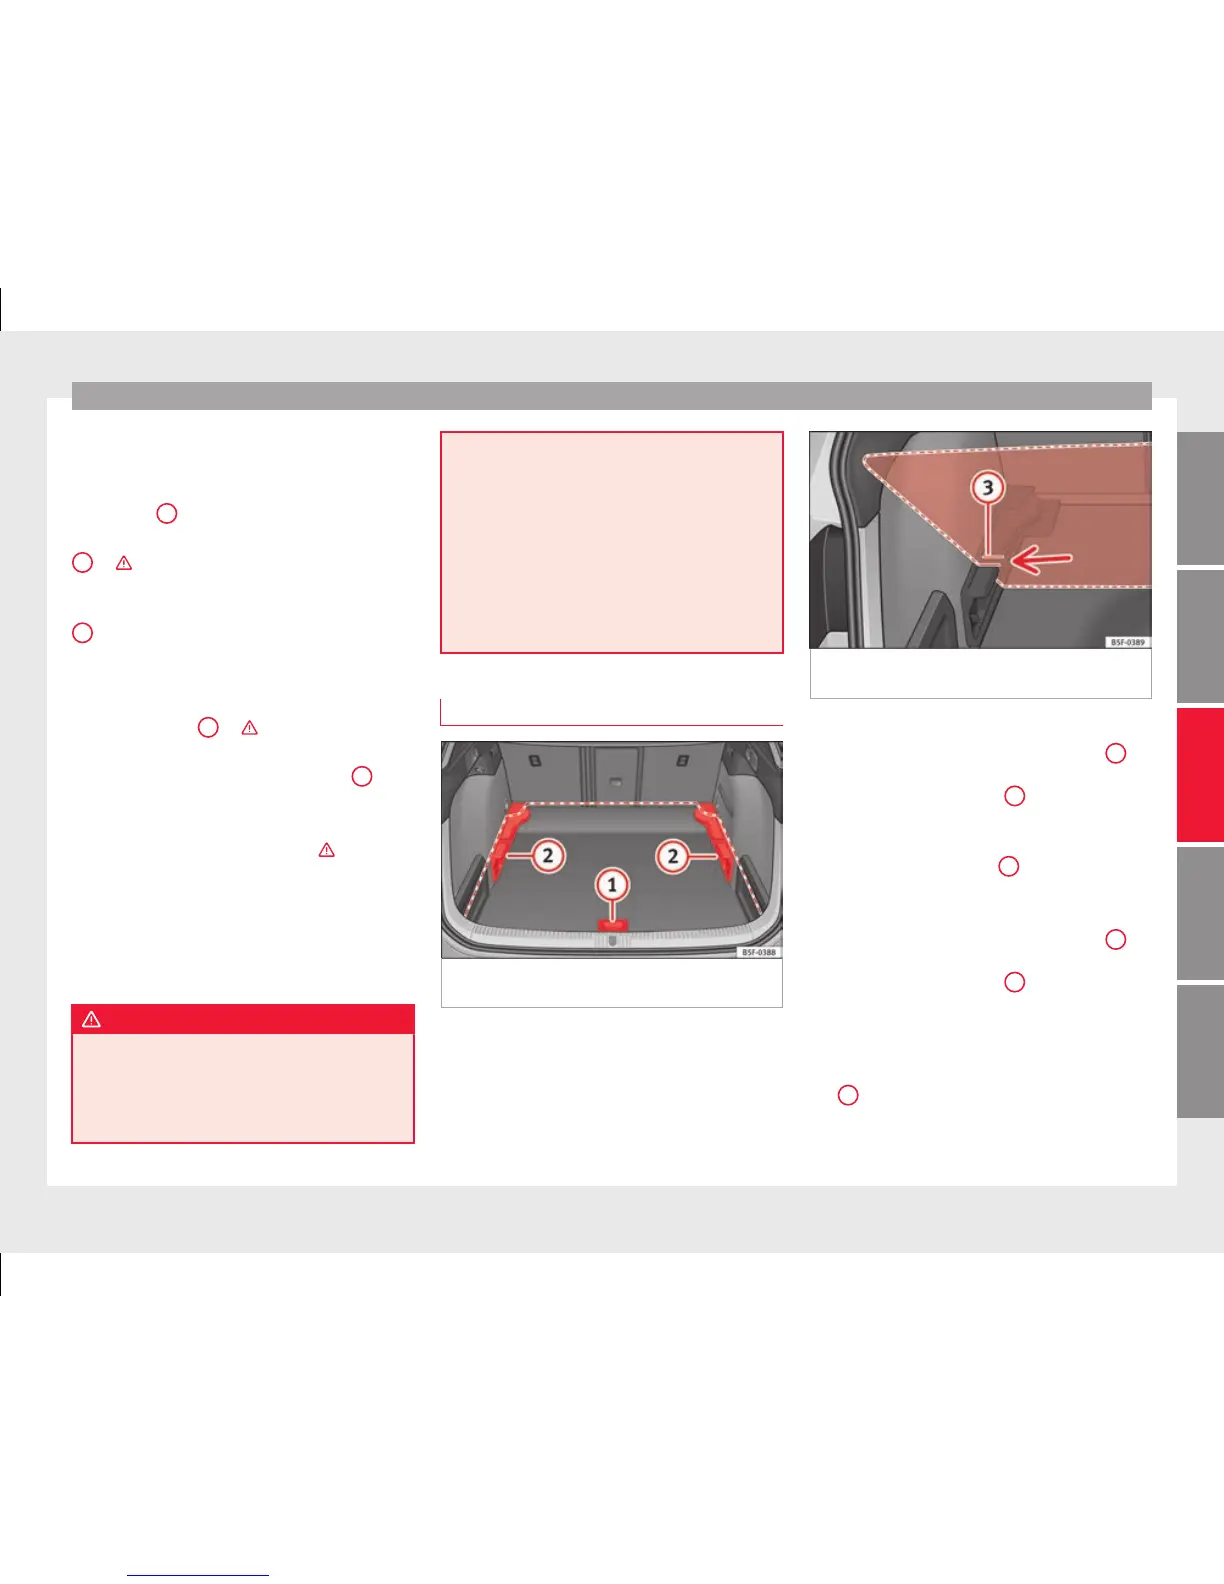
››› Fig. 156
2
.
●
Secure the net hooks to the fastening rings
2
›
››
. The bag zip should be facing up-
w
ar
ds.
●
Secure the net hooks to the fastening rings
1
.
Hook
the net
bag next to the load threshold
●
Secure the short net hooks to the fastening
rings ››› Fig. 157
1
›
›
›
. The bag zip should
be f
ac
ing upwards.
●
Secure the straps in the bag hooks
2
.
R
emo
ving the net bag
The hooked up net bag is taut ›››
.
●
Remove the hooks and the net bag straps
fr
om the f
astening rings and from the bag
hooks.
●
Store the net bag in the luggage compart-
ment.
WARNING
To secure the elastic net bag on the fastening
ring
s it must be stretched out. Once hooked
up it is taut. If the net bag is hooked up or un-
hooked incorrectly the hooks could cause in-
juries.
●
Alw
ays secure the net hooks properly so
that they do not suddenly release from the
fastening rings when hooking or unhooking
them.
●
On hooking or unhooking them, protect
your eyes and face in case the hooks are re-
leased suddenly.
●
Always hook up the net bag hooks in the
described order. If a hook is unexpectedly re-
leased the risk of injury is increased.
Luggage compartment variable floor
Fig. 158 Luggage compartment variable
floor: po
s
itions.
Fig. 159 Luggage compartment variable
floor: groo
ves tilted.
Variable floor in the high position
●
Lift the floor using handle ›
›
› Fig. 158
1
and pull it back until the front of the floor has
f
u
lly passed the supports
2
.
●
Move the floor forward over the supports as
f
ar a
s the rear seat backrest and then lower
the floor with the handle
1
.
V
ari
able floor in the low position
●
Lift the floor using handle ››› Fig. 158
1
and pull it back until the front of the floor has
f
u
lly passed the supports
2
.
●
Now match the front part with the lower
gr
oo
ves of the supports and slide the floor
forwards as far as the rear seat backrest and
lower the floor at the same time with the han-
dle
1
.
»
153
Technical dataAdviceOperationEmergenciesSafety