7
i0
8
ii
9
i2
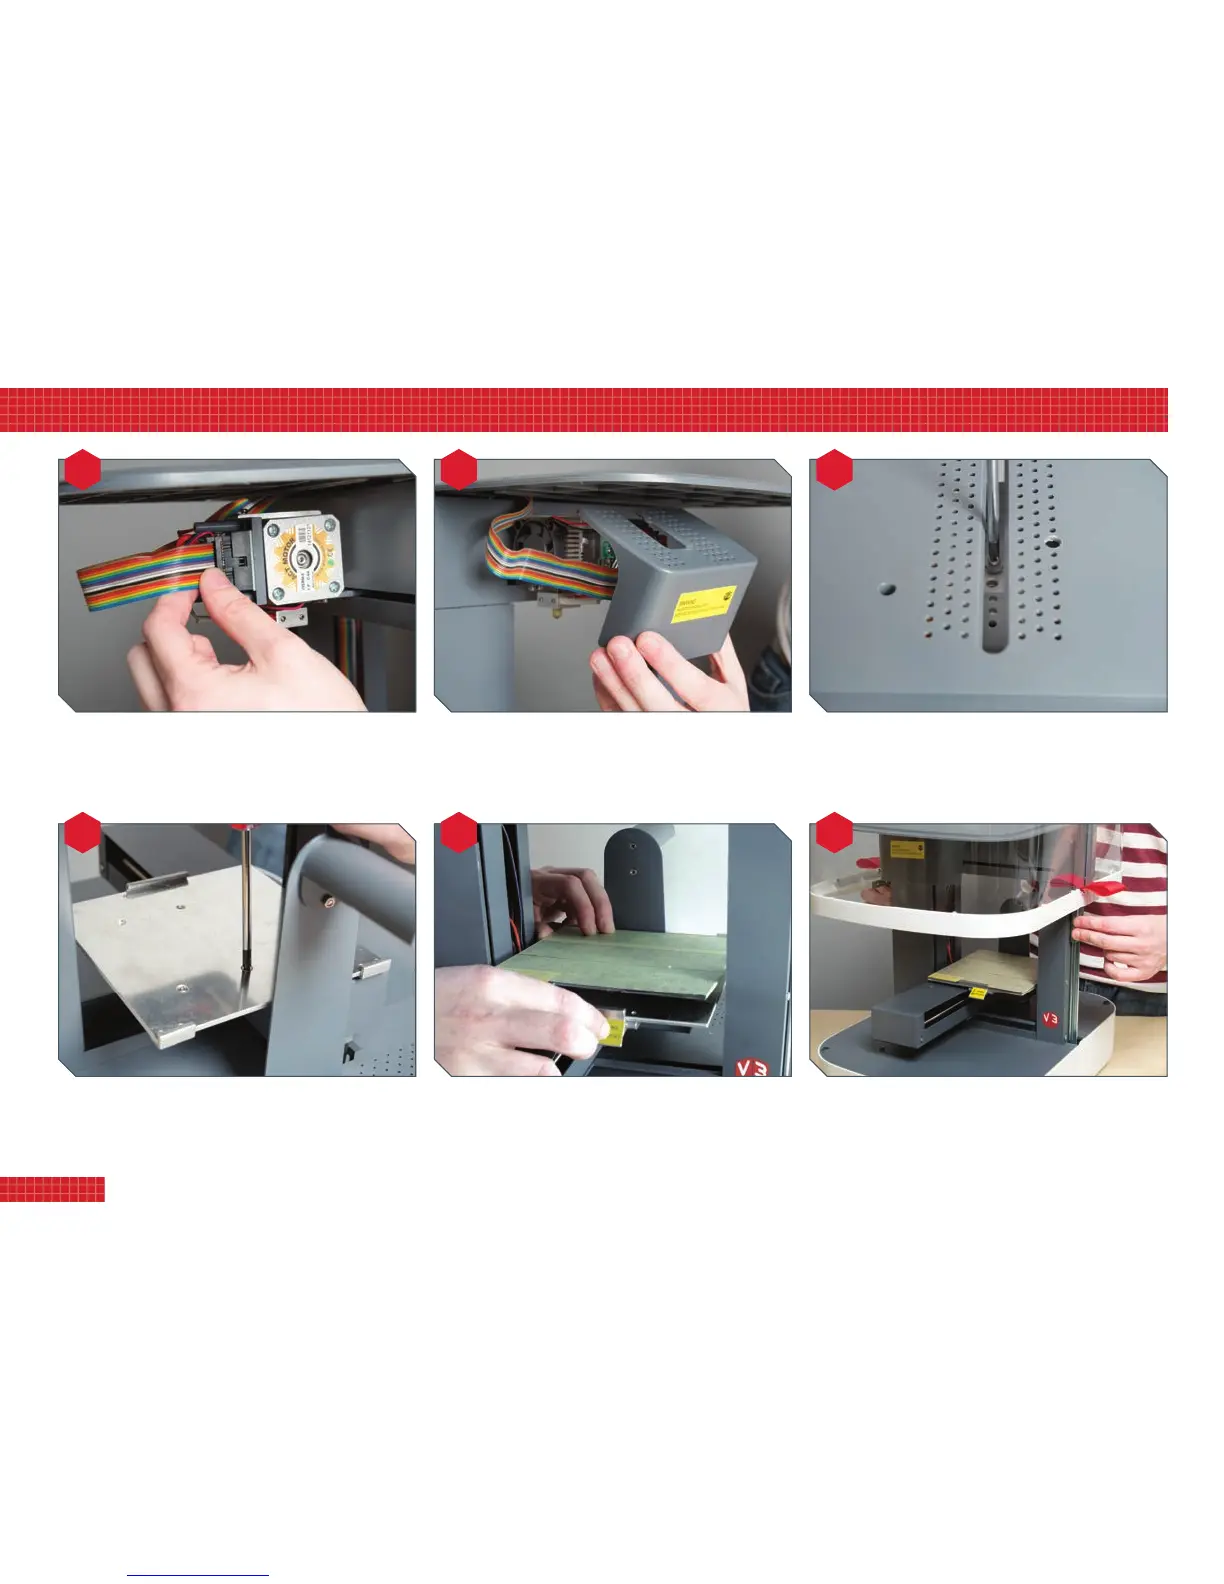
Plugtheprintheadcableintothesocketontheprinthead.
Itcanbeinsertedonlyonewayround.Ensuretheplugisfully
seatedinitssocket.
Offertheprintguarduptotheprinthead,ensuringthe
tubularsocketsinsideitengagewiththetwopostsprojecting
fromtheprinthead.Asyoudothis,makesurethecablewraps
aroundtotheleftandiskept
above
thetwoposts.
TheprintguardissecuredwithasinglePhillipsscrew;
accesstothescrewholeisviatheslotinthetopofthe
printer.Takecarenottoovertighten.
Nowattachthebuildplatebasetothebuildsupport,using
thefourcountersunkboltssupplied.Ensuretheyaredriven
fullyhomesothattheydonotsitproudofthesurfaceof
thebuildplatebase.
Fitthebuildplatetothebuildplatebase,engagingthetwo
cornerrecessesatthebackandthecentrerecessatthefront
clip.Werecommendyouaddmaskingtapetotheplateto
improveprintadhesion;dothisbeforeclippingitintoposition.
Reattachthehood.Guidethesidescarefullyintoplacesothat
theyengagesmoothlywiththerails.Notealsothatthehood
goesononlyonewayround,withtheside-railsclosertothe
backoftheprinterthantothefront.
6
2. setting up your printer