4
2i
5
3
6
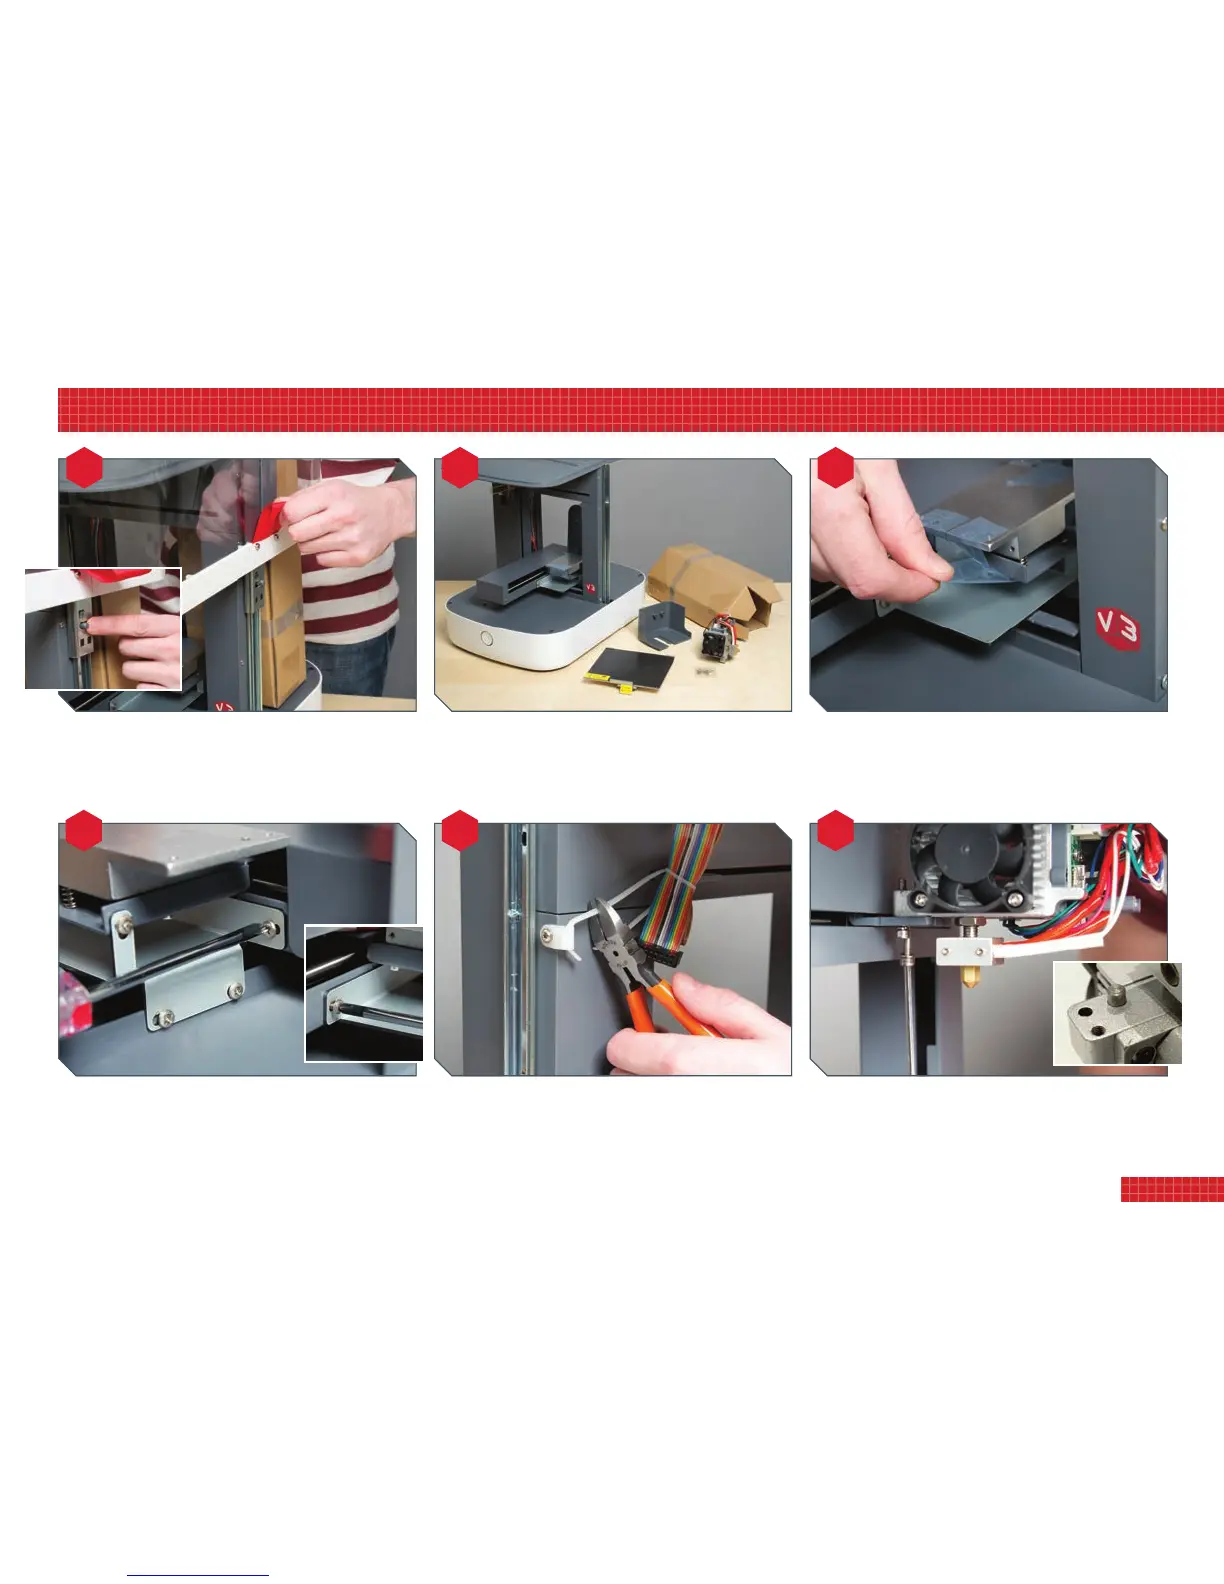
Removethecardboardboxfromthegantryandlayoutallthe
parts.Theseare:printhead(plustwobolts),printheadguard
(plusonescrew),base(plusfourcountersunkbolts),build
plate.Boltsandscrewsmaybesuppliedinaseparatebag.
Assemblyismucheasierwiththehoodremoved.(Youwill
replaceitbeforeprinting.)First,taketheredtabsandliftuntil
thehoodlocksonthecatches.Toreleasethese,keepthehood
raisedwhileeasingthecatchessideways,thenliftcleanoff.
Foraddedprotection,theX-andY-axismovementislocked
intoplacewithashippingbracket,whichmustberemoved.
First,peeltheadhesivetapeoffthebasemountingunit.
Nowremovethevescrewsfromtheshippingbracket,and
removethebracket.Youmaywanttokeepthebracketand
screwssomewherehandyincaseyouneedtotransportthe
printer(i.e.ifmovinghouse)orstoreitforanylengthoftime.
Cutthecabletieretainingthemulticolouredprintheadcable.
Theplasticlugcanalsoberemovedfromthegantry,ifyou
choose,butbesuretoreplacethescrewandtightenitfully.
Bolttheprintheadtoitssupportingplate.Toensureitis
correctlyseatedandaligned,engagethesmalllugonthehead
(seeinsetphoto)withinthenotchintheplate.Theboltstake
thelargeAllenkey;don’tovertighten,just‘nipthemup’.
2. setting up your printer
5