8
OPERATING INSTRUCTIONS
Starting The Machine
- Figures 1 & 2
Before turning on your vacuum cleaner, make sure that the vacuum handle is in its upright
locked position and that you have a firm hold on the handle grip to keep the machine from
m
oving forward.
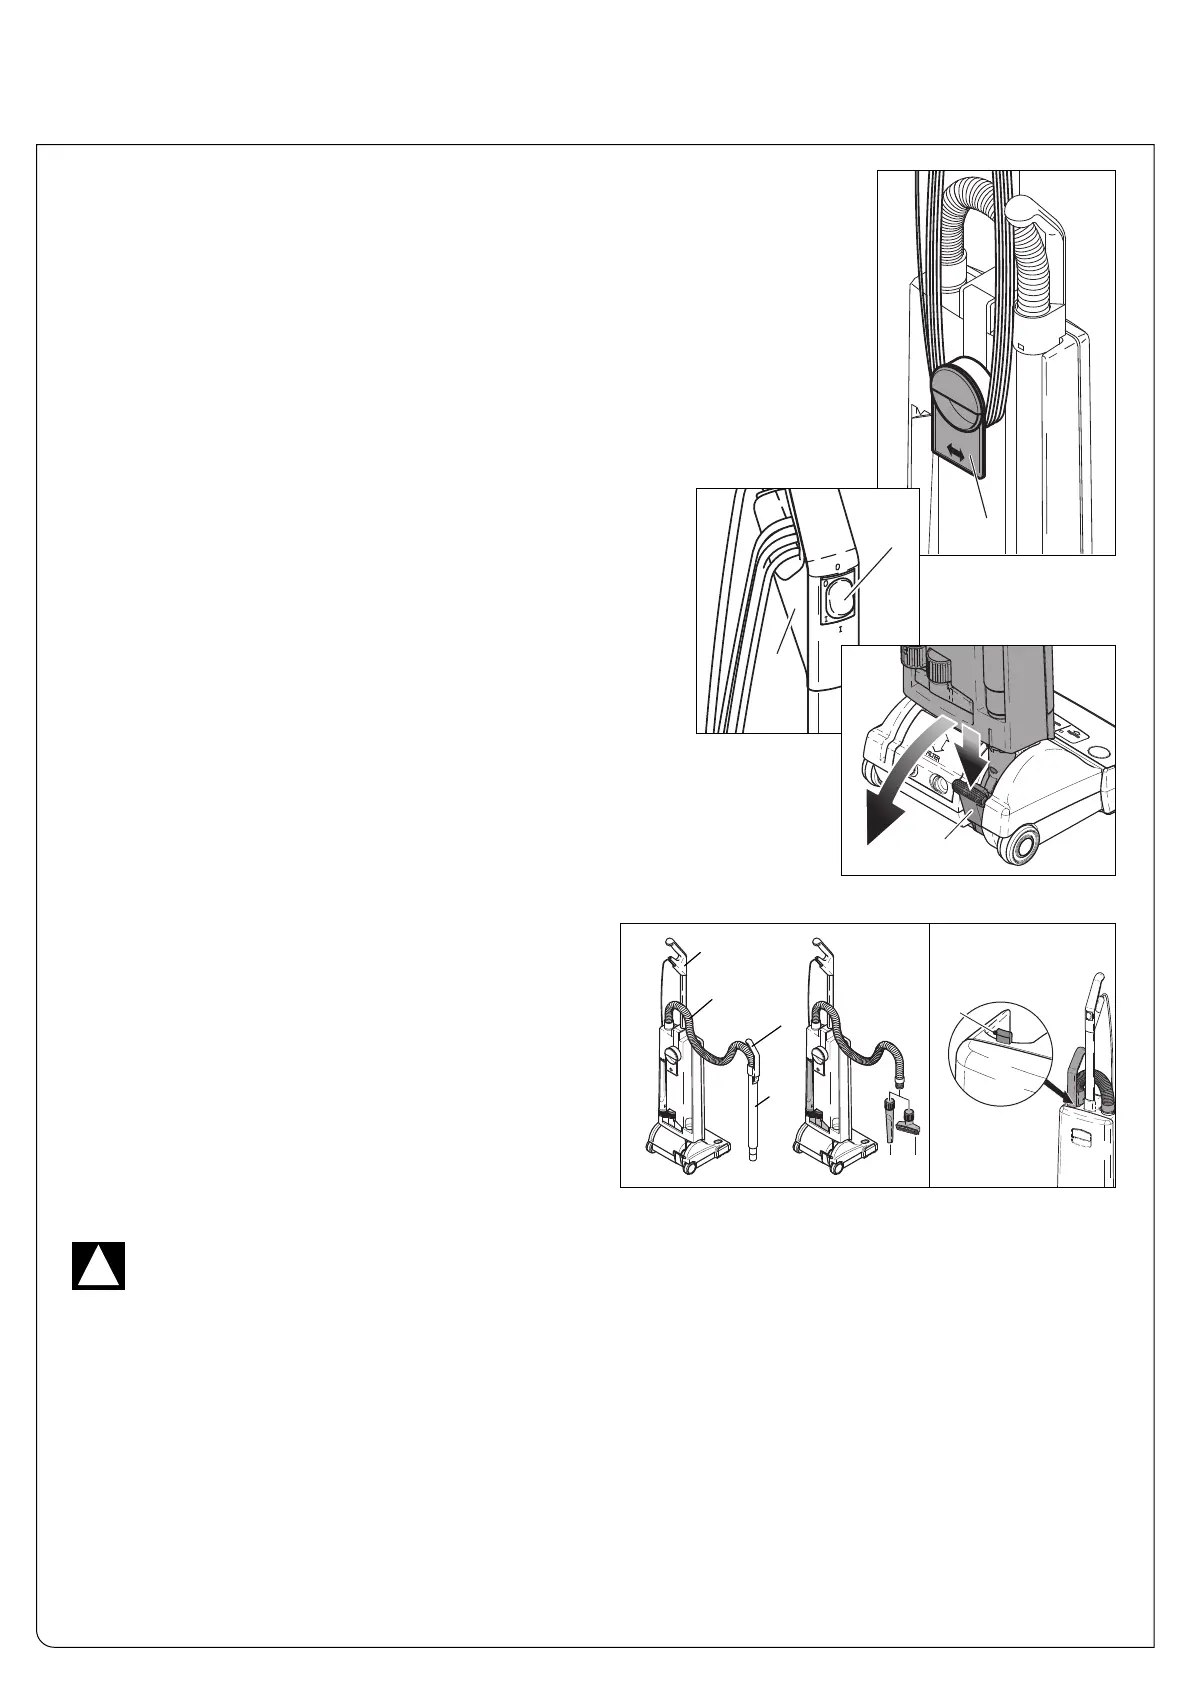
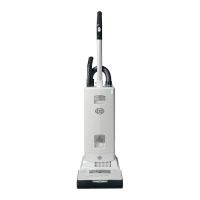
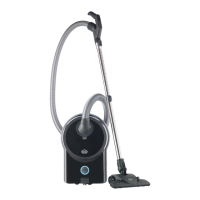
1. Turn the quick release cable hook (#19, figure 1) to the up positionby moving it to the
left or right.
2. Release the power cord plug from the power cord and lift the cord off of the upper cord
hook (#17, figure 2).
3. With the switch (#2, figure 2) in the “O” (OFF) position, plug the
polarized power cord into a 120 volt outlet located near the floor.
Switch Position
O = OFF
I = ON
NOTE: The AUTOMATIC X is equipped with a soft start system.
The gradual power-up extends vacuum life.
Operating the Machine
- Figure 3
When the machine is switched on with the handle in the upright locked
position, the power head and brush automatically rise from the carpet.
To release the machine from the upright locked position, press down on
the foot pedal (24) and lower the handle into the normal operating posi-
tion. The power head and brush will automatically lower to the appro-
priate height.
WARNING! The quality, condition, coating, texture, age and manufacturing technique of all floor surfaces vary.
Therefore, upright vacuums with rotating brushes, including your SEBO, may damage some floor coverings or surfaces. Some
types of high-gloss hardwood floors, cushion vinyl, berber carpets, long shag, and delicate or hand-woven carpets are particu-
larly vulnerable to damage by rotating brushes. When possible, consult the materials supplied by your floor’s manufacturer for
information on proper upkeep and cleaning. To ensure that your new SEBO vacuum cleaner is compatible with your floor,
please test the vacuum cleaner on each type of flooring surface in a small inconspicuous area to determine if any damage
occurs. If damage occurs, stop using the vacuum cleaner immediately! The standard brush roller on your SEBO vacuum is
appropriate for most types of floor surfaces. However, a soft-bristle brush roller (X7 part # 5010GE or X5 part # 5290GE) that
is designed for use on sensitive looped-pile carpets and/or hard floors is available for an additional charge. As with the stan-
dard brush roller, you should test the machine using the soft-bristle brush roller in an inconspicuous area prior to widespread
use. The soft-bristle roller will wear more quickly than the standard brush roller, so it will need to be replaced more often.
Also, because the bristles are softer, the height adjustment on the machine will be slightly lower than normal. Care must be
taken to ensure that the bottom of the machine does not contact the floor. If this happens, damage to the floor could occur.
If damage occurs, stop using the vacuum cleaner immediately!
!
Figure 1
Figure 2
Using the Cleaning Wand, Hose & Attachments -
Figures 4, 5, 6 & 7
The cleaning wand (21) is useful for vacuuming corners and hard-to-reach areas. The
handle grip (1) should be in the upright, locked position (as shown in figure 4). Grip the
cleaning wand handle (4), pull it up and away from the
machine and stretch out the hose (18) until it locks to the back
of the tube (this locking action will prevent the hose from
retracting back into the cleaning wand while it is in use).
Various attachments may be inserted onto the end of the tube.
After use, remove attachment and re-insert the cleaning wand
into the back of the machine. Be sure that the cleaning wand
handle (4) is inserted over the protruding tab (31) as shown
in figure 6. If the cleaning wand handle is properly seated over
the protruding tab, the hose will automatically retract and you
may resume vacuuming. There is no need to turn off the vacu-
um while switching from upright vacuuming to using the
cleaning wand or hose.
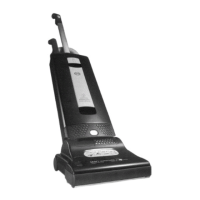
Figure 6
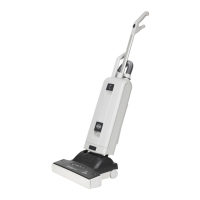
Figure 3
Figure 4
Figure 5
1
4
21
18
22 23