76 • seca 651/650
17-10-07-653-100_01-2020B
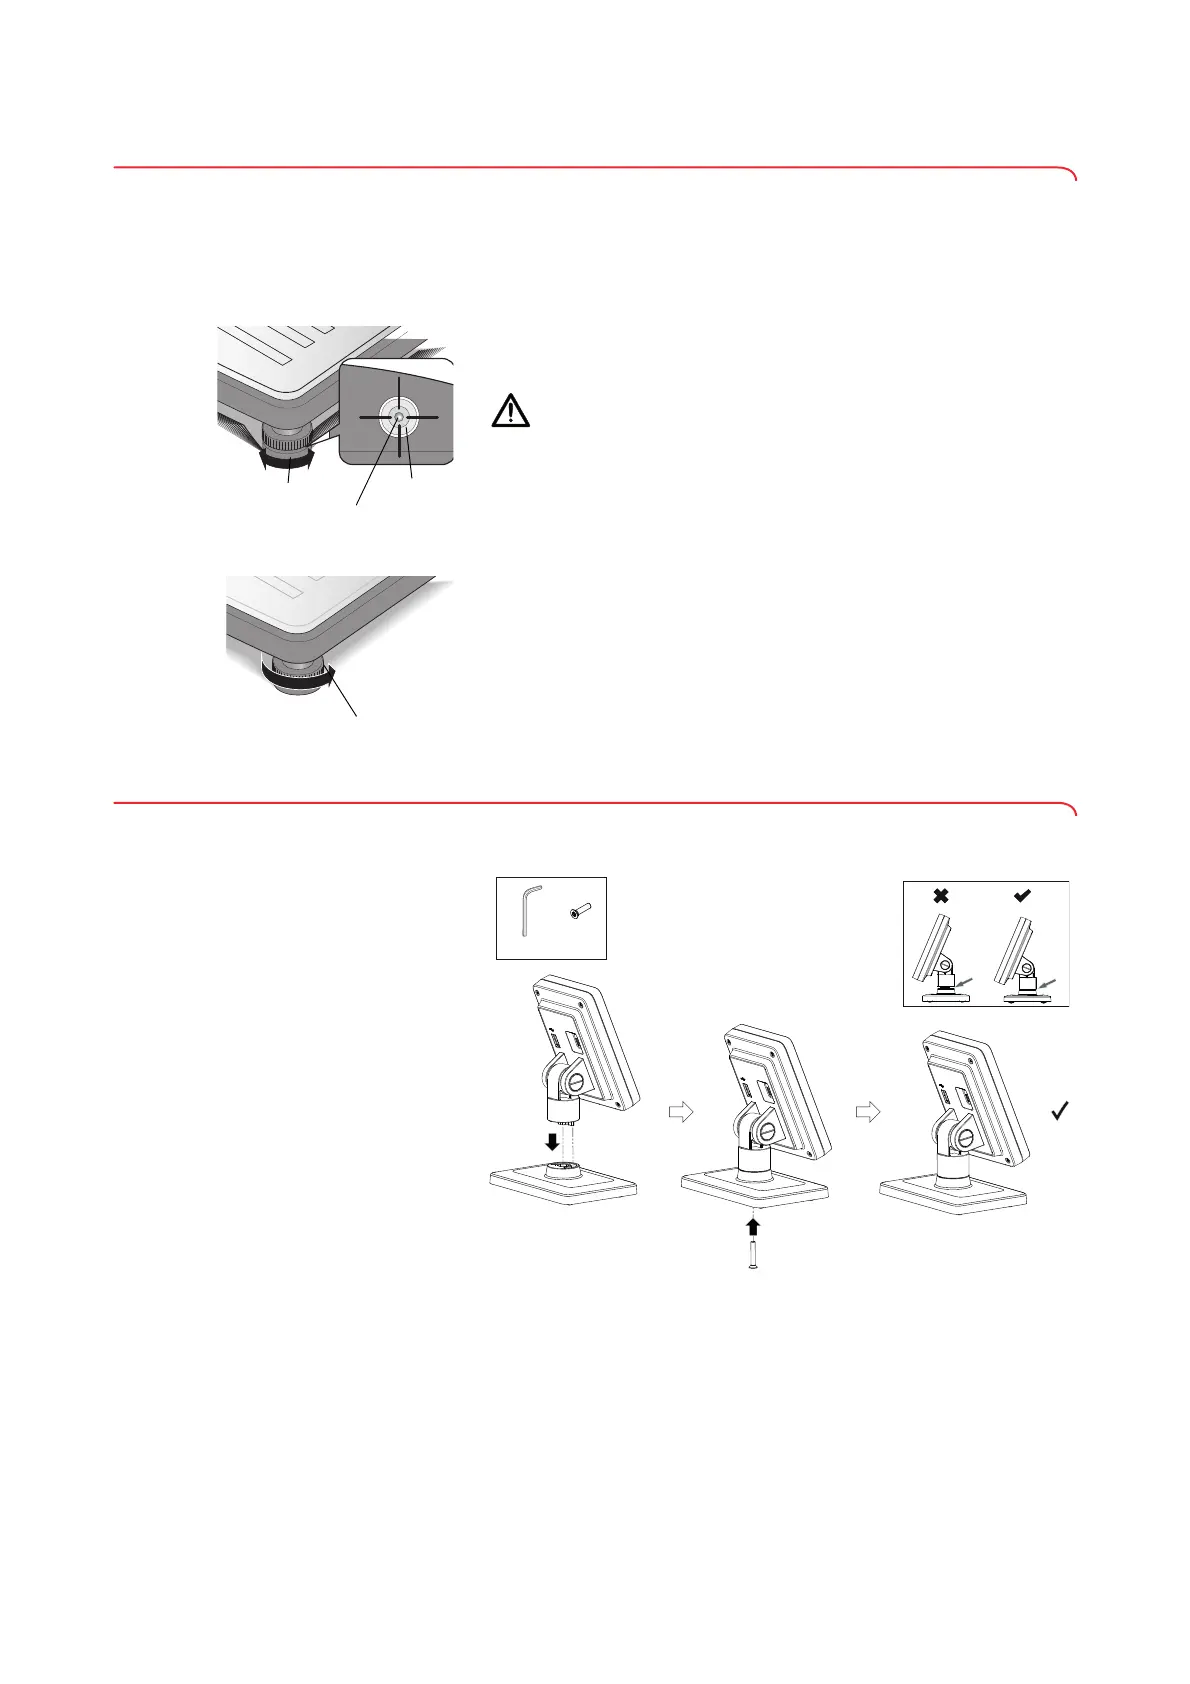
5.3 Setting up the device
To achieve accurate measuring results, the floor at the setup location must be
level and stable. Soft floors (wooden boards, for example) give under the
patient's weight and falsify the measuring result.
1. Place the device on a firm, level surface.
2. Align the device by turning the foot screws.
The device is positioned horizontally when the air bubble of the spirit level
is precisely in the middle of the circle.
CAUTION!
Injury from a lack of stability
If the foot screws are screwed out too far, they can come loose from
the device. The device is then unstable.
► Screw the foot screws out a maximum of 10 mm.
► If the device cannot be aligned horizontally with the screws screwed
out as far as possible, the setup location is unsuitable. Set the
device up in a suitable location.
3. Tighten the knurled wheels in the direction of the arrow.
The foot screws are secured against being adjusted.
5.4 Mounting the multifunctional display on the positioner
1. Screw the multifunctional display onto the positioner as shown in the
illustration.
You have the following options for continuing:
► Place the multifunctional display on a horizontal, non-slip surface.
►➔ Mounting the multifunctional display on the wall, page 77
2. Connect the multifunctional display to the weighing platform
➔ Connecting the multifunctional display to the scale, page 78.
Air bubble
Spirit level
Foot screw



 To Next Page