87
Battery Hatch Removal
• Inspect the Button, Lens, and Housing to ensure they
are not cracked or damaged.
• If there is any sign of moisture in the module, DO NOT
use the XP 5 until it receives proper service by an Autho-
rized SEEMANN Dealer, or the SEEMANN factory.
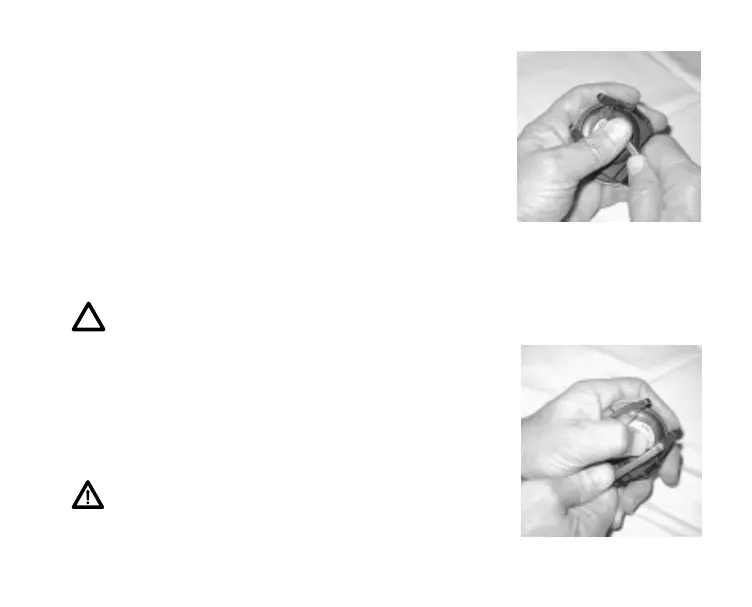
• Locate the Battery Compartment on the back.
• While applying steady inward pressure on the clear Bat-
tery Hatch, rotate the Hatch Ring clockwise 10 degrees
by pressing on the upper/right arm of the Ring with a
small blade screwdriver (Fig. 84).
NOTE: If available, an adjustable face spanner
tool or a pair of pointed pliers can be used
instead of the screwdriver by inserting the
tips of the tool in the small holes in the Ring
(Fig. 85).
• Lift the Hatch Ring up and away from the Housing.
• Remove the clear Battery Hatch.
WARNING: If damage, moisture, or corrosion is
found, it is recommended that you return your
XP 5 to an Authorized SEEMANN Dealer, and DO
NOT attempt to use it until it has received fac-
tory prescribed service.
Fig. 84 -Ring Removal
Fig. 85 - Ring Removal (alternate)