37
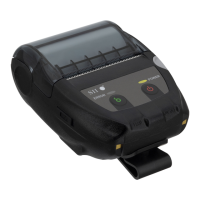
6. Insert the connector of a battery pack to be installed.
Figure 15-4 Installing Battery Pack (1)
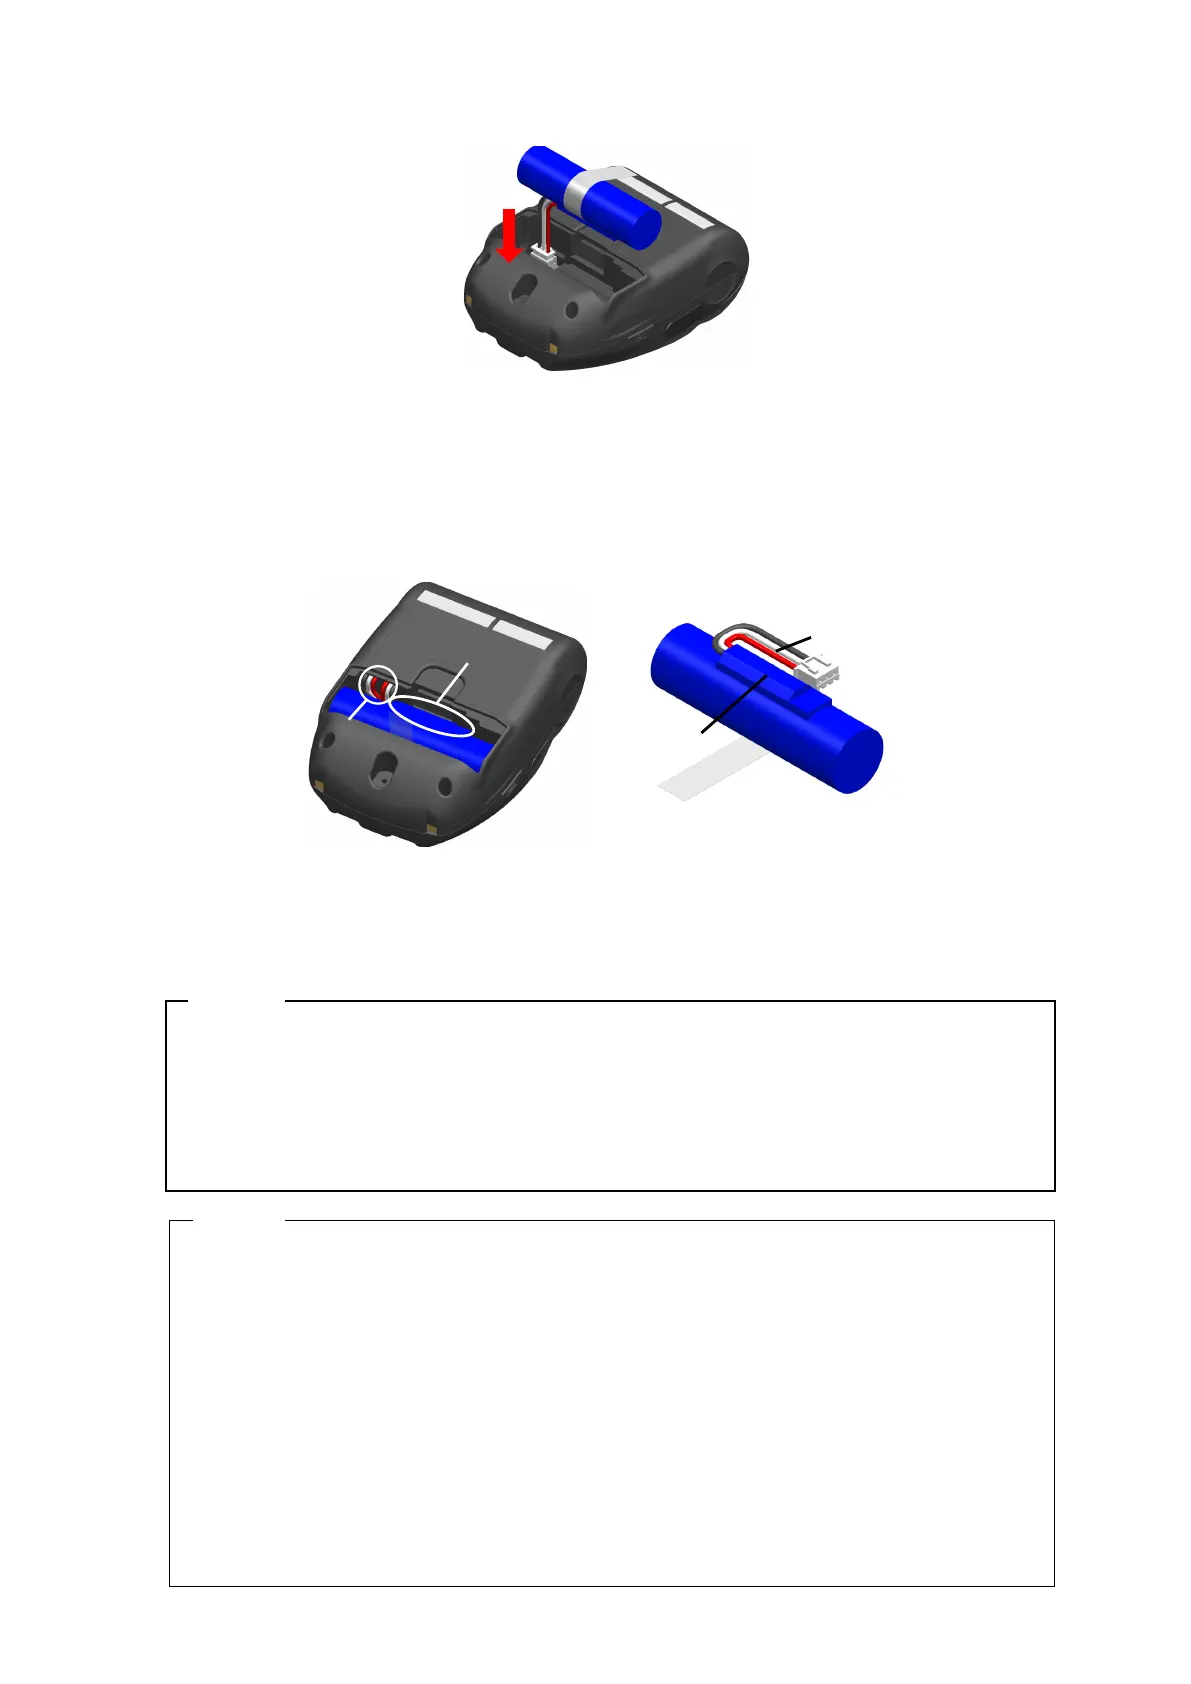
7.
Install the battery pack as shown in Figure 15-5.
Place the projection "c" and the lead wire "d"of the battery pack into the recess "C" and the space
"D" of the printer respectively. The battery cover can be closed only when the battery pack is
properly placed.
Figure 15-5 Installing Battery Pack (2)
8.
Close the battery cover.
NOTE
◆
Make sure to turn off the printer when replacing the battery pack.
◆
If the battery pack is removed during saving the registration data by registration
command or settings by function setting command, the data may be lost.
◆
See "2. SAFETY PRECAUTIONS" and "3. OPERATING PRECAUTIONS" for the
precautions of the battery pack.
HINT
•
The battery pack may get hot when in use. This is normal and not a malfunction.
•
If the usable time of the battery pack has become shorter significantly, the battery is at
the end of life. Please purchase a new battery pack.
•
When the battery pack is used at low temperature, the usable operating time of the
printer may be shortened.
•
The battery may deteriorate even if not used.
•
When Auto Power Off Setting is set to Enable, the printer is automatically turned off after
not operated for the set time, and this can prevent the useless consumption of the battery.
For details, see "11. FUNCTION SETTINGS".
•
By twisting a full turn, the lead wire d is easier to fit in the space D.
•
Dispose the used or unnecessary batteries according to local regulations.
 Loading...