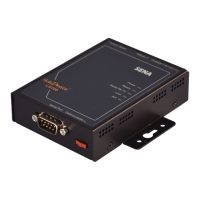
What to do if I cannot login to the console of my Sena Network Hardware?
D
Daniel RoachAug 19, 2025
If you can't log in to the console of your Sena Network Hardware, it might be due to an incorrect username or password. Ensure you are using the correct credentials. If you've lost them, perform a factory default reset using the factory reset switch. The default username and password are both 'admin'.
O
obarnesAug 21, 2025
Why is the Link LED not lighting up on my Sena HelloDevice LS100?
A
Annette CoxAug 22, 2025
If the Link LED on your Sena Network Hardware isn't lighting up, the Ethernet cable might not be properly connected. Check the Ethernet cable connection. Also, ensure you're using the correct type of Ethernet cable. For connection to an Ethernet hub, use a straight-through cable. For a direct connection between the LS100 and a remote host, use a crossover cable.
J
Jennifer HendersonAug 23, 2025
What to do if I cannot connect to the LS100 using telnet with my Sena HelloDevice LS100 Network Hardware?
B
Barry MillerAug 23, 2025
If you cannot connect to the LS100 using telnet, use the serial console to assign a valid IP address to the LS100. Also, exit the serial console and retry the telnet connection, if someone is using it.
A
Amanda MarquezAug 26, 2025
Why is the IP address of my Sena Network Hardware changing?
S
Stephen HorneAug 26, 2025
If your Sena Network Hardware's IP address changes, it might be because the DHCP server isn't extending the lease time. Check if the DHCP server is working correctly.
D
David YoungAug 28, 2025
What to do if HelloDeviceManager cannot probe the LS100 of my Sena HelloDevice LS100 Network Hardware?
M
Matthew HoffmanAug 28, 2025
If HelloDeviceManager cannot probe the LS100, use the serial console to assign a valid IP address to the LS100. Ensure that HelloDeviceManager is running on a PC that is on the same subnet as the LS100.
S
Sarah JonesAug 30, 2025
Why I cannot connect to the LS100 of my Sena HelloDevice LS100?
J
Jason RobertsAug 30, 2025
If you cannot connect to the LS100, verify that the IP configuration of the remote host is valid. Ensure that the host mode of the LS100 serial port is set to TCP server or TCP server/client. Specify the correct IP address and TCP port number for the LS100. If the DSR option is enabled, ensure the DSR input of the LS100 is high, or disable the DSR option. Lastly, if a TCP connection with another host is already established, close it or try connecting later.
E
Elizabeth WilsonSep 1, 2025
Why is the serial console halted for a few seconds periodically on my Sena Network Hardware?
A
Allison WilsonSep 1, 2025
If the serial console is halting for a few seconds periodically, and the IP mode is DHCP, it might be because an IP address hasn't been assigned due to a DHCP server failure. To resolve this, change the IP mode to static IP.
A
Amanda DavisSep 3, 2025
How to fix a Sena HelloDevice LS100 with Power LED that does not light up?
E
Erik MillerSep 3, 2025
If the Power LED on your Sena Network Hardware isn't lighting up, the power cable might not be connected properly. Check the power connection.
J
John ReynoldsSep 5, 2025
What to do if ACT LED does not blink on my Sena HelloDevice LS100 Network Hardware?
G
gibsonseanSep 6, 2025
If the ACT LED on your Sena Network Hardware isn't blinking, it might be due to an invalid IP configuration. Check the IP configuration parameters.
D
Dennis SmithSep 7, 2025
What to do if the serial console is not connected to my Sena Network Hardware?
K
Kristina SmithSep 7, 2025
To resolve the issue with the serial console not being connected, make sure you are using a serial console cable (null-modem cable). Also, check the serial port configuration of your terminal emulation program: 9600 bps, 8 Data bits, No parity, 1 stop bit, Hardware flow control. Finally, ensure the Console/Data switch is set to the Console side.
Details the serial interface, network interfaces, protocols, management, LEDs, power requirements, environmental specs, physical dimensions, weight, approvals, and warranty.