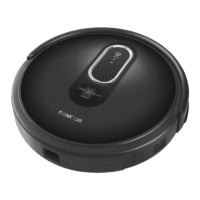
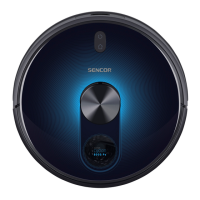
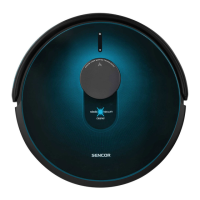
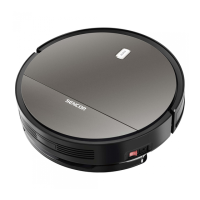
This document describes the SENCOR SRV 6250BK Robotic Vacuum Cleaner, an appliance designed for cleaning various types of hard floors and low-pile carpets. It effectively combines different cleaning routes to optimize floor area cleaning.
Function Description:
The robotic vacuum cleaner is equipped with a suction hole that effectively removes hair, animal fur, and other debris. Two side rotary brushes (A11, A15) are designed to brush dirt out of hard-to-reach places along walls, furniture, and corners. Motorized rubber wheels (A13, A16) protect sensitive floors from scratching and can navigate over threshold strips up to 1 cm high and ride onto 2 cm high carpets. A suspended bumper (A2) allows the vacuum cleaner to dampen its approach to obstacles and clean efficiently around them. Infrared sensors in the front bumper prevent collisions, while bottom anti-stair-fall sensors (A10, A12, A14) ensure safe operation in rooms with stairs.
A key feature is the mop function, which enables both dry and wet wiping of smooth hard floor surfaces. During wiping, the vacuum cleaner simultaneously vacuums small bits of dirt and dust to prevent the mop fabric from becoming excessively soiled. When cleaning is complete, the water supply automatically shuts off to prevent leakage.
For easy identification of its operating state, the power button (D1) on the cover has an indicator light that changes color: red for low battery, flashing alternately red and blue for charging, and blue for full charge and operation. The vacuum cleaner also provides audio signals and voice messages for certain functions or error states.
The remote control (C1) offers convenient control, allowing users to turn the vacuum cleaner on/off, set it to automatic cleaning mode, select an operating mode, send it to the charging station, or set scheduled cleaning. The vacuum cleaner also features a GYRO MAPPING function, which helps it identify room geometry for more efficient cleaning.
Important Technical Specifications:
- Dimensions (diameter x height): 335 x 79 mm
- Weight: 2.5 kg
- Operating time per single charge: up to 120 min
- Operating time per single charge (mop used): 90-110 min
- Dust container capacity: 475 ml
- Water tank capacity: 0.2 l
- Power adapter rated voltage range: 100-240 V AC
- Power adapter rated frequency: 50/60 Hz
- Power adapter output: 5 V, 1000 mA
- Battery type: 2,600 mAh Li-ion
- Charging time: 4-6 h
- Battery input: 5 V, 1 A
- Noise emission level: Lower than 65 dB(A)
Usage Features:
- Installation of Rotary Brushes: Rotary brushes (A11, A15) are pushed onto pins on the underside of the vacuum cleaner, matching L and R marks. They should be removed when cleaning carpets.
- Battery Insertion/Removal: The Li-ion battery is inserted into the battery compartment (A17) on the underside of the vacuum cleaner, ensuring the main switch (A3) is off. The battery connector must be properly connected. For extended storage, the battery should be removed and stored in a dry, clean, cool place.
- Charging Station Location: The charging station (B4) should be placed against a wall on a hard, even, dry surface, within reach of a power socket. Ensure no stairs or obstacles are within 1 m to the left/right and 2 m in front of the station.
- First-Time Charging: Before first use, the battery must be fully charged for at least 5 hours. The vacuum cleaner must be turned on via main switch A3. It can be charged by manually placing it into the charging station (connecting A16 to B5) or by directly plugging the power adapter (B1) into socket A4.
- System Time Setting: The system time is set via the remote control (C1) by holding down the CLK button (C11) and using arrow buttons (C5, C8) to adjust hours and minutes.
- Magnetic Tape (I1): This tape defines the vacuuming area, preventing the cleaner from crossing it. It should be placed before each cleaning session as the boundaries are not stored in memory.
- Turning On/Off: Turn on the main switch (A3), then press button D1. The vacuum cleaner enters stand-by mode when D1 is lit blue. To turn off completely, set main switch A3 to position 0.
- Sleep Mode: The vacuum cleaner enters sleep mode after 10 minutes of inactivity or if it cannot dock. It can be woken by pressing D1 or C9 (ON/OFF) on the remote control.
- Voice Messages: Voice messages can be deactivated/reactivated by simultaneously pressing PLAN (C3) and HOME (C4) buttons on the remote control.
- Cleaning Modes:
- Automatic Cleaning: Press D1 or C9 (ON/OFF). The cleaner combines various routes for optimal cleaning and returns to the charging station when finished.
- Maximum Power Mode: Press MAX (C12). Increases motor and central rotary brush power for more effective cleaning.
- Along-the-Walls Cleaning (MODE1): Press MODE (C10) repeatedly until C2 shows MODE1. The cleaner moves along the room perimeter.
- 2x2 Metre Area (SPOT) Cleaning (MODE2): Place the cleaner in the middle of the desired area. Press MODE (C10) repeatedly until C2 shows MODE2. Cleans a 2x2 meter area in straight parallel lines.
- Random Direction Movement (MODE3): Press MODE (C10) repeatedly until C2 shows MODE3. Cleans randomly until the battery is almost flat, then returns to charge.
- Intensive Cleaning (MODE4): Press MODE (C10) repeatedly until C2 shows MODE4. Cleans the same location twice.
- Pausing Cleaning: Press D1 or C9 (ON/OFF) at any time during cleaning.
- Mop Unit Usage: The mop unit (A6) consists of a removable dust container (E1), water tank (E2), and mop fabric (E3). It is used for dry or wet wiping. The water tank has an electronically-controlled pump.
- Dry Wiping: Attach mop fabric (E3) to the water tank (E2) using velcro strips (E4).
- Wet Wiping: Fill the water tank (E2) through cap (E5) with clean water. Avoid cleaning agents that foam. Ensure contacts (E6) are dry.
- Scheduled Cleaning: Set via the remote control (C1) by holding PLAN (C3) and setting the time. This functions as a delayed start. The smartphone application allows for daily scheduling. Avoid wet wiping with scheduled cleaning if the water tank is full to prevent excessive wetting.
- Mobile Application Control: The vacuum cleaner can be controlled via a smartphone or tablet app (available on Apple App Store and Google Play Store). The app allows mode selection, pausing, returning to the charging station, and scheduling. Wi-Fi (2.4 and 5 GHz) is supported.
Maintenance Features:
- General: Always turn off the vacuum cleaner (A3) before cleaning. Do not use abrasive cleaning products or solvents.
- Dust Container and Dust Filter: Empty dust container (A5) after every use. Release latch (A7) to remove. Wash both parts under running water and dry well. Tap out or clean dust filter (F2) with brush (F3). Replace if damaged. Do not wash in a dishwasher.
- Mop Unit: After each use, remove and hand wash mop fabric (E3) in lukewarm water with gentle washing powder. Clean the dust container (E1) and water tank (E2). Ensure contacts (E6) are dry.
- Central Rotary Brush: Push latches (H1) to remove cover (H2) and brush (H3). Clean the area and suction hole (A19). Remove dirt and material from the brush and bearings (H4).
- Rotary Brushes: Pull brushes (A11, A15) upwards to remove. Clean dirt from brushes and mounting locations. If bristles are deformed, dip in warm water to restore shape. Replace worn brushes.
- Complete Robotic Vacuum Cleaner: Wipe surfaces with a soft dry cloth. Regularly clean front swivel wheel (A9), motorized wheels (A13, A16), suction hole (A19), rotary brushes (A11, A15), and bottom sensors (A10, A12, A14).
- Charging Station: Clean the surface of the charging station (B4) and contacts (B5) with a soft dry wiping cloth weekly.
- Storage: For extended storage, clean the vacuum cleaner, remove the battery, disconnect the charging station, and store in a dry, clean, cool place.
Disposal:
- Used Batteries: Remove batteries before disposal. Dispose of used batteries at designated collection points.
- Packaging Materials: Dispose of packaging materials at designated waste sites.
- Used Electrical and Electronic Equipment: Do not dispose of with ordinary municipal waste. Hand over to determined collection points for proper disposal or return to the retailer when buying a new equivalent appliance.
The SENCOR SRV 6250BK complies with EU directives, including 2014/53/EU for radio devices.