- 12 -
11/2020
Copyright © 2020, Fast ČR, a.s.
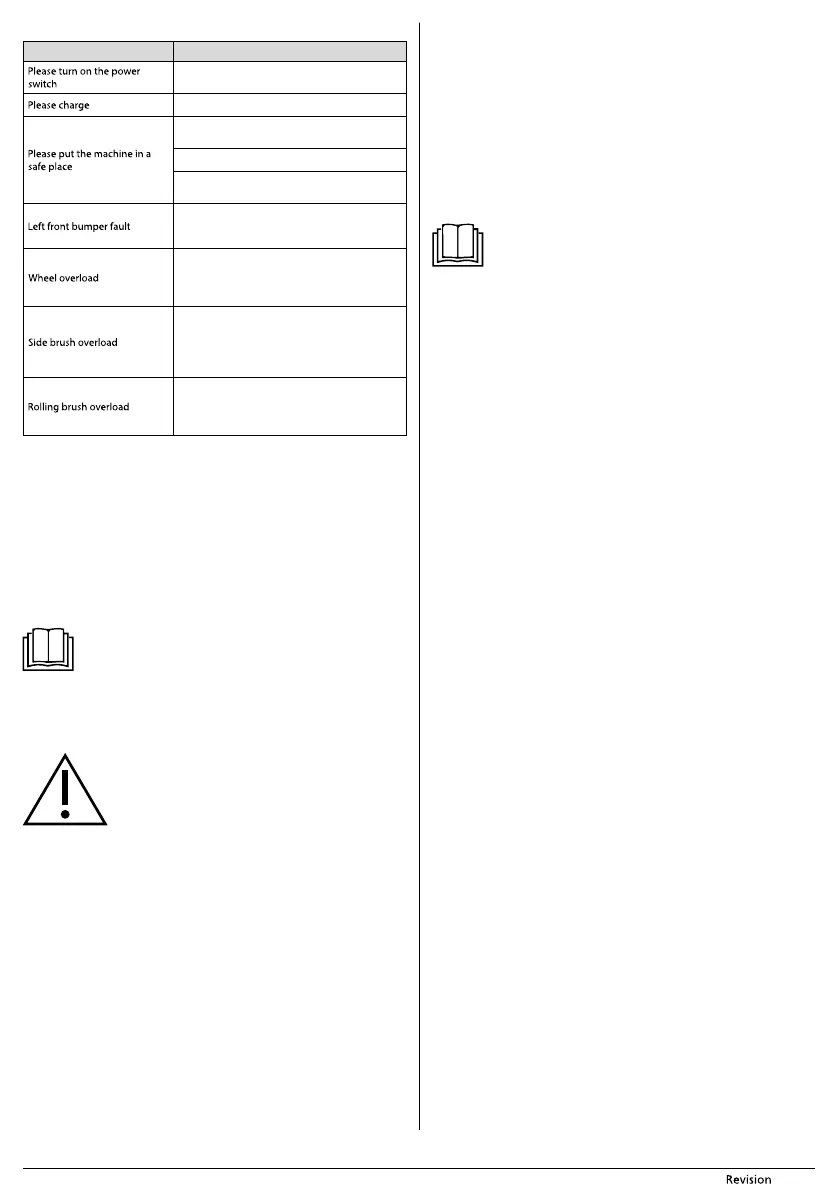
Voice messages
MESSAGE SOLUTION
Turn on the vacuum cleaner
Dock the robot into the charging station.
If the vacuum cleaner was lifted, put it down
on the floor
Anti-fall sensors are dirty. Clean them.
Sensor sent afalse error. Turn the vacuum cleaner
off and on.
Check that the bumper bar returns correctly
after being pushed in. If not, contact the service
department.
Overload of one of the rubber wheels, probably
due to dirty material or jamming on an obstacle.
Check that the wheels are clean and remove any
dirty material or obstacles.
Overload of one of the side rotary brushes,
probably due to dirty material or jamming on
an obstacle. Clean the rotary brush according to
the instructions in this user'smanual. Remove
any obstacles.
Overload of the central rotary brush, probably
due to dirty material. Clean the rotary
brush according to the instructions in this
user'smanual.
CLEANING AND MAINTENANCE
■ Prior to cleaning it, always turn off the vacuum cleaner using the main switch A3.
■ For cleaning, never use abrasive cleaning products, solvents, etc.
■ Neglecting cleaning and maintenance may negatively affect the working order of
the vacuum cleaner and lead to its reduced performance.
DUST CONTAINER AND DUST FILTER
■ Empty out the dust container A5 after every use and clean it regularly. Press latch A7
to slide the dust container out of the vacuum cleaner, open it and tip out the dirty
material. For hygiene reasons, we recommend doing this away from living areas.
■ Release the filter holder F1 and the dust filter F2 and take them out of the water
tank.
■ Wash both parts of the dust container under running water and dry it well.
Note:
The inside of the dust container does not need to be washed after every
use, it is sufficient to wipe it out with awet wiping cloth.
■ Tap out the dust filter and its holder or clean these parts using the brush F3. Check
the condition of the filter and if damaged, replace it with anew one. Insert the filter
back into the holder and into the dust container. Secure it in place by turning the
grip.
■ Insert the dust container back into the vacuum cleaner.
Attention:
Do not wash the dust container or the dust filter in adishwasher.
The dust filter must not be washed using water.
Before putting the vacuum cleaner back into operation, check
that the dust filter is in its location. Otherwise the vacuum
cleaner may be damaged.
MOP UNIT
■ After every dry or wet wiping, remove the mop fabric, wash it by hand in lukewarm
water with the addition of asmall amount of gentle washing powder and allow it
to dry naturally.
■ Slide the dust container E1 out of the water tank E2, open it and tip out any dirty
material. For hygiene reasons, we recommend doing this away from living areas.
Empty out the dust container after every use and clean it regularly.
■ Take the filter holder G1 and the dust filter G2 out of the dust container. Tap out the
dust filter and its holder or clean these parts using the brush. Check the condition
of the filter and if damaged, replace it with anew one. Insert the filter back into the
holder and into the dust container.
■ Wash the dust container under running water and dry it well.
■ Wipe the water tank using alightly dampened cloth and then wipe it dry. Take
special care to ensure that the contacts E6 are dry.
■ Return the closed dust container back into the water tank.
CENTRAL ROTARY BRUSH
■ Push on the latches H1 of the central rotary brush cover H2 and take the cover out
together with the brush.
■ Use adry wiping cloth to clean out the area in which the rotary brush is housed.
Clean out the suction hole as described in the previous paragraph.
■ Remove any dirt and material (dust, wound on hair, animal fur, etc.) from the rotary
brush and the bearings H4.
■ Reinsert the rotary brush and its cover.
SUCTION HOLE
■ The suction hole A19 is located underneath the central rotary brush A21, therefore,
take it out before cleaning the suction hole. With repeat use, dust and dirt may
accumulate around the suction hole, which may manifest itself through suction
decreased efficiency. Remove the dirt and dust from the suction hole using asoft
brush. Regularly clean the suction hole to ensure maximum suction power.
ROTARY BRUSHES
■ Take out the rotary brushes A11 and A15 by pulling them upwards. Remove any
dust and dirt from the location where the brushes were mounted.
■ Remove all dust and dirt from the brushes. If necessary you may wash the brushes
under running water. If the bristles were deformed while the vacuum cleaner was
running, dip them in warm water to allow them to return to their original shape.
Allow the brushes to dry before reattaching to the vacuum cleaner.
■ After cleaning them, reattach them.
Note:
The rotary brushes become worn out when used. After acertain time it
is necessary to replace the used brushes with new ones. To order new
brushes, please contact your vendor or an authorised service centre.
COMPLETE ROBOTIC VACUUM CLEANER
■ Regularly wipe the surface of the vacuum cleaner using asoft dry wiping cloth.
■ At least once per week or more frequently, clean the front swivel wheel A9, the
motorized wheels A13 and A16, the suction hole A19, rotary brushes A11 and A15
and the bottom sensors A10, A12 and A14.
■ First remove any coarser dirt from the front swivel wheel and the motorised wheels.
Then clean them around their entire perimeter using alightly dampened cloth and
wipe them dry. Do not forget to also clean the area around the wheels.
■ Wipe the sensors on the underside of the vacuum cleaner using asoft dry wiping
cloth or cotton bud.
CHARGING STATION
■ At least once per week, clean the surface of the charging bast B4 including the
charging contacts B5 using asoft dry wiping cloth.
STORAGE
■ When not using the vacuum cleaner for an extended period of time, do the
following:
■ Clean the vacuum cleaner as described in chapter CLEANING AND MAINTENANCE.
■ Remove the battery from the vacuum cleaner as described in chapter INSERTING
AND REMOVING THE BATTERY.
■ Disconnect the charging station from the power socket.
■ Store the vacuum cleaner with all its accessories in adry, clean and cool place.
TECHNICAL SPECIFICATIONS
Robotic vacuum cleaner
Dimensions (diameter × height) .............................................................................. 335 × 79 mm
Weight ................................................................................................................................................2.5 kg
Operating time per single charge ........................................................................... up to 120 min
Operating time per single charge when mop is used ............................................90-110 min
Dust container capacity ........................................................................................................... 475 ml
Water tank capacity ........................................................................................................................ 0.2 l
Power adapter
Rated voltage range .................................................................................................... 100−240 VAC
Rated frequency........................................................................................................................50/60 Hz
Output ................................................................................................................................. 5 V, 1000 mA
Battery
Type ............................................................................................................................ 2,600 mAh Li-Ion
Charging time ................................................................................................................................... 4-6 h
Input ................................................................................................................................................. 5 V, 1 A
The declared noise emission level is lower than 65 dB(A), which represents alevel Aof
sound power with respect to areference sound power of 1 pW.
 Loading...