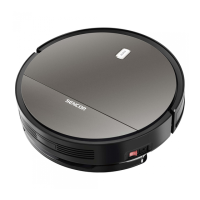
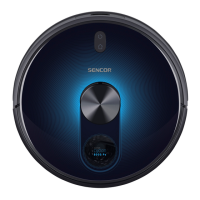
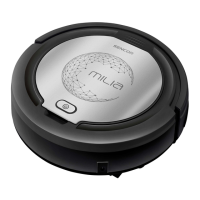
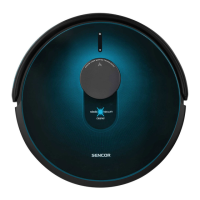
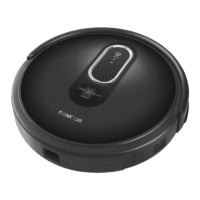
This document describes the SENCOR SRV 2230TI Robotic Vacuum Cleaner, a device designed for automated floor cleaning in households and offices. It is not intended for industrial use or outdoor environments.
Function Description
The robotic vacuum cleaner is designed to clean various types of hard floors, such as wooden, laminate, tile, and vinyl, as well as low-pile carpets. It employs a combination of zig-zag, along-the-wall, and random-direction movements to optimally clean the entire floor area. The suction hole efficiently removes hair, animal fur, and other debris. Two side rotary brushes are included to sweep dirt from hard-to-reach places along walls, furniture, and corners. The motorized rubber wheels are designed to protect sensitive floors from scratching and can navigate over threshold strips up to 1 cm high and onto carpets up to 2 cm high. A suspended bumper helps the vacuum cleaner dampen its approach to obstacles, allowing for efficient cleaning around them. Infrared sensors in the front bumper prevent collisions with obstacles, while bottom anti-stair-fall sensors ensure safe operation in rooms with stairs.
A key feature of this device is its mop function, which allows for both dry and wet wiping of smooth hard floor surfaces. When wiping, the vacuum cleaner simultaneously vacuums small bits of dirt and dust, preventing the duster from becoming excessively soiled.
The device features an indicator light on the top cover that changes color to signify its operating state: red for low battery, flashing red for charging, and blue for full charge or operation. Error states are indicated by specific flash patterns or color combinations, and the vacuum cleaner also provides audio signals for certain functions or errors.
Usage Features
Initial Setup: Before first use, the battery must be fully charged for at least 7 hours. Subsequent charges typically take around 4 hours. The main switch (A4) must be turned on for charging.
Rotary Brushes: The rotary brushes (A17 and A23) are installed by pushing them onto their designated pins on the underside of the vacuum cleaner, ensuring the L and R marks on the brushes match those on the device. For carpeted rooms, these brushes should be removed.
Battery Installation: The Li-ion battery (C6) is inserted into the battery compartment (C1) after removing the cover (A20). The battery connector (C4) is then connected to the vacuum cleaner connector (C3). For easier removal, two insulating strips (C5) are provided. If the vacuum cleaner will not be used for an extended period, the battery should be removed and stored in a dry, clean, and cool place.
Charging Station Placement: The charging station (B3) should be placed against a wall on a hard, even, and dry surface, within reach of a power socket. It requires a clear space of 1 m to its left and right, and 2 m in front, to allow the vacuum cleaner to find and dock successfully. The power cord should be routed to avoid tangling with the cleaning brushes.
Charging: The vacuum cleaner can be charged automatically by docking it into the charging station or manually by connecting the power adapter directly to the vacuum cleaner's socket (A5). During charging, the indicator light on button A2 flashes red. Once fully charged, it remains blue.
System Time Setting: The system time is set using the remote control (E1). In stand-by or charging mode, holding down the CLK button (E11) allows adjustment of hours and minutes using the arrow buttons (E5, E8) and toggle buttons (E6, E7). The set time is confirmed by pressing CLK again.
Operation Modes:
- Turning On/Off: The main switch (A4) powers the device. Pressing button A2 or ON/OFF (E9) on the remote control sets it to stand-by mode. Holding button A2 for more than 3 seconds or ten minutes of inactivity will put the vacuum cleaner into sleep mode. To completely turn off the device, set the main switch (A4) to position 0.
- Automatic Cleaning Mode: Initiated by pressing button A2 or ON/OFF (E9). The vacuum cleaner combines zig-zag, along-the-wall, and random-direction movements until the battery is nearly flat, then seeks the charging station.
- Spiral Cleaning Mode (MODE1): Activated by pressing MODE (E10) on the remote control. This mode features lower speed and increased motor and central rotary brush power for effective cleaning.
- Random Direction Movement Mode (MODE2): Activated by repeatedly pressing MODE (E10). The vacuum cleaner cleans in random directions until the battery is nearly flat.
- Along-the-Walls Cleaning Mode (MODE3): Activated by repeatedly pressing MODE (E10). The vacuum cleaner moves along room perimeters, using side rotary brushes to sweep dirt from walls, furniture, and corners.
- Zig-Zag Cleaning Mode (MODE4): Activated by repeatedly pressing MODE (E10). Suitable for cleaning large areas without furniture.
- Maximum Power Mode: Activated by pressing MAX (E12). Combines various routes for optimal floor cleaning with lower speed and increased motor and central rotary brush power.
- Pausing: Pressing button A2 or ON/OFF (E9) during cleaning will stop the vacuum cleaner in its current location.
Using the Mop: The mop function uses a water tank (D1) and a duster (D4). For dry wiping, the water tank remains empty. For wet wiping, the duster is attached to the water tank using velcro strips (D5), and the tank is filled with clean water through the cap (D3). Detergent can be applied to the duster but should not be poured into the water tank. The assembled water tank is then slid into the tabs on the underside of the vacuum cleaner. After cleaning, the mop should be disassembled, washed, wrung dry, and allowed to dry. The delayed cleaning function should not be used for wet wiping to prevent excessive floor wetting near the charging station.
Scheduled Cleaning Function: This function allows the vacuum cleaner to start cleaning automatically at a specific time each day. The scheduled cleaning time is set using the PLAN button (E3) on the remote control, similar to setting the system time. This acts as a delayed start; for example, if the current time is 5:00 p.m. and the scheduled time is 2:30, the vacuum cleaner will start cleaning at 7:30 p.m. If the main switch (A4) is turned off, the scheduled cleaning time will be deleted.
Remote Control Batteries: The remote control (E1) uses two AAA (1.5V) batteries, inserted by removing the cover (E13) and ensuring correct polarity.
Maintenance Features
Regular cleaning and maintenance are crucial for optimal performance and longevity of the vacuum cleaner. Always turn off the device using the main switch (A4) before cleaning or maintenance. Abrasive cleaning products or solvents should not be used.
Dust Container and Dust Filter: The dust container (A11) should be emptied and cleaned regularly after each use. To do this, open the lid (A3), remove the dust container, open its lid (A14), and tip out the contents. The dust filter (A12) and holder (A13) should be removed. The dust container can be washed under running water and dried thoroughly, but the dust filter should only be tapped out or cleaned with a soft brush, not washed with water or in a dishwasher. The area for the dust container (A7) and the exhaust hole (A8) should be cleaned with a wet wiping cloth.
Suction Hole: Dust and dirt can accumulate around the suction hole (A22), reducing suction efficiency. To clean it, the central rotary brush should be removed, and the suction hole cleaned with a soft brush.
Central Rotary Brush: To clean the central rotary brush (F3), push the latches (F1) of the cover (F2) and remove the cover and brush. The area where the brush is housed should be cleaned with a dry wiping cloth. Any dirt, hair, or animal fur should be removed from the rotary brush.
Rotary Brushes: The side rotary brushes (A17 and A23) can be removed by pulling them upwards. Dirt should be removed from the brushes and their mounting locations. If the bristles are deformed, they can be dipped in warm water to restore their original shape. The brushes should be allowed to dry before reattaching. Worn-out brushes should be replaced.
Mop: After each use, the duster (D4) should be removed, hand-washed in lukewarm water with a small amount of gentle washing powder, and allowed to dry naturally. The water tank (D1) should be wiped with a lightly dampened cloth.
Complete Robotic Vacuum Cleaner: The surface of the vacuum cleaner should be wiped regularly with a soft dry cloth. At least once a week, the front swivel wheel (A24), motorized wheels (A19 and A26), suction hole (A22), rotary brushes (A17 and A23), and bottom sensors (A15, A18 and A25) should be cleaned. Coarser dirt should be removed from the wheels, and then they should be cleaned around their perimeter with a lightly dampened cloth. The sensors on the underside should be wiped with a soft dry wiping cloth or cotton bud.
Charging Station: The surface of the charging station (B3), including the charging contacts (B5), should be cleaned at least once a week with a soft dry wiping cloth.
Storage: For extended periods of non-use, the vacuum cleaner should be cleaned, the battery removed, and the charging station disconnected from the power socket. The device and its accessories should be stored in a dry, clean, and cool place.