Explorer MX-HD Install and Setup Guide
18
700-0159
R003
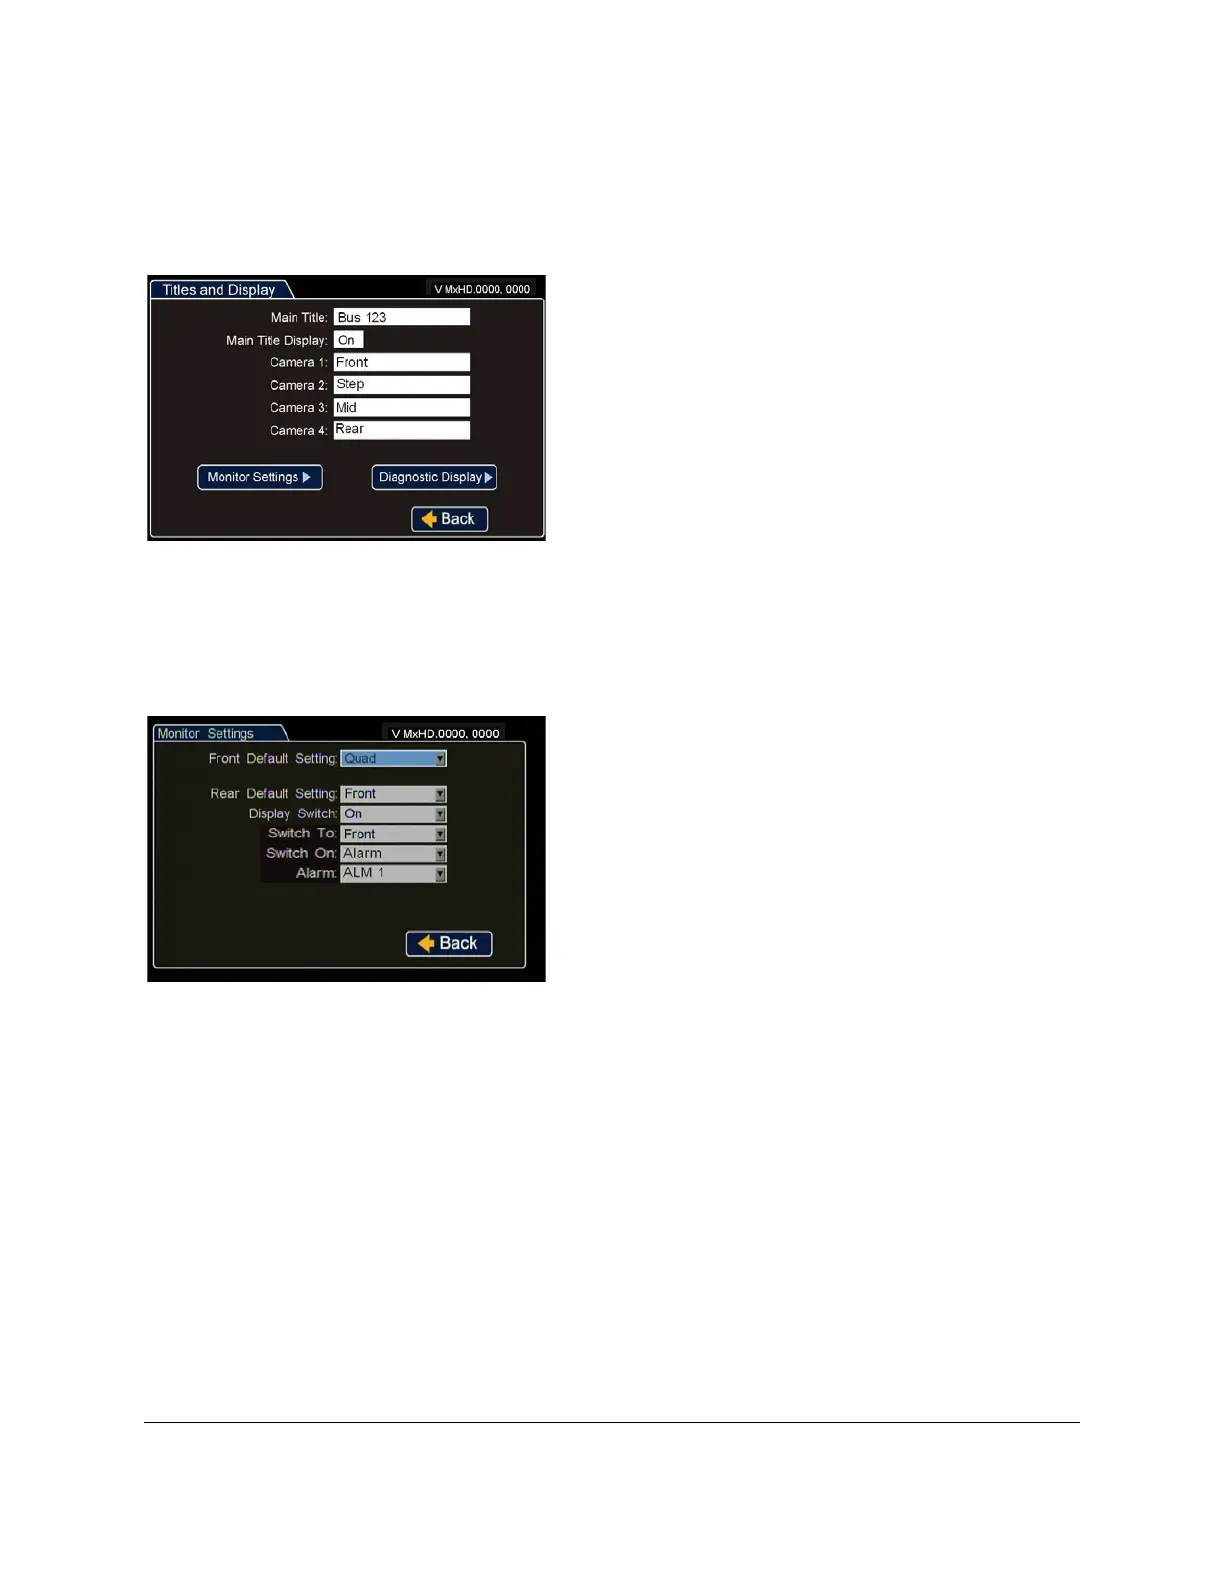
4 In the Configuration menu, click Titles/Display.
5 In the Titles and Display menu, enter vehicle ID and camera output labels to display on overlay and
menus.
6 In the Titles and Display menu, click Monitor Settings.
7 In the Monitor Settings menu, select options to provide monitor display for the camera output.
8 In the Titles and Display menu, click Diagnostic Display.
Main Title: Enter the bus number.
Main Title Display
:
Leave On to display.
Camera 1-4
:
Select camera titles that reflect the views
they are recording. Typical camera titles are:
•Front
•Step
•Mid
•Rear
•Stop Arm
Click Back to save the menu settings.
Figure 14
Titles and Display Menu
Front Default Setting
:
Choose a monitor view setting
which will display all the cameras you have connected.
Rear Default Setting
: If needed, c
hoose a monitor view
setting which will display from the DVR’s rear Video
Out socket.
Display Switch
:
Leave On to display the time and date.
Switch To
:
If a rear view camera is installed, select the
channel that will display the rear camera view when the
following alarm or signal setting triggers the switch.
Switch On
:
Select the switch type (alarm or signal) that
will play the rear view camera in the selected channel.
Alarm
:
Select the specific alarm or signal that will
trigger the rear view camera display.
Click Back to save the menu settings.
Figure 15
Monitor Settings Menu