Introduction
700-1015 R002 1–5
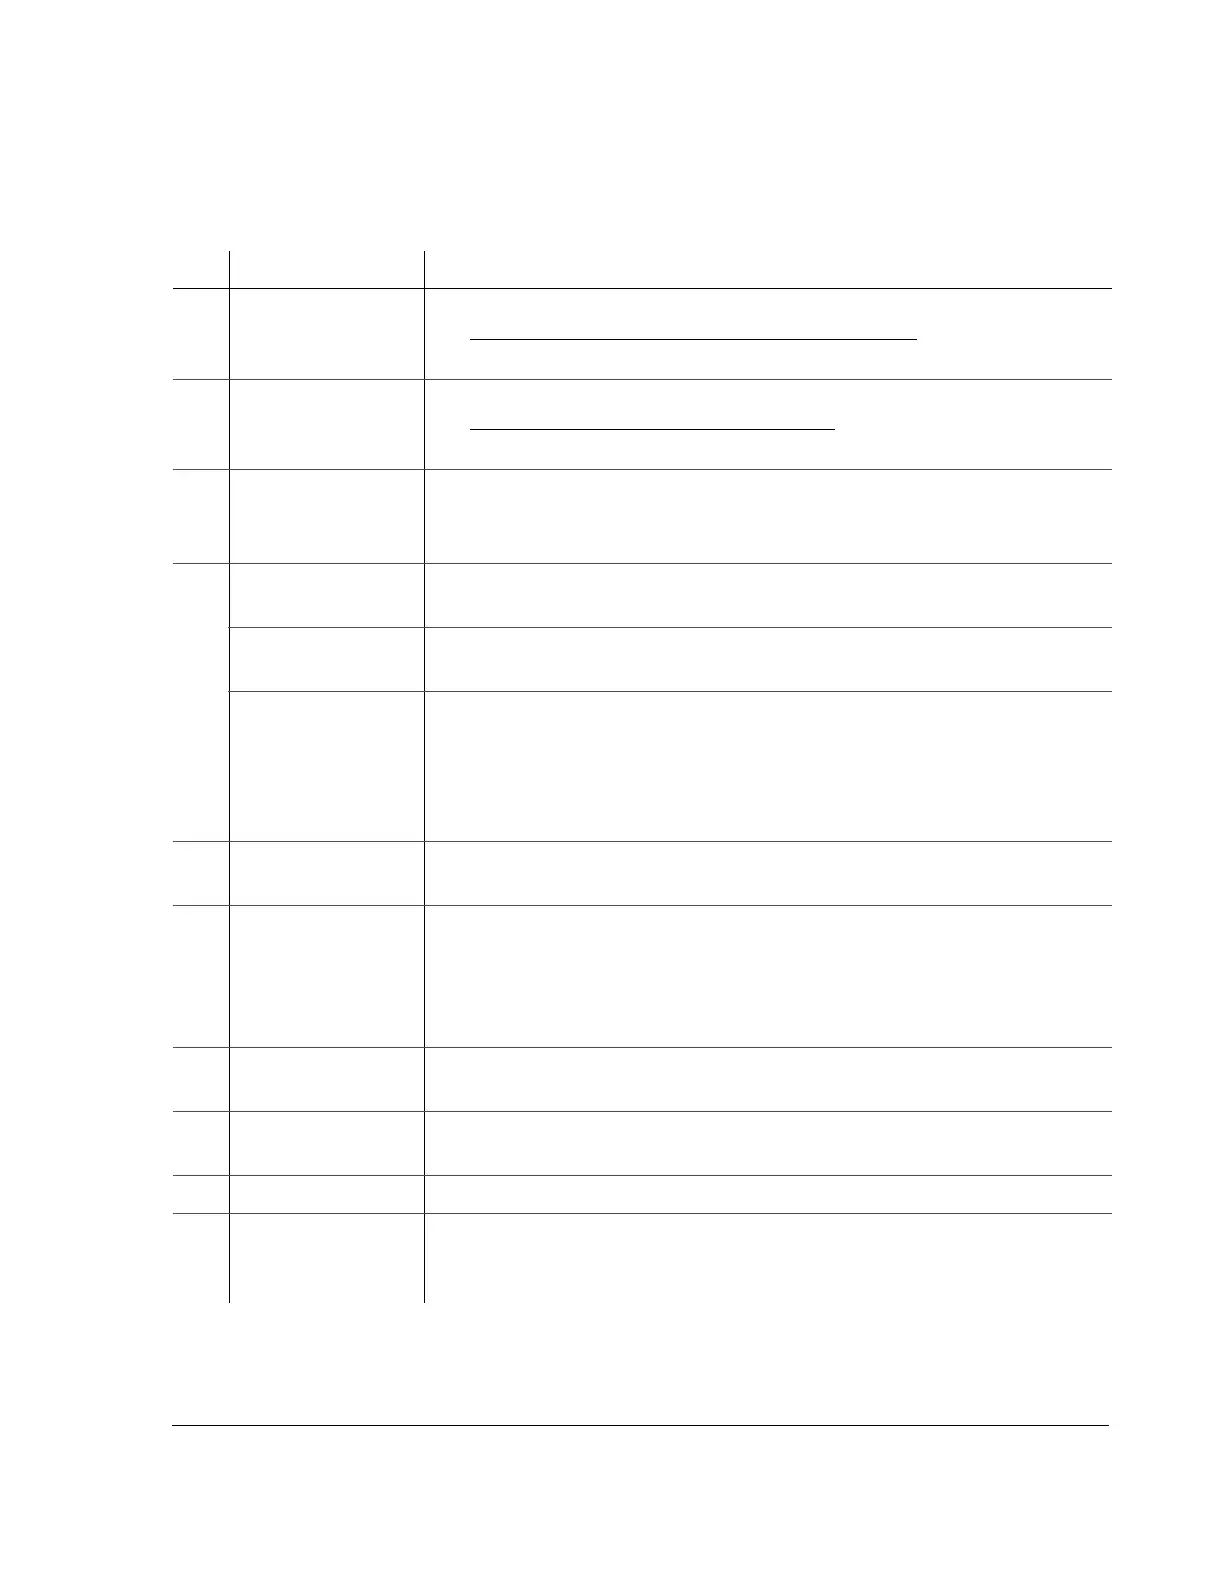
Table 1-1
Front Panel Features
Item Feature Description
1 DVR Drive lock Requires the DVR drive key to unlock and remove the DVR drive.
See Search, Playback, and Archive Video
, on page 2–1 for hard drive
removal details.
2 DVR Drive Remove the drive for playback using the HDD Dock connected to a PC.
See vMax View and HDD Dock
, on page 2–3 for hard drive playback
details.
3 Ethernet Port
Ethernet port with RJ-45 connector for connecting to LAN. Connect to a
laptop, Smart-Reach
Mobile wireless equipment, or other equipment.
4 LAN activity
(green)
Illuminates when there is network activity on the local area network
connection.
HDD activity
(green)
Illuminates when the DVR is accessing the drive.
Power (PWR)
indicator (green)
TEMP ---
VOLTAGE — —
Illuminates when the DVR is powered on.
Flashes quickly when the DVR cannot power up due to temperature
limitations.
Flashes slowly when the DVR cannot power up due to voltage limitations.
5 USB port for
trackball mouse
Connecting the trackball mouse.
6 USB port Supports USB devices for:
• Copying video and audio information.
• Exporting video clips.
• Updating the DVR firmware.
• Importing/exporting.
7 AUDIO OUT (red) Audio output RCA jack for DVR configuration, troubleshooting, video
playback, live viewing using a portable monitor and a USB mouse.
8VIDEO OUT
(yellow)
Video output RCA jack for configuring the DVR and viewing recorded
video with portable monitor.
9 SD card slot cover Unscrew to remove cover and access the optional SD card, if installed.
10 TEMP PWR
(red button)
• Power on the DVR for five minutes if held for more than 5 seconds.
• Powers down the DVR if held for more than 5 seconds when the DVR is
in temporary power mode, or in shutdown sequence
and the ignition is off.
 Loading...


