www.servware.com
800•768•5953
Service, Installation & Care Manual
5
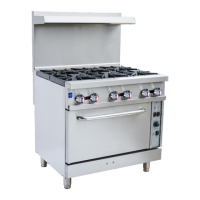
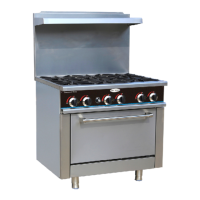
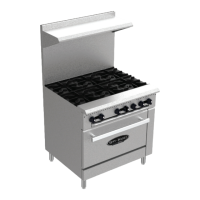
INSTALLATION
7. A pressure regulator must be installed with this unit. Ensure that the regulator type is in agreement
with the rating plate gas supply. Regulator must be upright after installation. If regulator is not level
during operation, performance problems may result.
8. After connecting the appliance to the gas system, check for leaks at joints and pipe ttings; to do
so, use soapy water or a specic leak detector (spray).
9. Check the gas supply pressure after installation.
10. Gas supply pressure can be measured with a liquid-lled pressure gauge (e.g. a U-shaped
pressure gauge, minimum scale division 0.1mbar) or a digital gauge. Procedure as follows:
• Ensure gas is turned off
• Remove the panel and unscrew the screw on the pressure port
• Place the pressure gauge
• Start up the appliance by following the instructions in this owner’s manual
• Check supply pressure. Pressure must agree with rating plate requirement when the unit is in
full operation
• After the check, turn off gas and remove the pressure gauge
• Replace the sealing screw
OPERATION
When turning on for the rst time please be advised that it might take a little longer to ignite due to
the air existing in the pipe.
BURNERS:
• Turn on the gas supply and ignite the pilot ame with a lighter. If the unit hasn’t been used in a
while or if this is the rst lighting, ignition might take a little longer (about two or three minutes).
• Press the corresponding valve knob of burner and turn 90 degrees counterclockwise.
The burner will be ignited and the ame will be at Max. To set the ame to Min, rotate
counterclockwise another 90 degrees.
• When nished turnoff main burner by rotating the knob clockwise to off position. Pilot should
remain lit.
• For complete shutdown, ensure that all burner knobs are turned to the off position, and then
turn main gas supply off.