Operation
Fast Installation
Connect the receiver and other equipments according to “BASIC CONNECTIONS”
1. Connect this unit to a mains outlet, then press STANDBY button to turn on the unit;
2. Press MENU button to access the menu system, then press CH-/CH+ button to choose Tools submenu, then
press VOL► button to access it with the default password “0000” input. Use CH-/CH+ button to choose Factory
Setting, press VOL► again to access before pushing VOL◄/VOL► button to choose YES and press OK to
confirm the restoration of Factory Setting. Once the operation
is finished, press EXIT to quit.
Note: It is a must to perform this operation if this receiver is
used for the first time or the software has just been upgraded.
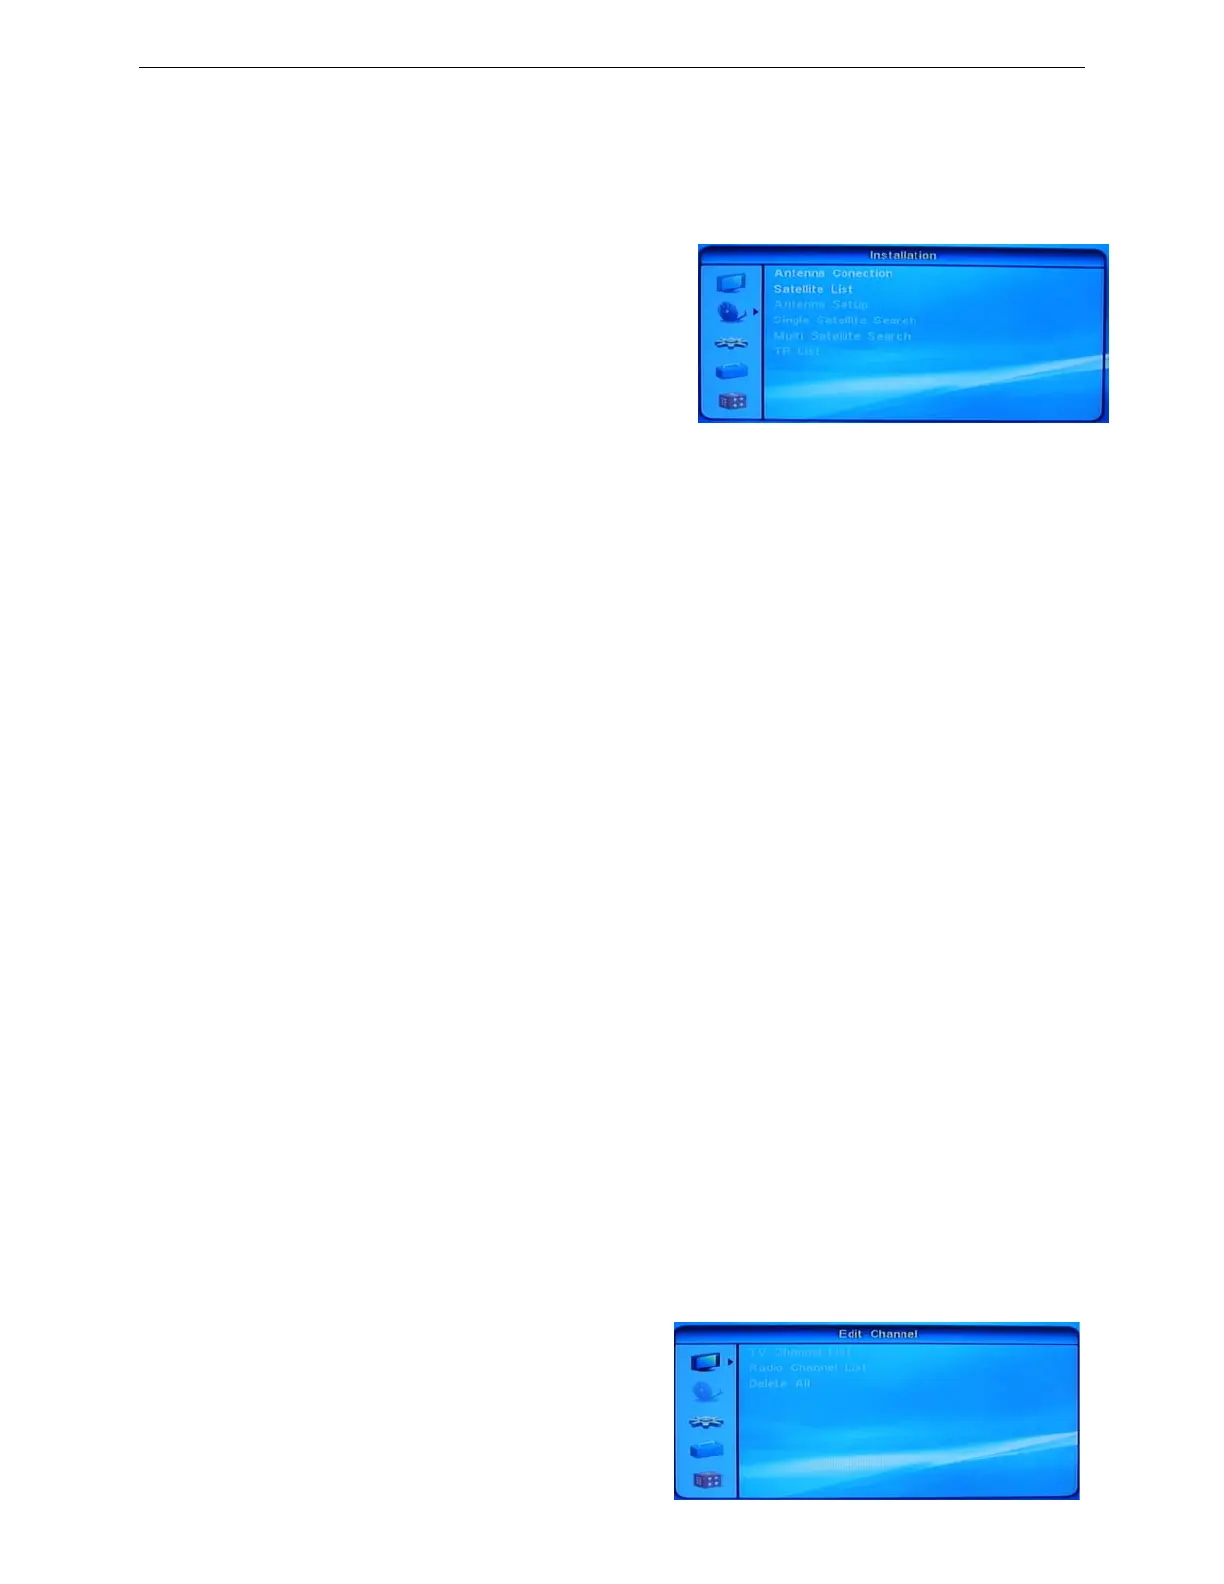
3. Press CH-/CH+ button to move to Installation submenu, then
press VOL► button to access it with the password “0000”
input.
a. Press VOL► button to highlight Satellite List where a
satellite should be selected, and press EXIT to quit once the
selection is complete. (Please conduct this operation
following the guidance displayed on the screen);
b. Press VOL► button to access LNB Freq where the Local Oscillation Frequency of the tuner and some other
related items can be set after you choose Antenna Setup. Press EXIT to quit as soon as the setup is finished.
c. Press VOL► button to highlight Single/ Multi Satellite to set the search information involved, then press VOL►
button again to start Auto Search.
Regarding actual operation please refer to the following instructions for more information:
Menu operation
Main Menu
Press MENU key to bring up the Main Menu that includes 5 subsidiary items:
Edit Channel
Installation
System Setup
Tools
Game
Press CH+▲/CH-▼ button to move the cursor up and down to choose a menu item, and press VOL► or OK button to
access current submenu; VOL◄/EXIT/MENU button are used to get back to the upper-level menu, and EXIT/ MENU to
quit menu operation.
Note: 1. CH▲, CH▼, VOL◄, VOL►, PG+, PG-, OK, EXIT and MENU buttons function the same in menus at all
levels; PG+/ PG- button can be used not only to turn over gages, but also to select a satellite.
2. Refer to the screen hints during operation of some menu items.
3. The color buttons represent different function in different menu windows.
Shortcut keys:
EPG: View the EPG information of the current service (if available).
TEXT: View the text information of the current service (if available).
SUB-T: Enable or disable subtitle display on the screen (if available).
◆ INFO: Check the relevant information of the current service
◆ TV/RADIO: Press this button to turn on or off the channels.
◆ RED, GREEN, YELLOW, BLUE and WHITE: These buttons are used for various function operations.
◆ LAST: Shift to the previous service.
◆ MODE: Press this button to setup TV System: Display modes, Aspect modes and Video Output modes. (Refer to
the actual operation result for more information)
◆ AUDIO: Shift the audio channels as well as audio languages.
◆ STANDBY: Press this button switch on /off STANDBY status.
◆ MUTE: Enable or disable mute functionality.
◆ FAVOR: Bring up Favor Groups window for detailed setup.
1.
1.
Edit
Channel
Edit Channel
Press VOL► of OK to access this submenu which includes 3
items.
TV Channel List
Radio Channel List
◆ Delete All
7
 Loading...