8
6. Tighten attaching screws until the controller is firmly seated. Tightness
may be checked by rocking the controller.
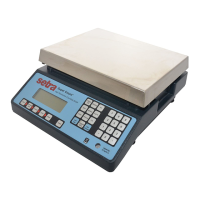
Replace the pan by visually centering it on the scale and pressing it
in place until well seated. The pan will be seated correctly if it is level
on all sides.
Note: When the controller and platform are attached, the scale may be carried by
grasping the right or left side of the platform, using the flange as a handle.
EXPERIMENTATION
1. Display test
When your scale is first powered on (connected to an AC outlet), it automatically
runs through a “display test,” showing all possible segments which might be
displayed. This test lasts approximately six seconds. The scale next says “HELLO”
and performs self-diagnostics to ensure proper operation. The scale then sets
itself to zero, and is ready for use. For best accuracy allow the scale to warm up
for at least 45 minutes.
2. Trying your scale
Experimenting with your scale and its keyboard prior to reading this guide in its
entirety will not harm your scale, and may actually give you a better understand-
ing of the instructions in this guide. If you instruct the scale to do something it is
not capable of doing, the scale will simply respond by displaying the message
“UnAbLE”. To continue experimenting, press the clear key.