EasyManua.ls Logo

Shark ROCKET IZ363HT - User Manual

Shark ROCKET IZ363HT
2 pages
Print Icon
To Next Page IconTo Next Page
Loading...
QUICK
START
GUIDE
Please make sure to read the enclosed Shark® Owner’s Guide prior to using your vacuum.
IZ363HT_QSG_MP_Mv3
EMPTYING THE DUST CUP
1. To empty the dust cup,
first disconnect the
handheld vacuum from
the wand by pressing
the Wand Release
button and pulling
up on the handheld
vacuum.
Wand Release
Button
CleanTouch
Dirt Ejector
IZ363HT
POWERFINS CORDLESS VACUUM
For questions, visit us online
at sharkclean.com/support
Register your vacuum at
registeryourshark.com
PRO
ROCKET
®
PET
VERSATILE CLEANING
Slide the power button
to the desired power
setting. Place your foot
on the floor nozzle
and tilt the handheld
vacuum back.
To detach the wand for
above-floor cleaning, stand
the vacuum upright, then
press the Nozzle Release
button on the bottom of the
wand and pull the wand up
to disconnect it.
To detach the handheld
vacuum, press the Wand
Release button and lift the
handheld vacuum o the
wand.
Attach a cleaning accessory,
then choose the power
setting.
NOTE: Brushroll will only engage
when the handle is tilted back.
OR
THEN
2. Position the dust
cup over a trash
bin and slide the
CleanTouch™ Dirt
Ejector forward.
© 2020 SharkNinja Operating LLC. ROCKET and SHARK are registered trademarks of SharkNinja
Operating LLC. CLEANTOUCH is a trademark of SharkNinja Operating LLC.
Question and Answer IconNeed help?

Do you have a question about the Shark ROCKET IZ363HT and is the answer not in the manual?

Summary

Versatile Cleaning Modes

Powering and Tilting for Use

Slide the power button to the desired setting and tilt the handheld vacuum back.

Detaching the Wand

Detach the wand for above-floor cleaning by pressing the Nozzle Release button.

Detaching the Handheld Vacuum

Detach the handheld vacuum from the wand by pressing the Wand Release button.

Attaching Cleaning Accessories

Attach desired cleaning accessories and select the power setting.

Emptying the Dust Cup

Disconnecting Handheld Unit

Disconnect the handheld vacuum from the wand using the Wand Release button.

Ejecting Dirt

Position the dust cup over a bin and slide the CleanTouch Dirt Ejector forward.

Vacuum Assembly

Connecting Wand to Nozzle

Connects the wand to the floor nozzle, indicated by a click.

Connecting Handheld to Wand

Attaches the handheld vacuum unit to the wand, confirmed by a click.

Power Settings and Boost Mode

Off and Standard Settings

Slide switch to 'Off' to power down, or to 'Bare Floor' or 'Carpet' for cleaning.

Boost Mode Activation

Pull the trigger on the handheld vacuum for an added boost in power.

Battery Charging and Status

Inserting and Removing Battery

Slide battery into the slot. Press and hold Release Button to remove.

Battery Indicator Lights

Lights indicate battery charge level: Full, Mid, Nearly Empty, No Charge.

Charging Time

A full charge takes approximately 3 hours.

Overview

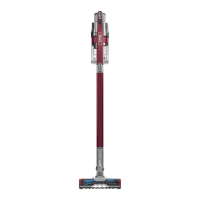
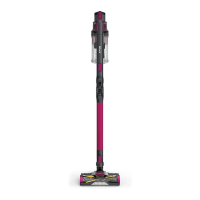
This document provides a quick start guide for the Shark® Rocket® Pet Pro PowerFins Cordless Vacuum, outlining its versatile cleaning capabilities, dust cup emptying procedure, assembly, power settings, and battery charging instructions.

Function Description

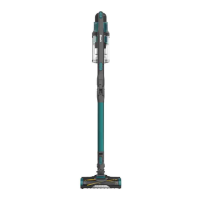
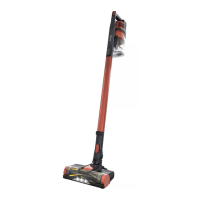
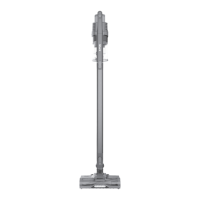
The Shark® Rocket® Pet Pro PowerFins Cordless Vacuum is designed for versatile cleaning across various surfaces, from bare floors to carpets. It features a cordless design for unrestricted movement and a powerful motor to effectively pick up dirt, debris, and pet hair. The vacuum can be used as an upright stick vacuum for floor cleaning or converted into a handheld vacuum for above-floor tasks and cleaning tight spaces. Its PowerFins™ floor nozzle is engineered to provide continuous cleaning contact with carpets and hard floors, preventing hair wrap and ensuring thorough pickup. The vacuum incorporates a multi-stage filtration system, including a HEPA post-motor filter, to capture allergens and fine dust, promoting cleaner air in your home.

Usage Features

Versatile Cleaning Modes:

The vacuum offers multiple configurations to suit different cleaning needs:

  • Upright Stick Vacuum: For general floor cleaning, the vacuum is used in its assembled upright form. To engage the brushroll, the handle must be tilted back while your foot is on the floor nozzle.
  • Above-Floor Cleaning with Wand: For reaching high areas or under furniture, the wand can be detached from the floor nozzle. To do this, stand the vacuum upright, press the Nozzle Release button at the bottom of the wand, and pull the wand up. Cleaning accessories can then be attached to the end of the wand.
  • Handheld Vacuum: For detailed cleaning of upholstery, stairs, or car interiors, the handheld vacuum can be detached from the wand. This is achieved by pressing the Wand Release button and lifting the handheld vacuum off the wand. Once detached, cleaning accessories can be directly attached to the handheld unit.

Power Settings:

The vacuum provides distinct power settings accessible via a slide switch on the handheld unit:

  • OFF: Turns off the vacuum.
  • Bare Floor/Area Rugs (Standard Mode): This setting is for cleaning bare floors and small area rugs. The brushroll spins slowly to effectively pick up debris without scattering it.
  • Carpet (Standard Mode): Designed for carpets, this setting makes the brushroll spin faster to pick up debris embedded below the surface of carpets.
  • Boost Mode: For an extra burst of power, especially for stubborn dirt or deep cleaning, pull the trigger on the handheld vacuum while in the Carpet setting. Releasing the trigger returns the vacuum to the standard Carpet power. It is recommended to use the Carpet setting and Boost mode for deep cleaning embedded dirt in carpets.

Battery System:

The vacuum is powered by a removable Li-Ion battery, which comes pre-installed.

  • Insertion: To insert the battery, slide it into the slot at the back of the handheld vacuum until it clicks into place.
  • Removal: To remove the battery, press and hold the Battery Release Button located on the handheld unit, then slide the battery out.
  • Battery Indicator Lights: The handheld vacuum features battery indicator lights that show the current charge level during use and charging.
    • In Use: Lights indicate Full, Mid, Low, Nearly Empty, or No Charge.
    • Charging: Lights indicate Full, Mid, Nearly Full, or Full Charge.
  • Charging Time: A full charge typically takes approximately 3 hours. The battery can be charged while it is in the vacuum or when removed.

Cleaning Accessories:

The vacuum includes several accessories to enhance its versatility:

  • Crevice Tool: For reaching into narrow spaces and corners.
  • Dusting Brush: For gently cleaning delicate surfaces.
  • Pet Multi-Tool: A versatile tool designed for picking up pet hair and debris from various surfaces.
  • Anti-Allergen Brush: Specifically designed to remove allergens from surfaces.
  • Wand w/Handheld Storage Clip: Allows for convenient storage of the handheld vacuum on the wand.

Maintenance Features

Dust Cup Emptying:

The vacuum features a CleanTouch™ Dirt Ejector for easy and hygienic dust cup emptying.

  1. Disconnect Handheld Vacuum: First, detach the handheld vacuum from the wand by pressing the Wand Release button and pulling up on the handheld unit.
  2. Position Over Trash Bin: Hold the handheld vacuum with the dust cup positioned over a trash bin.
  3. Eject Dirt: Slide the CleanTouch™ Dirt Ejector forward to release the collected dirt and debris into the bin.

Filter Maintenance:

The vacuum is equipped with a HEPA Post-Motor Filter, which is crucial for trapping fine dust and allergens. Regular cleaning of filters is essential to maintain optimal suction performance and air quality. Specific instructions for filter cleaning and replacement are detailed in the enclosed Owner's Guide.

Brushroll Maintenance:

The PowerFins™ floor nozzle is designed to minimize hair wrap, but occasional inspection and cleaning of the brushroll may be necessary. The Owner's Guide provides instructions on how to access and clean the brushroll area to ensure it remains free of obstructions and operates efficiently.

General Maintenance:

For comprehensive maintenance instructions, including details on cleaning various parts of the vacuum and troubleshooting common issues, users should refer to the enclosed Owner's Guide. Additional parts, accessories, and batteries can be purchased from sharkaccessories.com or sharkclean.com/batteries, respectively. Regular maintenance ensures the longevity and optimal performance of the Shark® Rocket® Pet Pro PowerFins Cordless Vacuum.

Shark ROCKET IZ363HT Specifications

General IconGeneral
TypeCordless Stick Vacuum
Battery TypeLithium-Ion
FiltrationHEPA
Voltage25.2V
FeaturesLED headlights

Related product manuals