sharkclean.comsharkclean.com
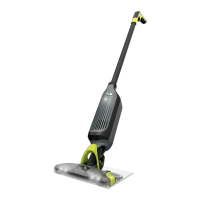
ASSEMBLY
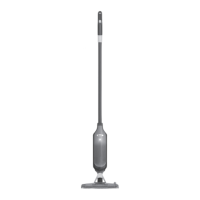
1. Align and insert the Handle into the top of the Pole. You will feel it click in place.
2. Align and insert the pole into the Main Body. You will feel it click in place.
For proper operation, ensure all components are completely connected and clicked into place.
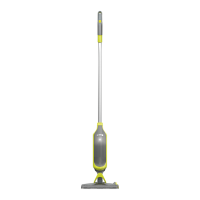
Your VACMOP™ unit comes partially assembled with a cord connecting the parts. All versions assemble the
same way. This appliance is for Household use only.
NOTE: The model and serial numbers can be found on the QR code label on the back on the main body.
1.
2.
(Click)
(Click)
Handle
Spray
Button
Vacuum
Trigger
Hanging
Loop
Reservoir
Lid
Charging
Connector
Pad
Release
Spray
Nozzle
LED
Indicator
Pole
Main
Body
CONTROLS
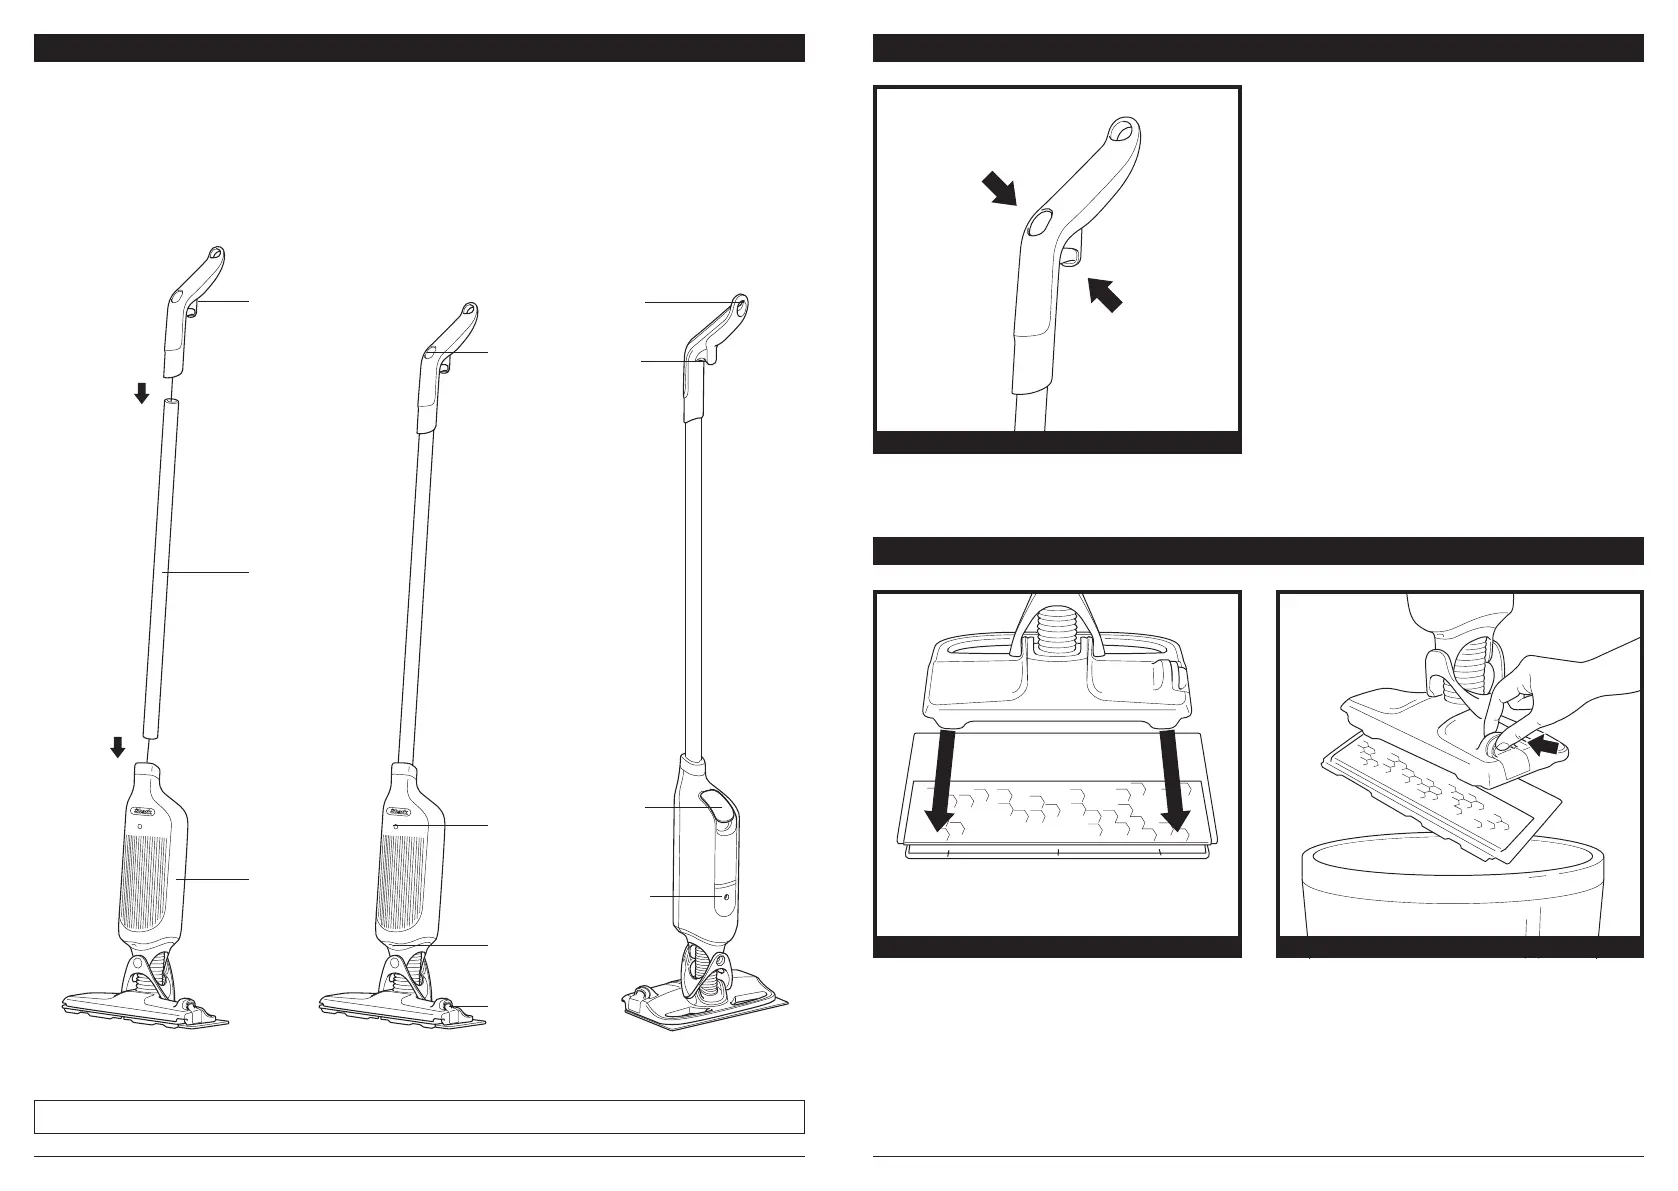
Spray Button
Press and hold the spray button on top of the handle to
dispense cleaning solution through the spray nozzle.
Vacuum Trigger
To vacuum, pull the trigger and hold it in.
VACUUM TRIGGER AND SPRAY BUTTON
Spray Button
Vacuum Trigger
ATTACHING AND REMOVING PADS
Place the VACMOP™ Disposable Pad on the floor
with the dust chamber up. Line up the front edge
of the VACMOP into the plastic bumper on the pad.
Holding the handle, press the VACMOP base down
until the pad clicks into place.
Dispose of dirty pads by releasing them directly
into the trash.
To detach the pad, press the release button on the
side of the VACMOP base.
INSTALL PAD PAD DISPOSAL