SX-68JF200
16
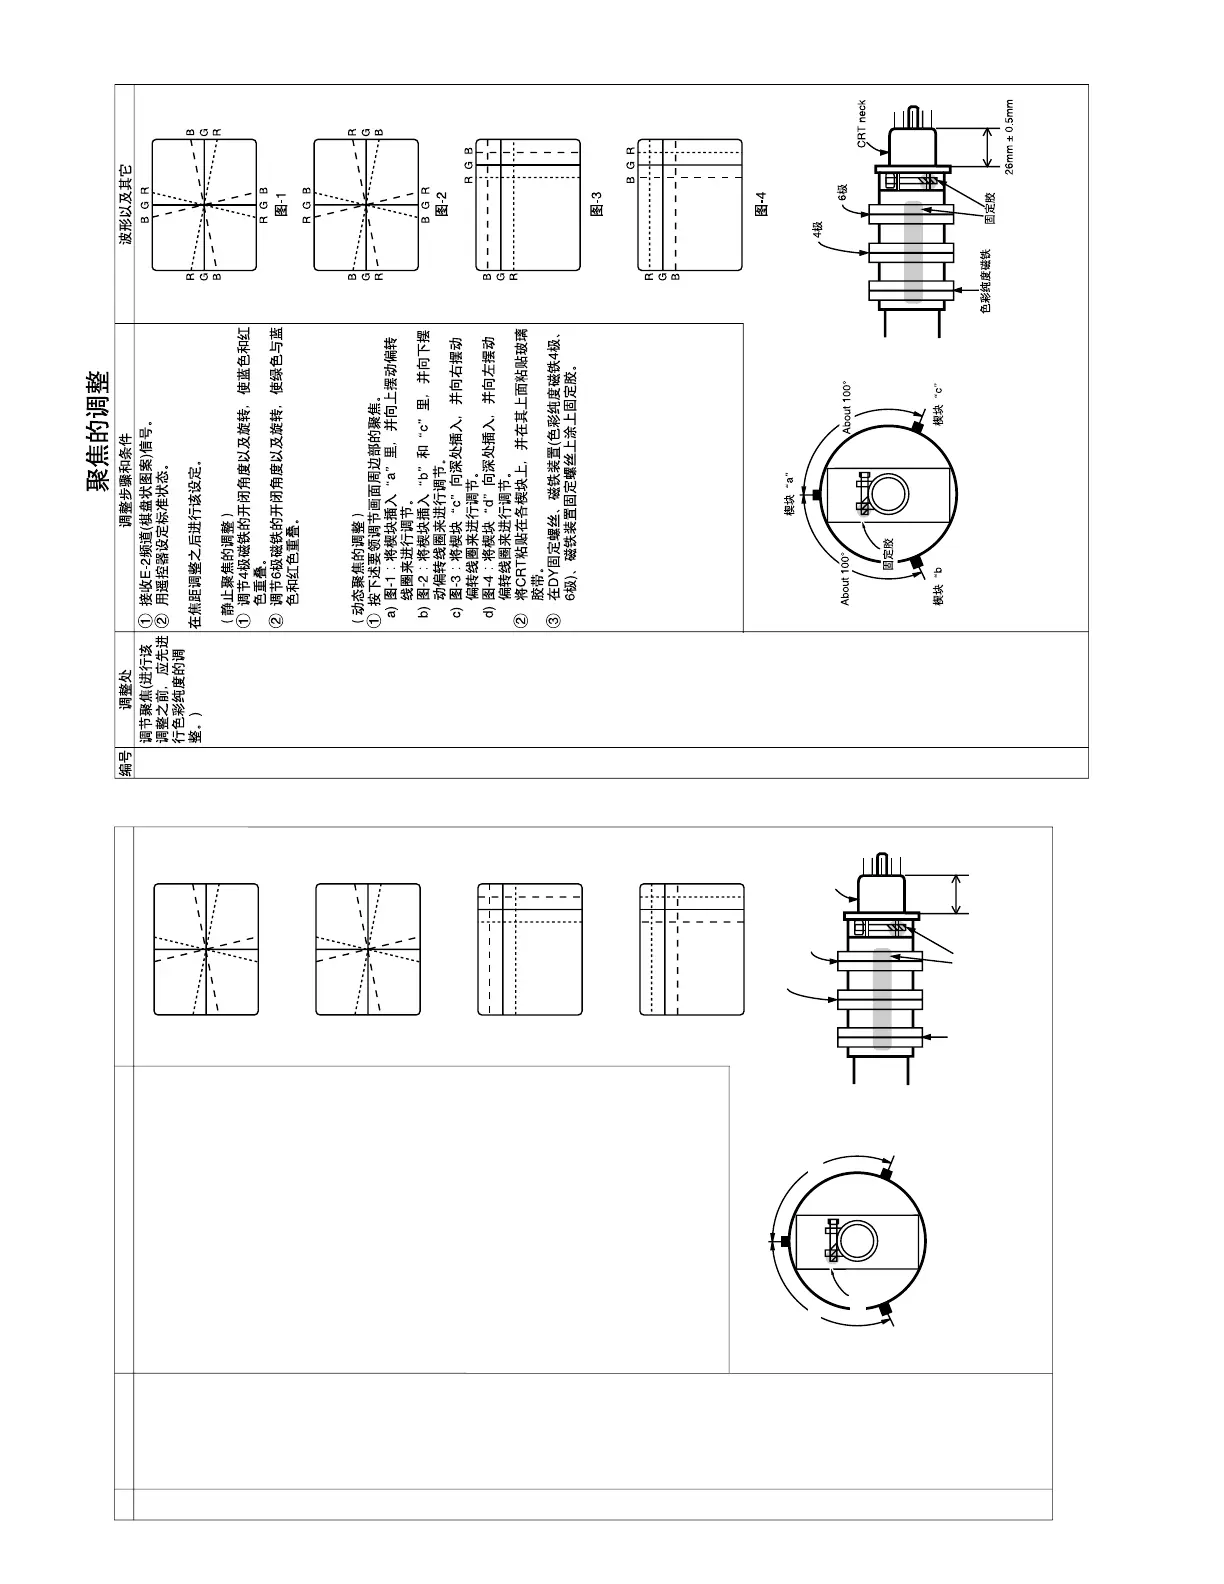
CONVERGENCE ADJUSTING METHOD
NO. Adjustment part Adjusting procedure and conditions Waveform and others
Convergence
adjustment
(Apply this after
purity adjust-
ment.)
1 Receive E-2CH (Crosshatch pattern).
2 With the remote controller, make it normal.
Apply this after focus adjustment.
(Static convergence adjustment)
1 Overlap blue and red with the open-/closing
angle and rotation of the 4-pole magnet.
2 Overlap green on blue and red with the open-/
closing angle and rotation of the 6-pole mag-
net.
(Dynamic convergence adjustment)
1 Adjust the convergence of the peripheral area
of the screen in the following procedure.
a) Put the wedge in Fig.-1: “a” to swing the
deflecting coil upward for alignment.
b) Put the wedge in Fig.-2: “b” and “c” to swing
the deflecting coil downward for alignment.
c) Deeply put the wedge in Fig.-3: “c” to swing
the deflecting coil rightward for alignment.
d) Deeply put the wedge in Fig.-4: “d” to swing
the deflecting coil rightward for alignment.
2 Bond each wedge on CRT, and bond the glass
tape on it.
3 Coat the lacquer paint on the DY fastening
screws, the magnetic unit (purity 4-pole and 6-
pole) and the magnetic unit fastening screws.