AR-M355N/M455N MAINTENANCE AND DETAILS OF EACH SECTION 7 - 71
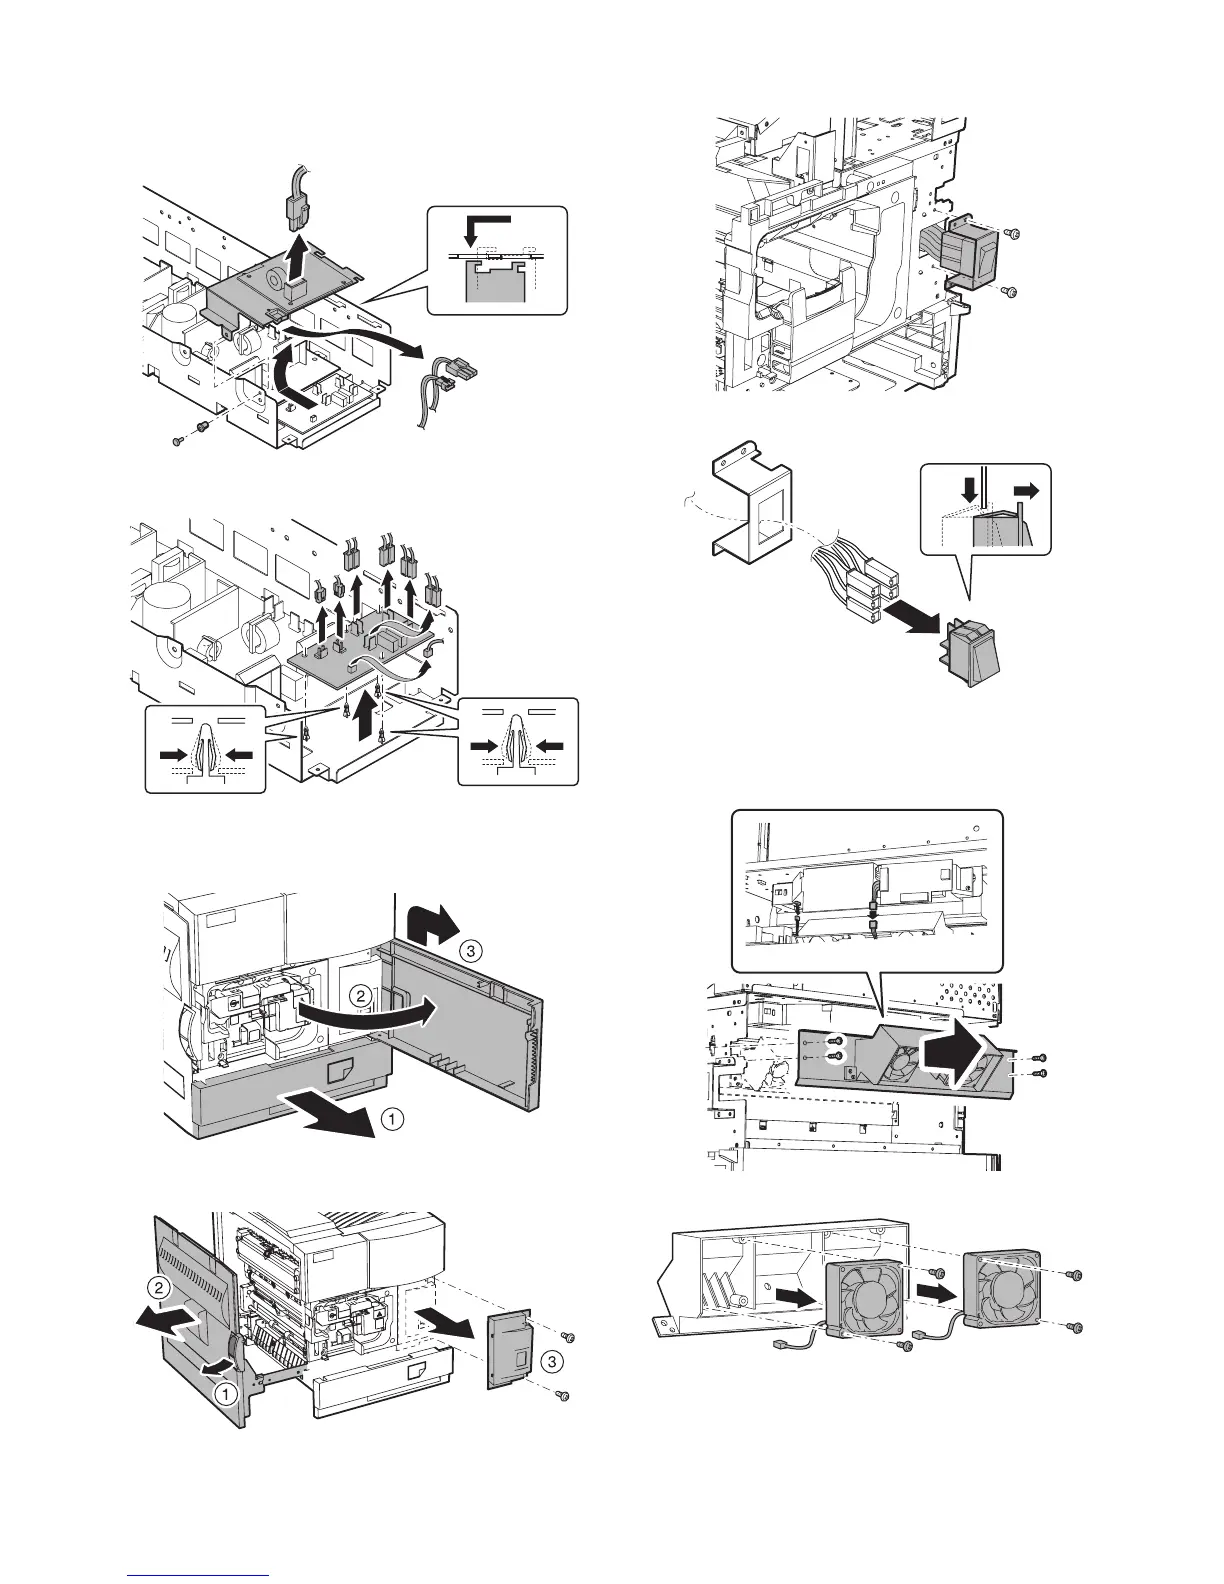
a-3. Relay PWB
1) Remove the power unit.
2) Remove the connector and the bushing, and remove the filter
PWB mounting plate.
3) Remove the connector and the PWB supporter, and remove
the relay PWB.
b-1. Main switch
1) Pull out the No. 1 paper feed tray unit, and push up and
remove the front door.
2) Release the lock, and pull out the left door. Remove the
screw, and remove the front cover right.
3) Remove the screw, and remove the main switch mounting
plate.
4) Remove the connector, and remove the main switch.
b-2. Cooling fan motor
1) Remove the power unit.
2) Remove the connector and the screw, and remove the duct
holding cover.
3) Remove the screw, and remove the cooling fan motor.
∗ When installing the fan, check the indication arrow and note the
fan direction.