CD-C811W/821W
– 9 –
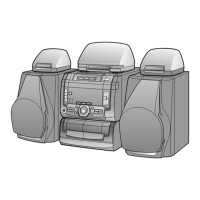
How to remove the turntable up/loading/down
motor (See Fig. 9-3)
1. Remove the screws (A1) x 2 pcs., to remove the turntable
up/down/loading motor.
How to remove the pickup (See Fig. 9-4)
1. Remove the screws (B1) x 2 pcs., to remove the shaft (B2)
x 1 pc.
2. Remove the stop washer (B3) x 1 pc., to remove the gear
(B4) x 1 pc.
3. Remove the pickup.
Figure 9-4
REMOVING AND REINSTALLING THE MAIN PARTS
CD MECHANISM SECTION
Perform steps 1, 2, 3, and 11 ~15 of the disassembly method
to remove the CD mechanism.
Figure 9-3
Note:
After disconnecting the optical pickup connector, wrap the
front end of connector in conductive aluminum foil to prevent
damage to the optical pickup by static electricity.
Figure 9-1
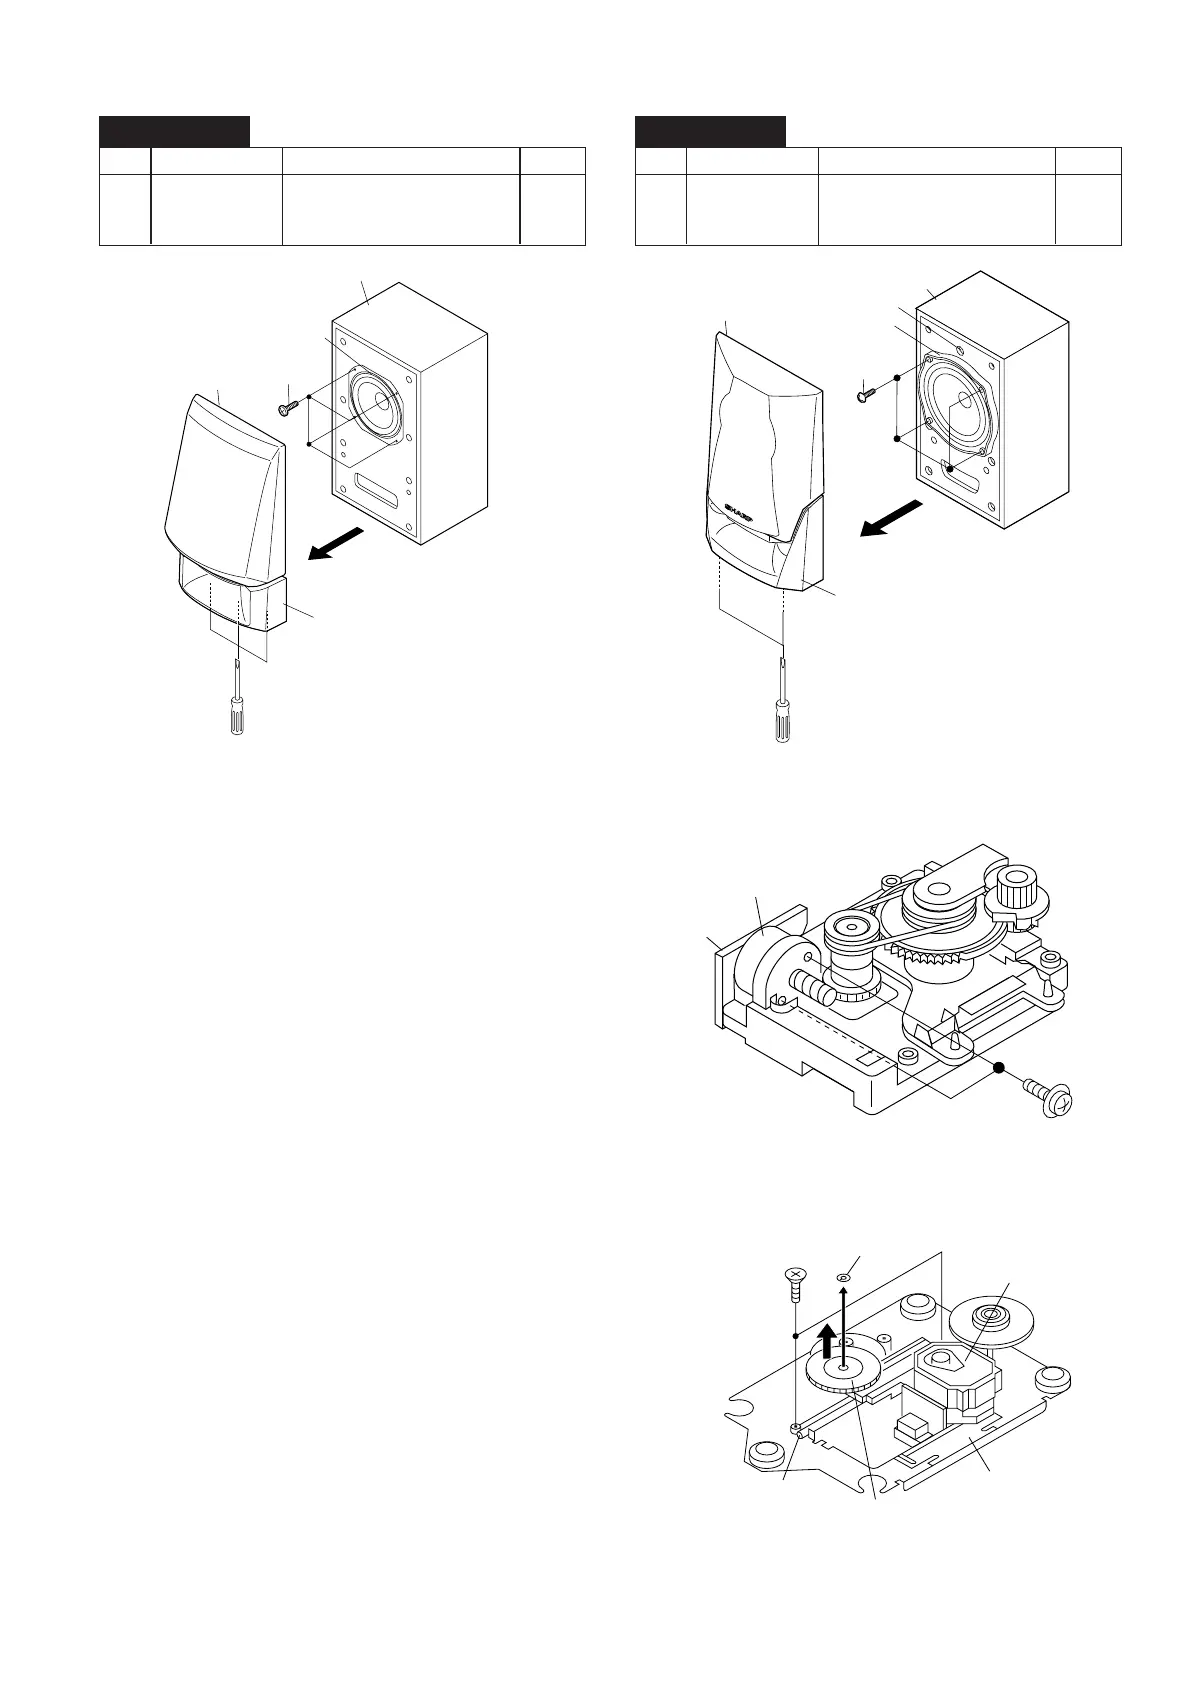
CP-C811W
STEP REMOVAL
PROCEDURE
FIGURE
1 Speaker 1. Net Frame............... (A1) x1 9-1
2. Duct Panel .............. (A2) x1
3. Screw ...................... (A3) x4
Speaker Box
(A1)x1
Net Frame
(A3)x4
ø3x8mm
(A2)x1
Duct Panle
Woofer
(A1) x2
ø2.6x5mm
Turntable/Up/
Loading/Down Motor
Motor
PWB
(B1) x2
ø2.6x6mm
Shaft
(B2) x1
Stop Washer
(B3)x1
Gear
(B4) x1
CD Mechanism
Pickup
Figure 9-2
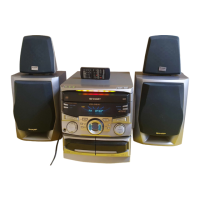
CP-C821W
STEP REMOVAL
PROCEDURE
FIGURE
1 Speaker 1. Net Frame............... (B1) x1 9-2
2. Duct Panel .............. (B2) x1
3. Screw ...................... (B3) x4
(B1)x1
Net Frame
(B2)x1
Duct Panle
(B3)x4
ø3x8mm
Woofer
Super Tweeter
Speaker Box