E-6
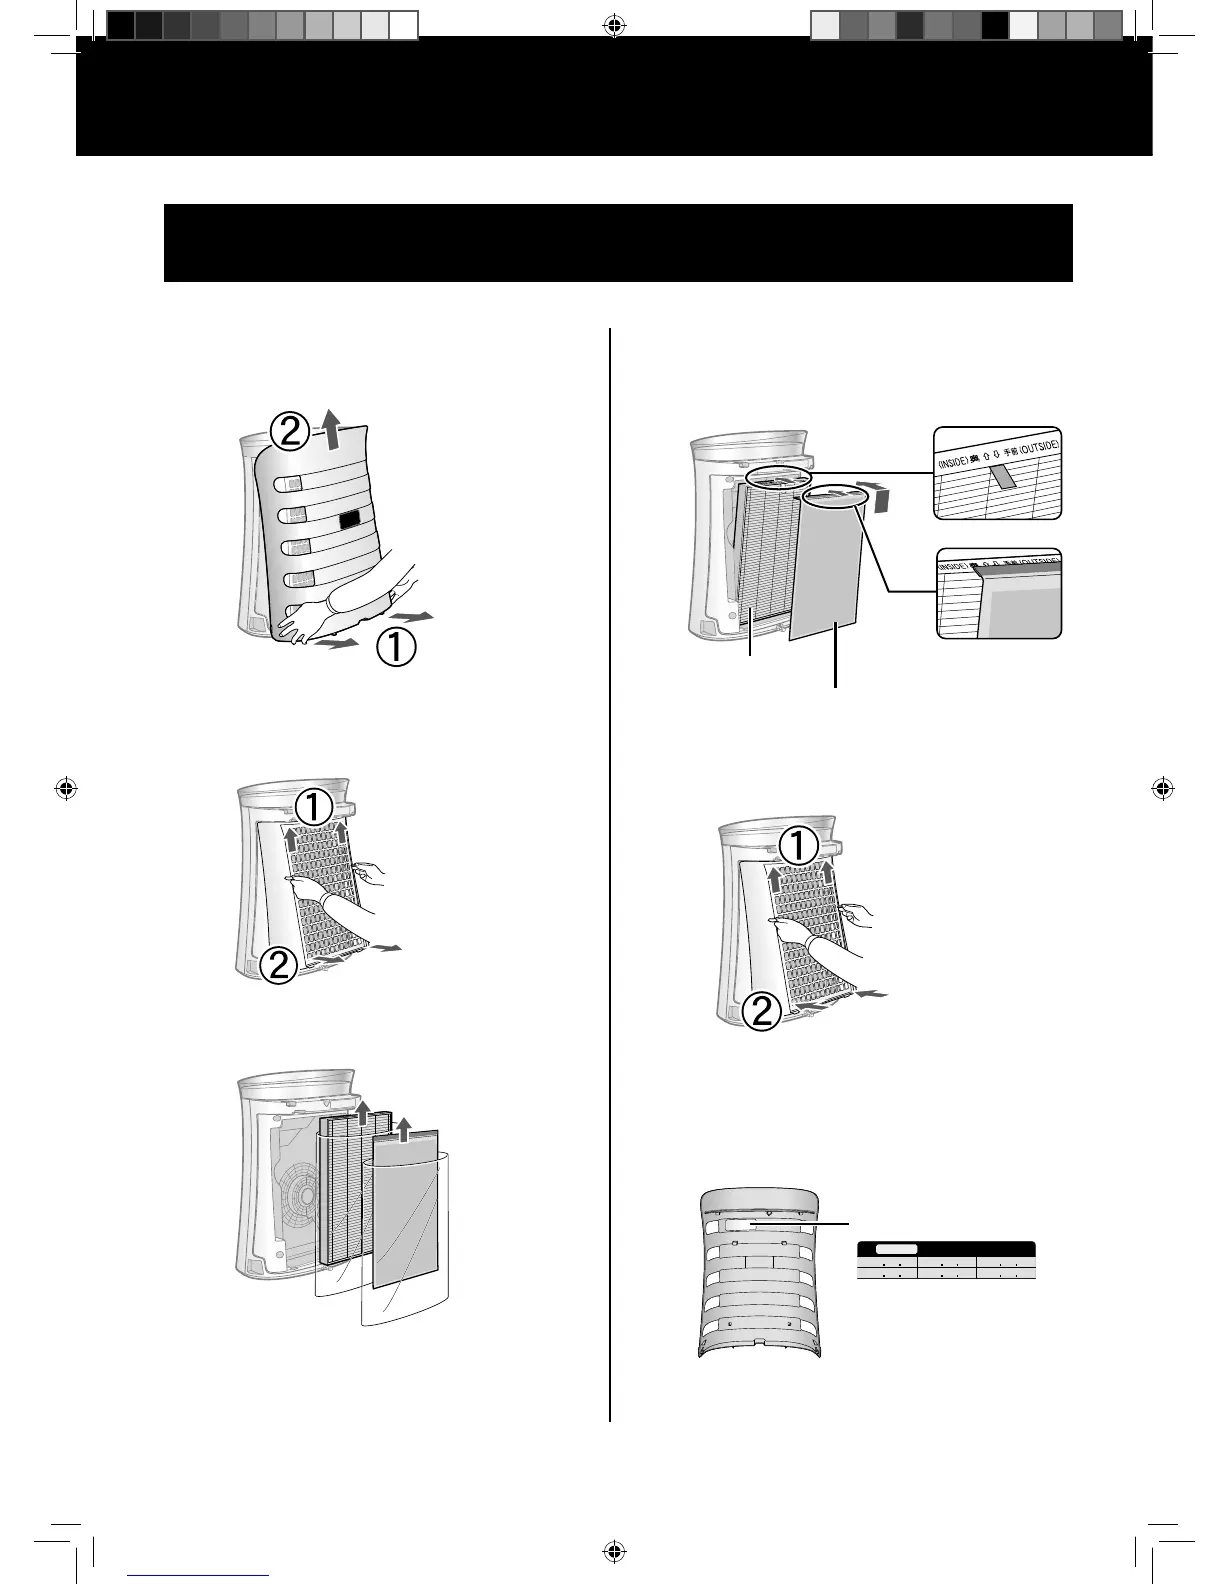
FILTER AND GLUE SHEET INSTALLATION
To maintain the quality of the fi lter and Glue Sheet, it is installed in the main unit and packed in plas-
tic bag. Be sure to remove the fi lter and Glue Sheet from the plastic bag before using the unit.
1
Remove the Catch Panel from
underpart.
2
Hold the tabs of Pre-fi lter, lift it
and remove it from its under-
part.
3
Remove the Filter from plastic
bag.
4
Hold upper part of Deodorizing
Filter, cover the upper part of
HEPA Filter and set it.
5
Hold tab of Pre-Filter, and replace
it from upper part.
6
Fill in the usage start date on the
Date Label.
Use the date as a guide for the
fi lter replacement schedule.
HEPA Filter
Deodorizing Filter