– 10 –
MD-MT866H/MD-MT866W
1
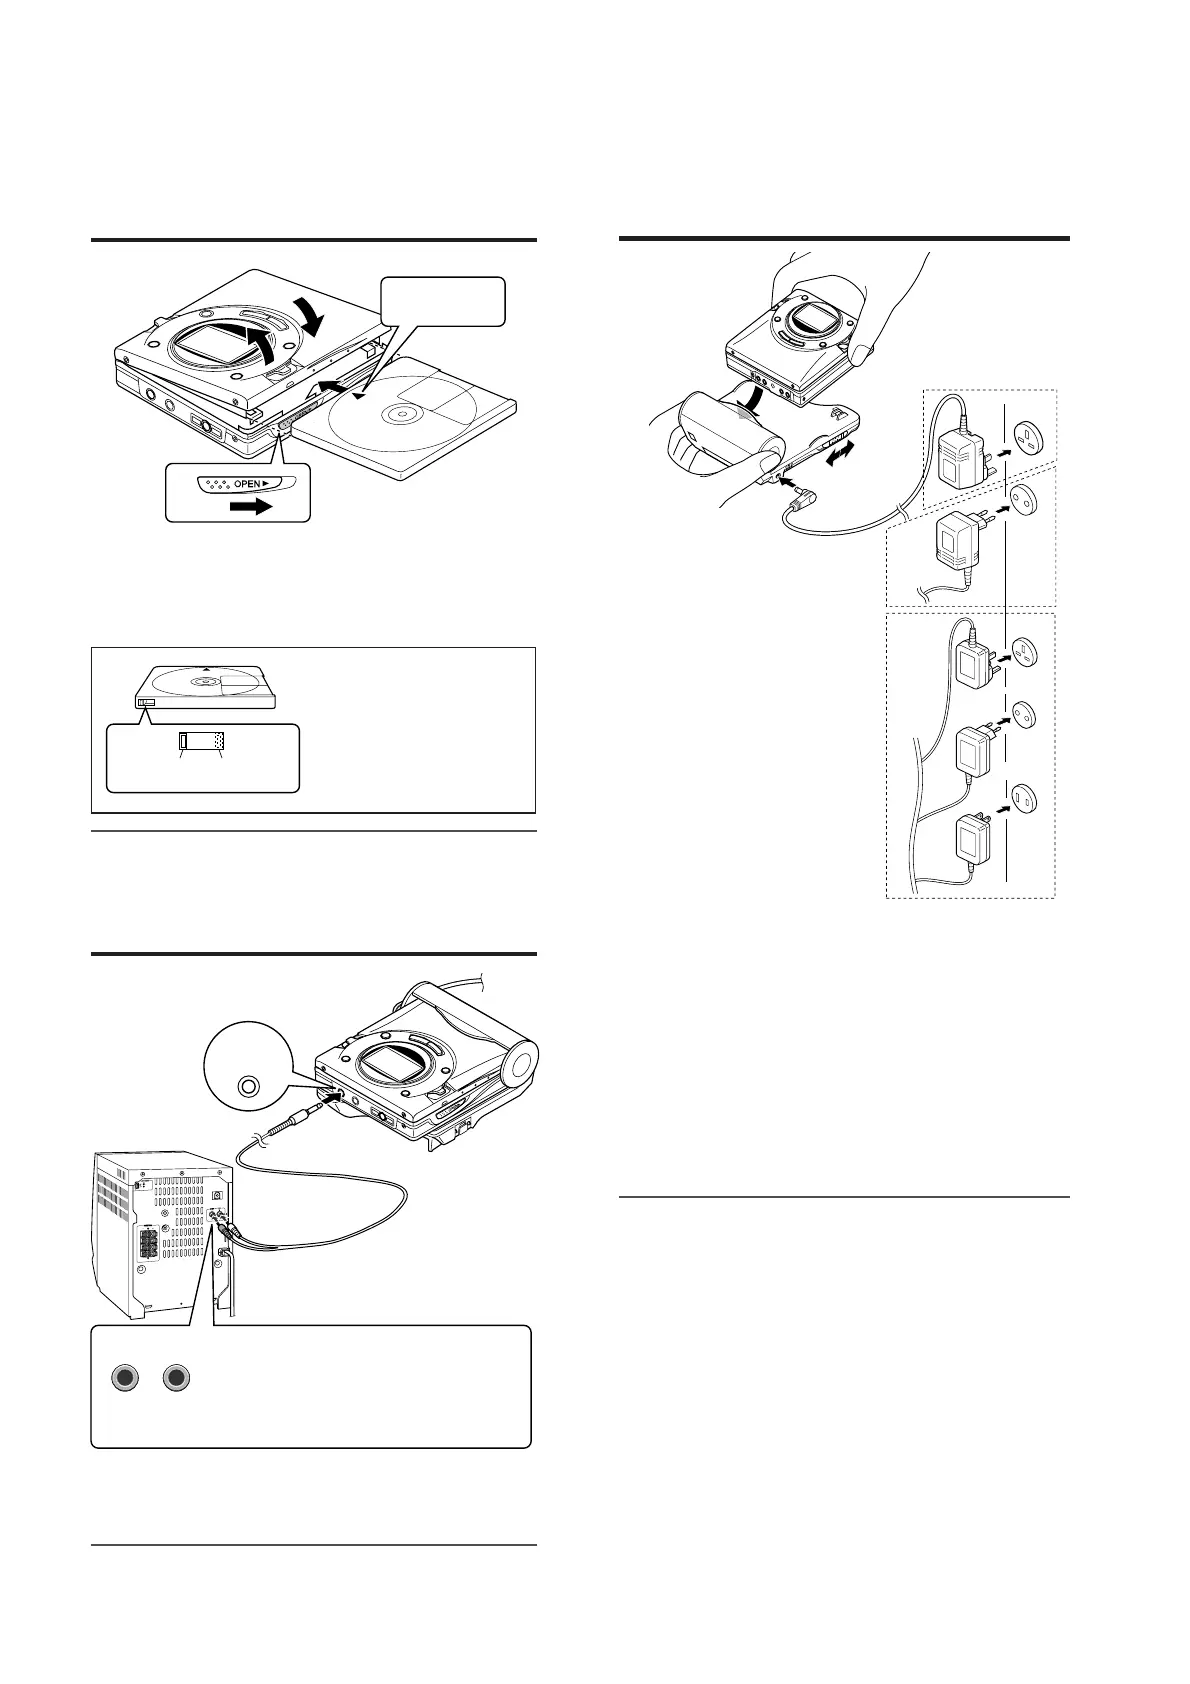
Insert a MiniDisc
1
Slide the OPEN lever to re-
lease the compartment door.
2
Lift it up the compartment.
3
Insert a MiniDisc as shown.
4
Close the compartment door.
33
1
222
4
Insert according to
the direction arrow.
When you record on a MiniDisc,
check that the erase prevention tab
is set to the “recordable” position.
Recordable
Recording
prevented
OPTICAL/
LINE IN
AUDIO OUT
LEFTRIGHT
3
Connection
To a stereo system with “AUDIO OUT” or “LINE
OUT” sockets. (See left. Analogue connection)
Note:
● If the audio system has only one pair of socket then
they are usually input only and recording via this con-
nection is not possible.
NOTE:
Refer to (operation manual) for connecting the unit to a stereo system
with “DIGITAL OUT” or “OPTICAL OUT” sockets.
White: To Left
Red: To Right
2
Connect the AC adaptor
MD-MT866H(S) for U.K.
AC 230-240V 50/60 Hz
Insert securely,
all the way in.
To wall socket.
2
Insert the portable MD into
the battery charger.
Before using the unit with a rechargeable battery, the battery has to be charged.
Refer to “Using with the rechargeable battery”.
3
Move the Charge/Operation
switch to OPERATION mode
(LOCK).
4
Plug the AC adaptor.
1
Move the Charge/Operation
switch to CHARGE mode (RE-
LEASE).
Caution:
● Before setting the main unit to the battery charger, make sure the battery charger
is in CHARGE mode (RELEASE). If you insert the main unit by force whilst in
OPERATION mode (LOCK), the hook for fixing the main unit may break.
● If the Charge/Operation switch is not set to OPERATION mode, no operation is
possible. Refer to “How to use the Charge/Operation switch”.
RELEASE
To the DC IN
5V socket.
LOCK
MD-MT866H(S) Except
for U.K. AC 220-230V
50/60Hz
MD-MT866W(S)
AC 110-240V
50/60Hz