MX-C250 SIMULATION 6 – 31
44
44-1
Purpose
Setting
Function (Purpose)
Used to set each correction operation func-
tion in the image forming (process) section.
Section
Image process (Photoconductor/Develop-
ing/Transfer/Cleaning)
Operation/Procedure
1) Select an item to be set with Arrow keys.
2) Enter the set value with 10 keys.
3) Press [OK]/[START] key.
The set value in step 2) is saved.
NOTE:
Set the items to the default values unless a change is spe-
cially required.
44-2
Purpose
Adjustment/Setup
Function (Purpose)
To execute the light quantity adjustment for
process control sensor and registrations
sensors (2pcs are done at same time), and
reading the surface of belt.
Section
Process
Operation/Procedure
When [OK]/[START] key is pressed, the adjustment is executed
automatically.
After completion of the adjustment, the adjustment result is dis-
played.
If the adjustment is not executed normally, "ERROR" is displayed.
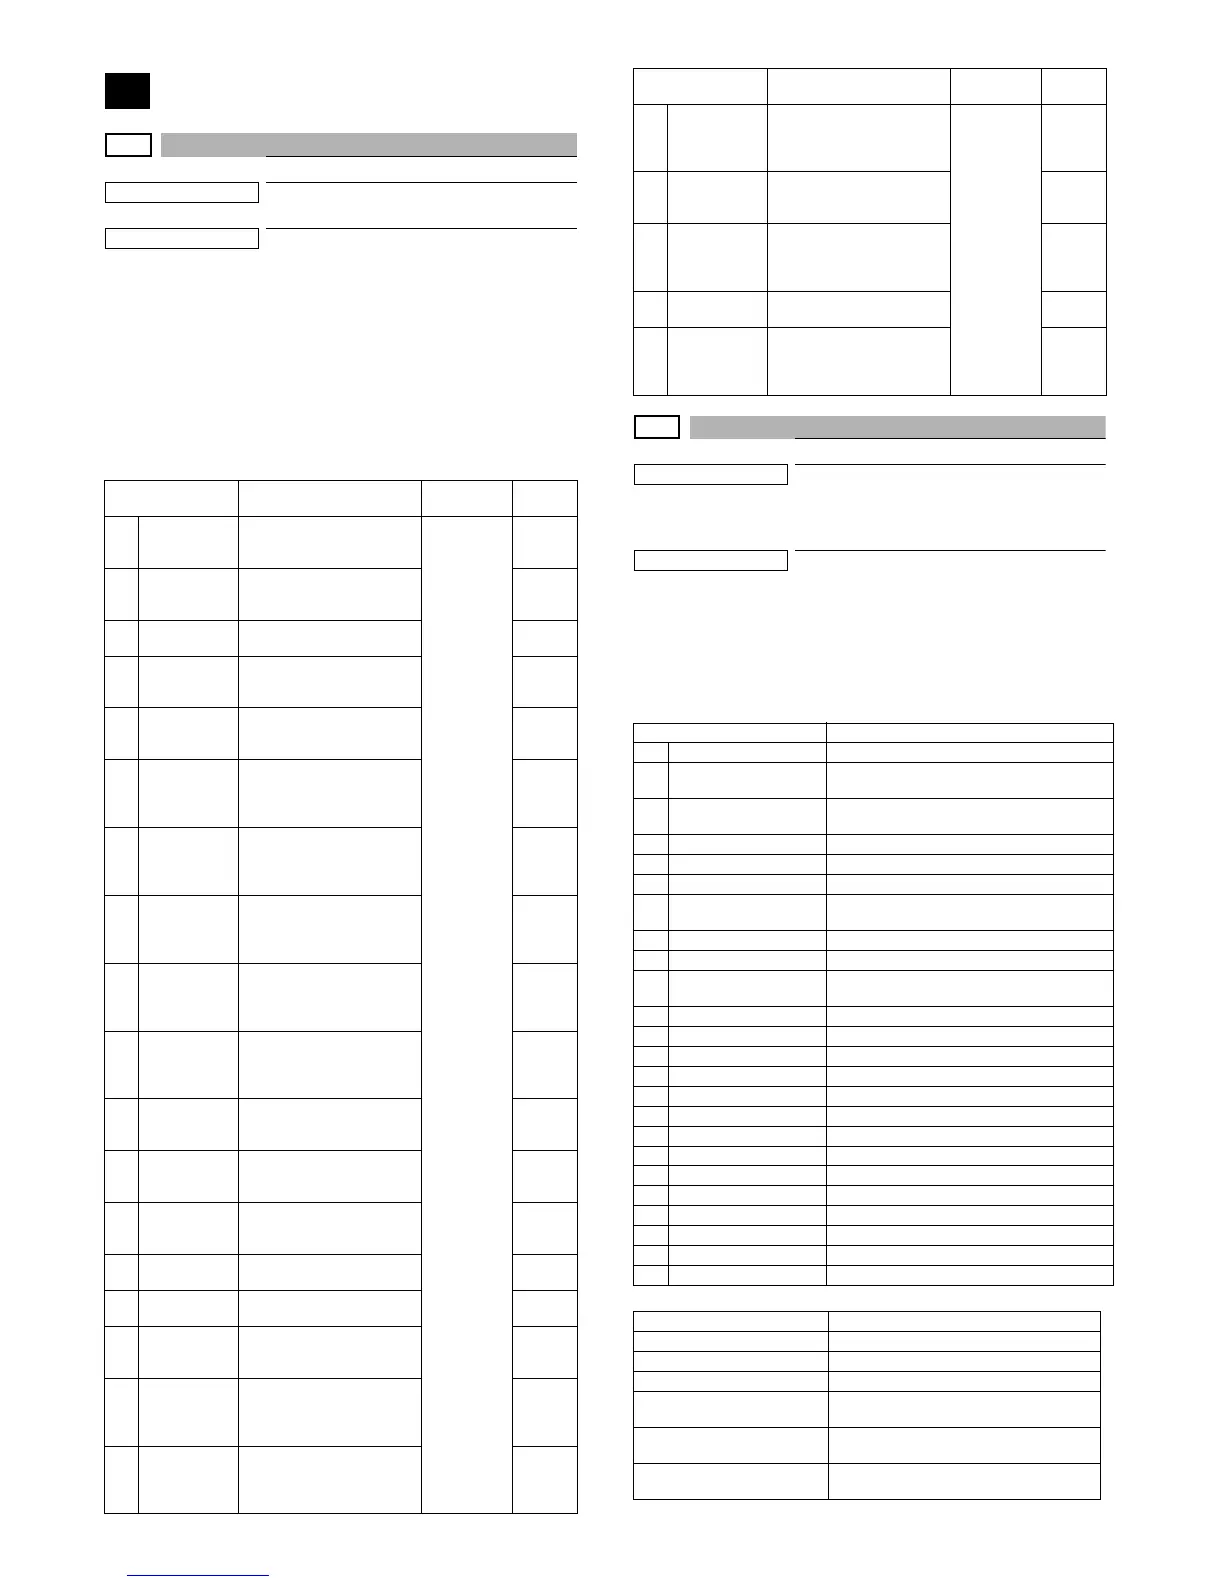
Item/Display Content
Setting
range
Default
value
1HV
Normal operation high
density process control
Enable/Disable setting
Normal
(Disable : 1
: NO)
Reverse
(Enable : 0 :
YES)
0
2HT
Normal operation half tone
process control Enable/
Disable setting
0
3TC
Transfer output correction
Enable/Disable setting
0
4MD VG
Membrane decrease grid
voltage correction Enable/
Disable setting
0
5MD LD
Membrane laser power
voltage correction Enable/
Disable setting
0
6MD EV
Membrane decrease envi-
ronment grid voltage cor-
rection Enable/Disable
setting
0
7 MD DL
Membrane decrease dis-
charge light quantity cor-
rection
Enable/Disable setting
0
8 MD DL EV
Membrane decrease envi-
ronment discharge light
quantity correction
Enable/Disable setting
0
9MD LD EV
Membrane decrease envi-
ronment discharge light
quantity correction Enable
/ Disable setting
1
10 LD PROCON
Membrane laser power
voltage correction by pro-
cess control Enable / Dis-
able setting
0
11 TN PIX SUP
Toner supply control by
yield count Enable / Dis-
able setting
0
12 TN FB
FEEDBACK toner density
correction enable / disen-
able setting
0
13 TN INT
Interval toner supply con-
trol enable / disenable set-
ting
0
14 TN RECV
Developer recovery enable
/ disenable setting
0
15 TN ADJ
Sensor output adjustment
enable / disenable setting
0
16 TN EMP
Control the detection of
toner drop amount enable/
disenable setting
0
17 TN EMP INT
Control the detection of
toner drop amount when
job intermission enable /
disenable setting
0
18
TN EMP
NEW
Control the detection of
toner drop amount when
installed new cartridge
enable / disenable setting
0
19 TN PIX TBL
Execution the calculation
of yield count correction
table enable / disenable
setting
Normal
(Disable : 1
: NO)
Reverse
(Enable : 0 :
YES)
0
20 AR AUTO
Auto registration adjust-
ment Enable / Disable set-
ting
0
21 AR ERROR
Auto registration adjust-
ment execution error
check Enable / Disable
setting
0
22 DM PHASE
Drum phase fitting Enable/
Disable setting
0
23 PRT_HT
Half tone process control
printer correction feed-
back Enable/Disable set-
ting
0
Item/Display Content
1 P_F_CL_ka F side color sensor correction factor
2 P_F LED ADJ F sensor light emitting quantity adjustment
value
3 P_R LED ADJ R sensor light emitting quantity adjustment
value
4 P_F_CL_DARK Dark voltage of color (F side)
5 P_F DARK Dark voltage of sensor (F side)
6 P_R DARK Dark voltage of sensor (R side)
7 P_F GRND Belt substrate when the item D adjust-ment
is completed.
8 P_F BELT MAX Belt substrate input max. value
9 P_F BELT MIN Belt substrate input min. value
10 P_R GRND Belt substrate when the item F adjust-ment
is completed.
11 P_R BELT MAX Belt substrate input max. value
12 P_R BELT MIN Belt substrate input min. value
13 REG_F BELT MAX Belt substrate input max. value (F side)
14 REG_F BELT MIN Belt substrate input min. value (F side)
15 REG_R BELT MAX Belt substrate input max. value (R side)
16 REG_R BELT MIN Belt substrate input min. value (R side)
17 REG_F PATCH(K) Patch light receiving potential F(K)
18 REG_F PATCH(C) Patch light receiving potential F(C)
19 REG_F PATCH(M) Patch light receiving potential F(M)
20 REG_F PATCH(Y) Patch light receiving potential F(Y)
21 REG_R PATCH(K) Patch light receiving potential R(K)
22 REG_R PATCH(C) Patch light receiving potential R(C)
23 REG_R PATCH(M) Patch light receiving potential R(M)
24 REG_R PATCH(Y) Patch light receiving potential R(Y)
Error name Error content
CL_SEN_ADJ_ERR Color sensor adjustment abnormality
BK_SEN_ADJ_ERR Black sensor adjustment abnormality
P_F_CL_ka F Color sensor adjustment abnormality
P_F_GRND F sensor basis material reading abnor-
mality
P_R_GRND F sensor basis material reading abnor-
mality
REG_F_LED_ADJ Registration sensor F adjustment abnor-
mality
Item/Display Content
Setting
range
Default
value