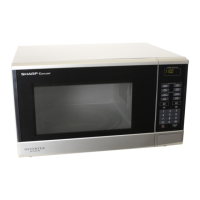
SSC3088AS
13
●
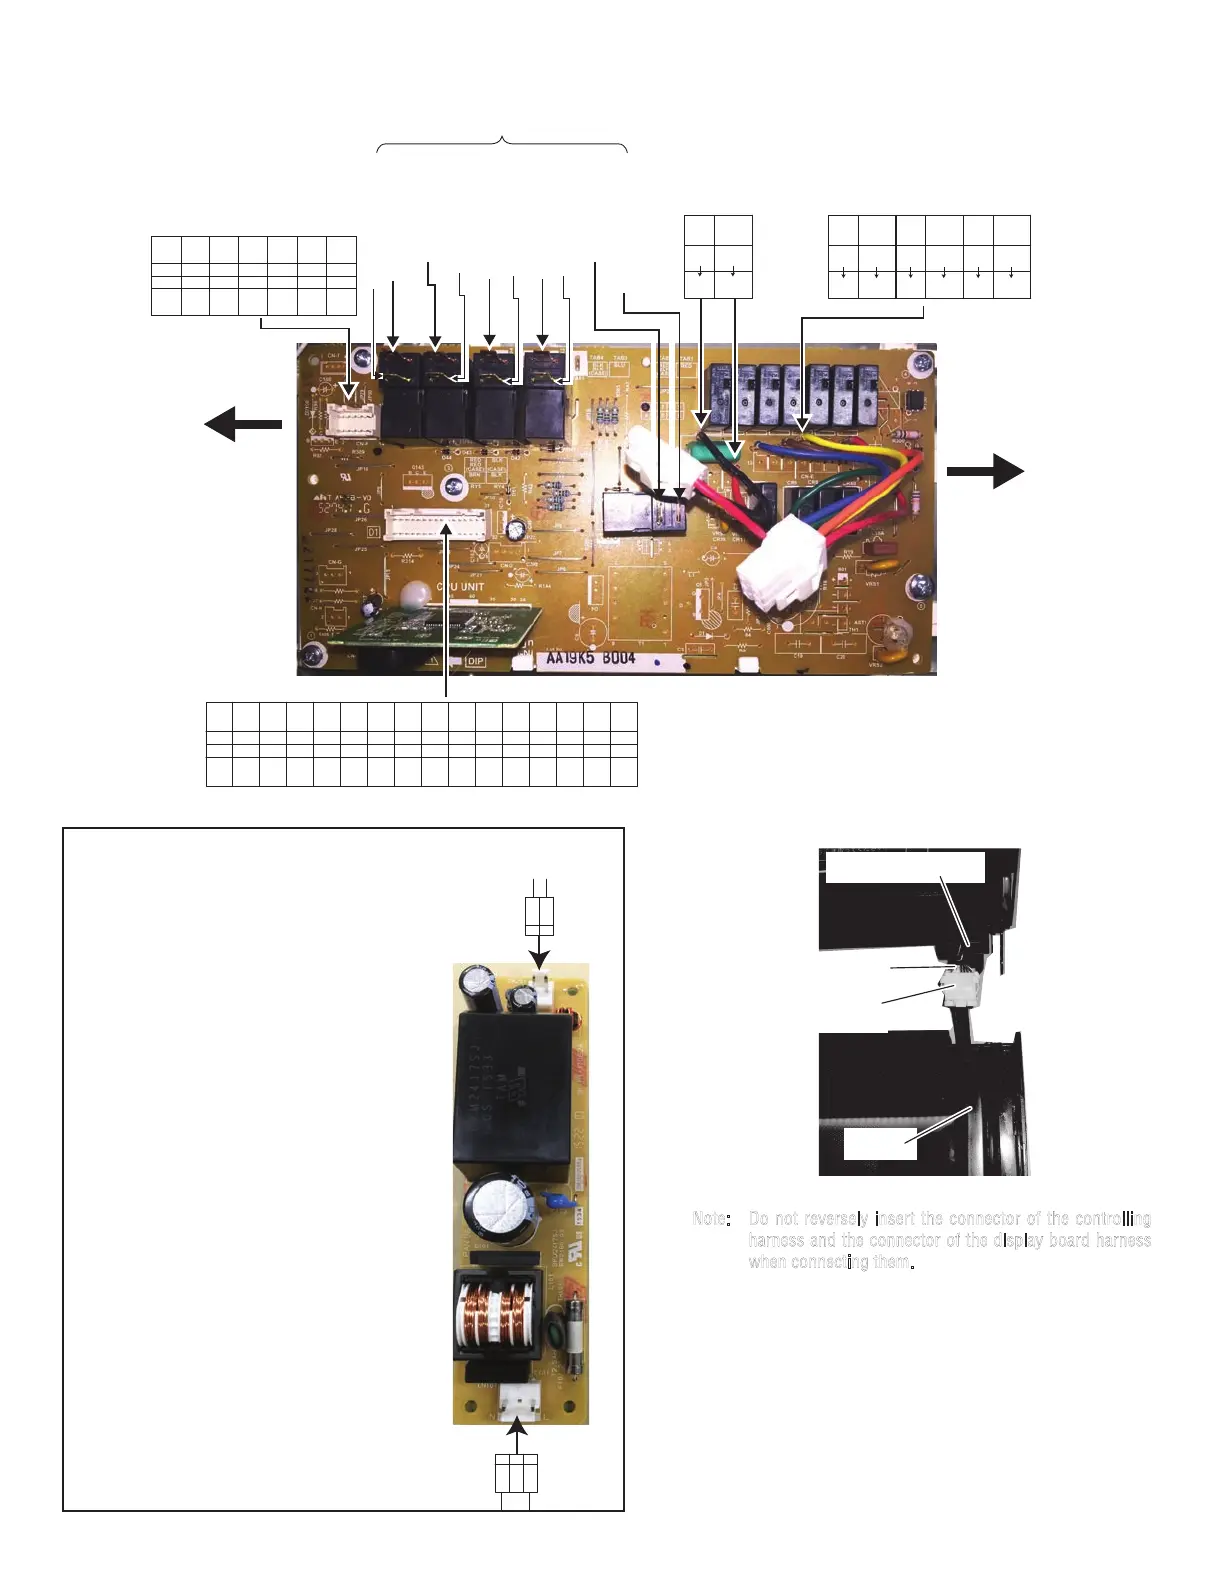
(Main harness)
CN-B (controlling harness)
(Main harness)
(Controlling harness)
Door
side
Rear
plate
side
CN-P
(Controlling harness)
Red BLU
Black
1
2
White
4
White
6
White
8
White
10
Black
3
Black
5
Black
7
Black
9
White/blue (white case)
white/white
Red
White
11
12
White
13
14
1
5
White
7
Black
9
Red
11
Orange
13
Gray
15
Black
17
Red
19
Black
21
Orange
23 25
3
2
6
8
Yellow
10
Brown
12
14
Blue
16
White
18
20
22
24
26
Red
Black
27 29
Red
31
28
White
30
324
Black/red (white case)
Red/red (red case)
Black/black (blue case)
Black (black case)
Black
Brown
J H
BLK RED
BLU GRN
G F
GRY BLK
BRN YLW
E D
WHT YLW
ORG RED
C B
GRY BLU
Blue
RY5
MOLEX
MOLEX
Black
RY4
RY3
RY2
RY1
Connection of door assembly
Wiring protection cover
Controlling harness
Door
assembly
Display board
harness connector
Note: Do not reversely insert the connector of the controlling
harness and the connector of the display board harness
when connecting them.
BLK
BLU
1
2
3
CN-101
BLK
WHT
1
2
CN-201
POWER UNIT
CONTROL UNIT
Power unit check:
While oven is power and idle:
1) CN101: Do you have AC-120V across
pins #1 and #3?
• No – check AC side of harness feeding into
Sw. Unit
2) Yes then check CN201: Do you have
DC-24VDC across pin#1 and pin #2?
• No – replace large Sw. Unit
3) Yes then check Control Unit CN-B:
Do you have DC-24VDC across pins
#28 & #32?
• No – check DC side of harness feeding
from Large Sw. Unit into Control Unit
• Yes – check/replace control unit.