VL-PD3S/H/E
VL-PD3S/H/E
7-1
7. TAPE RUNNING ADJUSTMENT
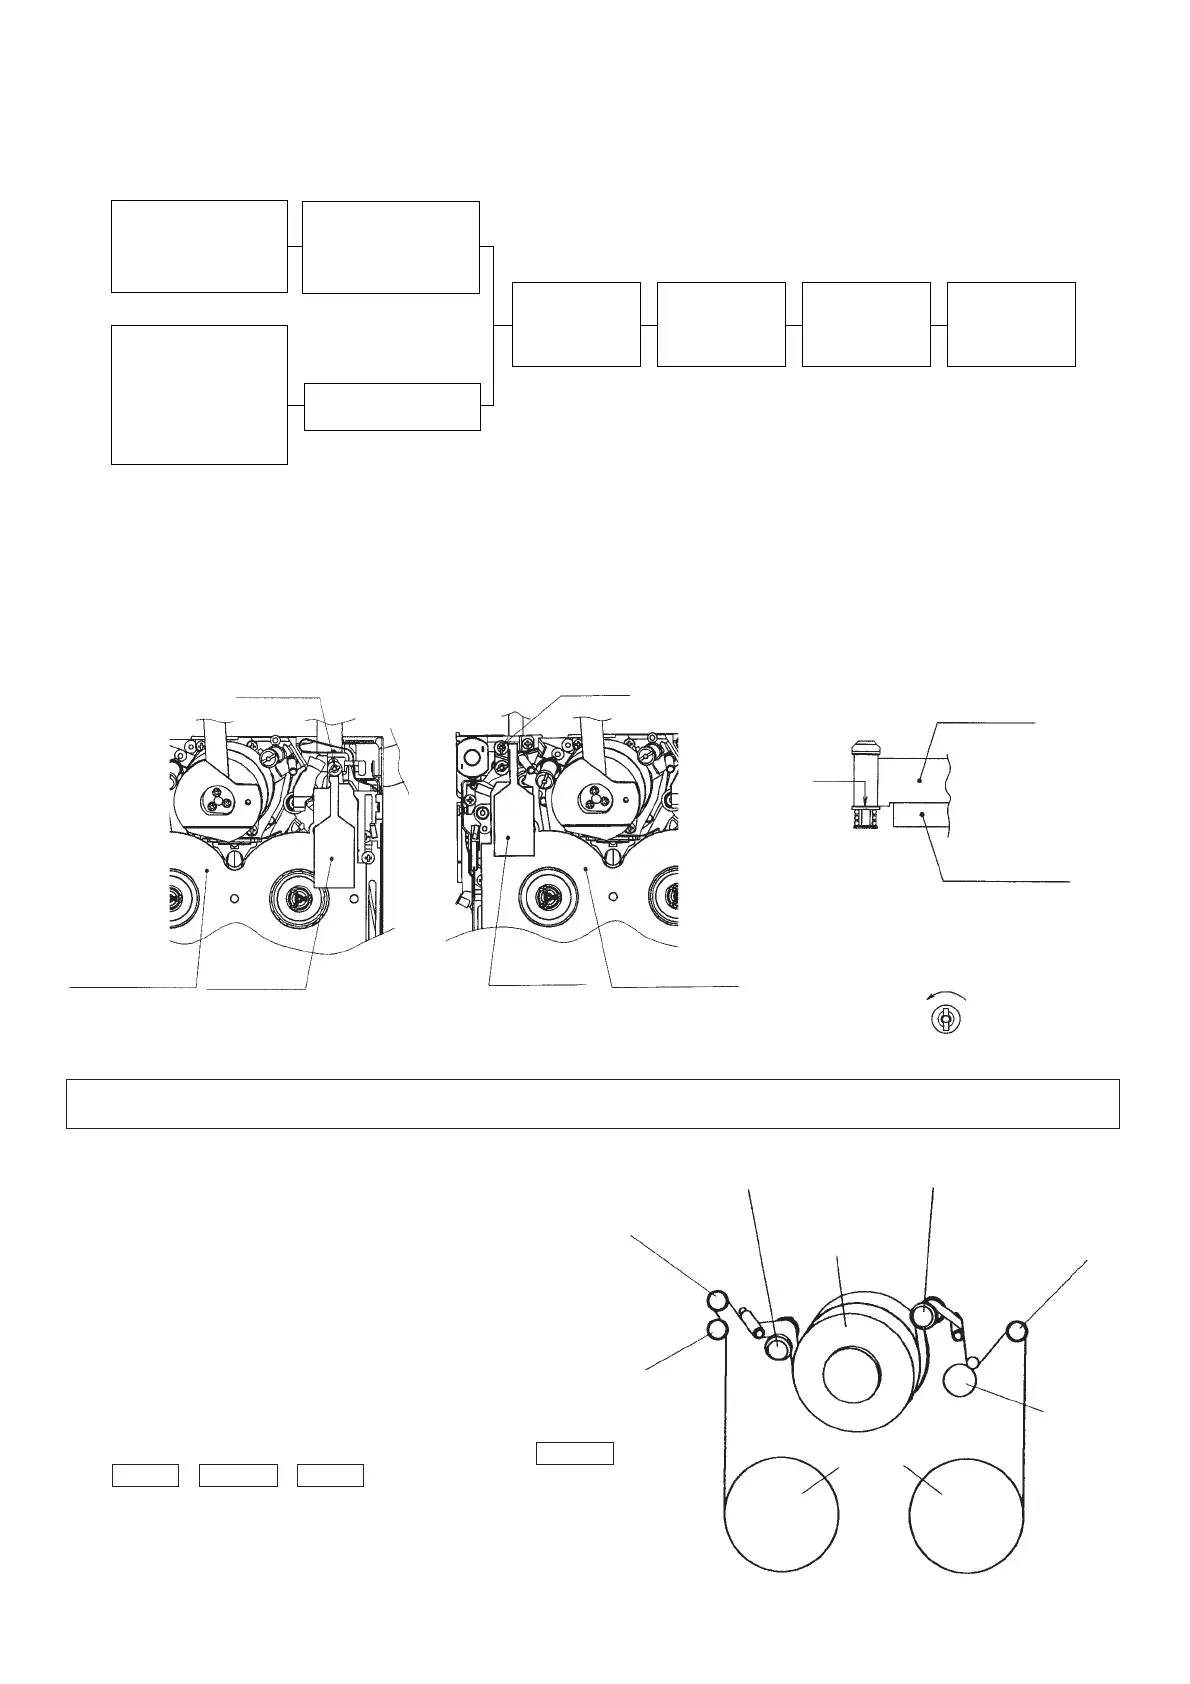
7-1. Adjustment locations
7-3. Preparation for tape running adjustment
Meters, jig… Oscilloscope, Adjustment remote control, Height adjustment screw driver, Alignment tape (for tape running
adjustment, for switch point adjustment), Master plane, Height adjustment jig.
<Method and description>
(1)Remove the cassette controller assembly.
(2)Clean the tape running surface (especially, adequately clean
the drum surface and the lower drum helicam surface).
(3)Connect an oscilloscope to each TP on the relay circuit board.
(4)Turn the AC adapter power ON.
(5)Using the adjustment remote control unit, put the system into
TEST mode T-05.
(6)Replay the alignment tape for running adjustment, and make
sure that the tape is running in the SP mode.
(7)Check the oscilloscope playback envelope, then, at +1/4 shift
and -1/4 shift, check whether all of it is flat. If it is not, perform
the following adjustment so that it becomes flat.
(Each time you push the PLAY key, the shift will change; +1/4 shift
→ Normal → -1/4 shift → Normal , in order.)
7-2. Running height adjustment
· After replacement of T roller or Tu guide adjust the height . (Adjust only the replaced parts.)
· After height adjustment do not turn the T roller. If crease is found on the tape of Tu guide, remove the crease by rotating.
(As for details refer to the “running rough adjustment”.)
· After height adjustment of T roller or Tu guide, apply Screw lock to an end of shaft.
(After replacement of S guide apply Screw lock to same point, too.)
Tu guide
Height setting
jig
Master plane
Running adjustm-
ent preparation
Adjustment
procedure 7-3
<Replacement parts>
· T roller, arm
· Tu guide, arm
· Slide chassis
Adjust the height of only
replaced parts with the
adjusting jig.
Adjustment procedure 7-2
<Replacement parts other
than those shown above>
· S guide
· Pole base
· Guide roller
· Drum assembly
· Capstan motor, etc.
Height presetting is not
necessary.
Cassette controller
installation
Running rough
adjustment
Adjustment
procedure 7-4
Running final
adjustment
Adjustment
procedure 7-5
S guide
Reels
Tension roller
Drum
Tu guide roller
Sup guide roller
Pinch roller
Tu guide
Fit height the par on low edge fitting.
After setting adjustment jigs, turn T roller
and S guide counterclockwise to 225°.
Lower edge
fitting
Height setting
jig
Master plane
Master plane
Height setting
jig
T roller