VL-SD20U
1 O-2. Camera Section Adjustments
1 O-2-1. Camera section service
(1) Camera adjustment is performed after the set has been completed.
(2) Subjects, measuring instruments and jigs needed for camera section service and adjustments
l Frequency counter
l Illumination meter
l Color temperature meter
l Color temperature conversion filter
HOYA “LB-1 65”
l Color video monitor
l Video output cable
l AC adapter
l Extension cables
l Remote control unit for servicing
10-2-2. List of camera jigs and tools
Configuration
<Note: The entries of list> 1. Name 2. Part No. 3. Cod1
1. Gray scale chart
1. Color bar chart
1. Illumination meter
2. JiGMETER-
1. Color temperature meter
(1600 to 400000 degrees K)
2. JiGMETER-
1. Color temperature
conversion filter
(3200 degrees K ti 6800
degrees K)
!. JiGHOYA-LB165
1. BN
2. JiGTH-SSlO
2. RRMCG0033TASA
1. Put/pullet out jig
2.95CM22001
l For the QCNW-1929TAZZ
10-2-3. Adjusting the camera unit
(1) Preparations for adjustments and items to be checked
1) Set up the light box so that the entire pattern is evenly lit. Set the color temperature to 3200°K.
2) Use test patterns that are not dirty nor discoloured.
3) If the electrical circuitry gets in trouble, be sure to pinpoint the trouble spot with a measuring instrument and repair or replace
the defective part.
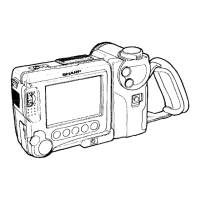
(2) Remote control for servicing RRMCG0033TASA
To adjust the camera section of this machine, the remote control for servicing (RRMCGOOSSTASA) is used. The adjustment is made
in such a manner that the remote control writes necessary data by way of the microprocessor to the specific addresses on the
E2PROM (IC702 and the ROM on the lens unit).
1) To adjust the camera:
Press the “CONTINUE” key first and then the “CAM ADJ” key.
This will show
I
on the LCD screen, thereby having the camera unit ready for the adjustments.
2) Descriptions of the displays
I,,,““,,.,,““...
(Indicates the camera adjustment mode.)
l The address values for this machine range from 0000 to 05FF.
l The data include byte data (the last two digits are effective) and e-byte data (the last three digits are effective).
3) Descriptions of the remote control keys
“FF” key:
“REW” key:
“PLAY” key:
“STOP” key:
Increases the address and data values.
Decreases the address and data values.
Specifies addresses and calls the data.
This key also fixes (i.e., writes to the E2PROM) the data values.
Clears the data to enable the selection of address.
10-12