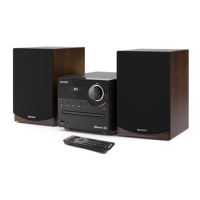
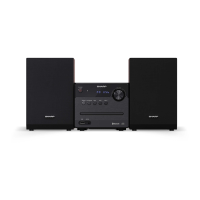
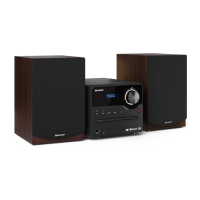
FM radio operation
1. Press the source button on the unit, or FM button on the remote control to enter the FM mode. (FM frequency: 87.50-108.00MHz)
2. Press the buttons on remote control to decrease or increase the frequency in 0.05MHz increments.
3. Press and hold the buttons on remote control to scan through the frequency range quickly. The scan will stop once it has found a station.
4. Press and hold the button to scan through the frequency range quickly; it will store any stations found automatically.
5. SAVE a station:
You can store up to 40 FM stations in memory.
– Press the FREQ button and then, using the number buttons enter the frequency that you want to store.
– Press the SAVE button, it will show ” P01″ on the display.
– Press the button to select the station preset number you want to save the frequency under.
– Press the SAVE button again to confi rm.
6. Recall the preset stations:
– Press the button to recall your stored stations.
CD operations
1. Press the source button on the unit, or CD button on the remote control to enter the CD mode. Press the button to open the disc drawer, put
a CD in, then press the button again to close.
2. Press the button to pause or play the song.
3. Press the button on remote control to stop playing, press the button to re-start.
4. Press the button to skip to the previous or next song.
5. Press the button on remote control to fast forward or fast rewind the playback, press repeatedly to resume normal speed.
6. To directly select a specifi c song press the number buttons 0-9 on remote control.
Example:
– If the track number consists of two digits, for example, 25, press button “2“, and then button “5“ to select the 25th track.
– If the track number is a one-digit number, for example, 9, press “0“ first, then “9“ to skip to the 9th track.
7. REPEAT button:
While in playing mode, press the button to set repeat mode.
– For CD and CD-R discs, press the button to repeat playing songs
– Press once to repeat current song. Press again to repeat all tracks.
– Press a third time to cancel.
8. Press the button on the remote control to play the tracks in a random order. Press again to resume.
9. You can set the disc to play tracks in a programmed order:
– Press the button on remote control to stop playing.
– Press the PROGRAM button on remote control. The screen displays: P01.
– Press the number buttons on remote control to select the tracks to program.
– Press the buttons on remote control to skip between the program tracks.
– Press the PROGRAM button on the remote control to confi rm.
– To begin the programmed order, press the button.
– To cancel the program sequence, press the button twice.
Notes:
– MP3 format is supported.
– Unsupported fi le formats are skipped. For example, Word documents (.doc) or MP3 files with extension .dlf are ignored and not played.
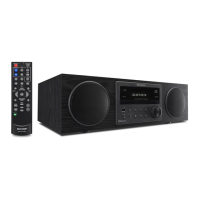
Bluetooth Operation
The Microsystem has Bluetooth capability and is able to receive a signal within a range of 7 meters. To pair the Microsystem with a Bluetooth device:
1. Press the source button on the unit, or button on the remote control button repeatedly to enter the Bluetooth mode, the“bt“ message appear
and fl ash on the display.
2. Activate your Bluetooth device and select the search mode.
3. Select “SHARP XL-B512” from the search list and connect.
4. Enter “0000“ for password if prompted.
5. When the devices are connected to each other, a confirmation sound will be made. “bt” will stop fl ashing in the display.
6. You can now playback music from your device. Please note that the volume on the Bluetooth source device operates independently to the volume
of the unit.
7. To turn off the Bluetooth function: switch to another function on the Microsystem; disable the function on your Bluetooth source device, or press the
button on the remote control.
Connect other audio devices
Audio (AUX IN) allows your unit quickly and easily to connect to an MP3 player or other external sources.
1. Use a 3.5mm audio cable to connect your external audio device to the AUX IN socket on the front panel.
2. Press the source button on the unit, or AUX button on the remote control button to switch to the AUX IN mode.
3. You may need to operate the external audio device directly for playback features.
4. Please note that the volume on the Audio source device operates independently to the volume of the unit.