EN
USER AND SAFETY GUIDE
4 CIRCUIT WI-FI RELAY SWITCH WITH
POWER MEASUREMENT
SHELLY PRO 4PM
OK
15:50
OFF
OFF
OFF
5 . 4W
Read before use
This document contains important technical and safety
information about the device, its safety use and instal-
lation.
⚠CAUTION! Before beginning the installation, please
read this guide and any other documents accompanying
the device carefully and completely. Failure to follow the in-
stallation procedures could lead to malfunction, danger to
your health and life, violation of the law or refusal of legal
and/or commercial guarantee (if any). Allterco Robotics
EOOD is not responsible for any loss or damage in case of
incorrect installation or improper operation of this device
due to failure of following the user and safety instructions
in this guide.
Product Introduction
Shelly® is a line of innovative microprocessor-managed
devices, which allow remote control of electric appliances
through a mobile phone, tablet, PC, or home automation
system. Shelly® devices can work standalone in a lo-
cal Wi-Fi network or they can also be operated through
cloud home automation services. Shelly® devices can
be accessed, controlled and monitored remotely from
any place the User has Internet connectivity, as long as
the devices are connected to a Wi-Fi router and the In-
ternet. Shelly® devices have integrated web servers,
through which the user may adjust, control and monitor
them. The cloud function could be used, if it is activated
through the web server of the device or the settings in the
Shelly Cloud mobile application. The user can register and
access Shelly Cloud using either Android or iOS mobile
application, or with any internet browser at
https://my.shelly.cloud/
Shelly® Devices have two Wi-Fi modes - Access Point
(AP) and Client mode (CM). To operate in Client Mode,
a Wi-Fi router must be located within the range of the
device. Devices can communicate directly with other Wi-
Fi devices through HTTP protocol. An API is provided by
Allterco Robotics EOOD.
The User can register and access Shelly Cloud, using ei-
ther Android or iOS mobile applications, or any internet
browser and the website: https://my.shelly.cloud/
Control your home with your voice
Shelly® devices are compatible with Amazon Echo and
Google Home supported functionalities. Please see our
step-by-step guide on:
https://shelly.cloud/support/compatibility/
Shelly® Pro Series
Shelly® Pro series is a line of Devices suitable for homes,
oces, retail stores, manufacturing facilities, and other
buildings. Shelly® Pro devices are DIN mountable inside
the breaker box, and highly suitable for new building con-
struction.
All Shelly® Pro devices can be controlled and monitored
through Wi-Fi and LAN connections. Bluetooth connec-
tion can be used for the inclusion process.
Shelly® Pro series offers PM products for real-time pre-
cise power measurement.
(g.1)
Legend:
• N: Neutral terminal / wire
• L: Live (110-240V) terminal / wire
• O1, O2, O3, O4: Load output terminals
• S1, S2, S3, S4: Switch (input) terminals controlling O1,
O2, O3, O4
• LAN: Local Area Network RJ 45 connector
* The cables connecting the four L terminals to the 40 A
circuit breaker must be the same length!
Installation Instructions
The Shelly Pro 4PM smart relay by Allterco Robotics is
intended to be mounted into a standard switchboard on
DIN rail, next to the circuit breakers in order to control and
monitor the electric power through it. Shelly can work as
a standalone device or as an accessory to a home auto-
mation controller.
⚠CAUTION! Danger of electrocution. Mounting/ Installa-
tion of the Device to the power grid has to be performed
with caution, by a qualied person (electrician).
⚠CAUTION! Danger of electrocution. Mounting the De-
vice to the power grid has to be performed with caution.
⚠CAUTION! Do not allow children to play with the button/
switch connected to the Device. Keep the Devices for re-
mote control of Shelly (mobile phones, tablets, PCs) away
from children.
DE
BENUTZER- UND
SICHERHEITSLEITFADEN
4-KREIS-WLAN-RELAISSCHALTER
SHELLY PRO 4PM
OK
15:50
OFF
OFF
OFF
5 . 4W
Vor Benutzung lesen
Dieses Dokument enthält wichtige technische und si-
cherheitstechnische Informationen über das Gerät und
seine sichere Verwendung und Installation.
⚠ACHTUNG! Bevor Sie mit der Installation beginnen,
lesen Sie bitte die Begleitdokumentation sorgfältig und
vollständig durch. Die Nichtbeachtung der empfohlenen
Verfahren kann zu Fehlfunktionen, Lebensgefahr oder
Gesetzesverstößen führen. Allterco Robotics EOOD haftet
nicht für Verluste oder Schäden im Falle einer falschen In-
stallation oder Bedienung dieses Geräts.
Produkteinführung
Shelly® ist eine Reihe innovative mikroprozessorges-
teuerte Geräte, die die Fernsteuerung von Elektrogeräten
über ein Mobiltelefon, Tablet, PC oder Hausautomations-
system ermöglichen. Shelly®-Geräte können eigenstän-
dig in einem lokalen Wi-Fi-Netzwerk arbeiten oder auch
über Cloud-Heimautomatisierungsdienste betrieben
werden. Auf Shelly®-Geräte kann von jedem Ort, an
dem der Benutzer über eine Internetverbindung verfügt,
aus der Ferne zugegriffen, sie gesteuert und überwacht
werden, solange die Geräte mit einem WLAN-Router und
dem Internet verbunden sind. Shelly®-Geräte verfügen
über integrierte Webserver, über die der Benutzer sie ein-
stellen, steuern und überwachen kann. Die Cloud-Funk-
tion kann verwendet werden, wenn sie über den Web-
server des Geräts oder die Einstellungen in der Shelly
Cloud-Mobilanwendung aktiviert wird. Der Benutzer kann
sich über die mobile Android- oder iOS-App oder mit ei-
nem beliebigen Internetbrowser unter https://my.shelly.
cloud/ registrieren und auf Shelly Cloud zugreifen.
Shelly®-Geräte haben zwei WiFi-Modi - Access Point (AP)
und Client-Modus (CM). Für den Betrieb im Client-Modus
muss sich ein WLAN-Router in Reichweite des Geräts be-
nden. Geräte können über das HTTP-Protokoll direkt mit
anderen WiFi-Geräten kommunizieren. Eine API kann vom
Hersteller bereitgestellt werden.
Der Benutzer kann sich registrieren und auf Shelly Cloud
zugreifen, entweder über mobile Android- oder iOS-An-
wendungen oder einen beliebigen Internetbrowser und
die Website: https://my.Shelly.cloud/
Steuern Sie Ihr Zuhause mit Ihrer Stimme
Shelly®-Geräte sind mit den von Amazon Echo und Goo-
gle Home unterstützten Funktionen kompatibel. Bitte
lesen Sie unsere Schritt-für-Schritt-Anleitung auf:
https://shelly.cloud/support/compatibility/
Shelly® Pro-Serie
Die Shelly® Pro-Serie ist eine Reihe von Geräten, die für
Wohnungen, Büros, Einzelhandelsgeschäfte, Produktions-
stätten und andere Gebäude geeignet sind. Shelly® Pro-
Geräte sind DIN-montierbar im Unterbrecherkasten und
sehr gut geeignet für den Neubau.
Die Konnektivität für alle Shelly® Pro-Geräte kann über
eine Wi-Fi- oder LAN-Internetverbindung erfolgen, und
Bluetooth kann für den Aufnahmeprozess verwendet
werden.
Die Shelly® Pro-Serie bietet PM-Produkte für die präzise
Leistungsmessung in Echtzeit.
(Abb.1)
Legende:
• N: Neutralklemme / Draht
• L: Stromführende (110-240 V) Klemme/Draht
• O1, O2, O3, O4: Ausgang 1, 2, 3, 4;
• S1, S2, S3, S4: Schalter (Eingang) Schalterklemme zur
Steuerung von O1, O2, O3, O4
• LAN: Local Area Network RJ 45-Anschluss
*Die Verbindungskabel zwischen den 4 L-Terminals und
der 40A-Schaltung müssen in Länge gleich beträgen!
Installationsanleitung
Das Shelly Pro 4PM Smart Relay von Allterco Robotics
soll in eine Standard-Schalttafel auf einer DIN-Schiene
neben den Leistungsschaltern montiert werden, um die
elektrische Leistung zu steuern und zu überwachen.
Shelly kann als eigenständiges Gerät oder als Zubehör für
eine Heimautomatisierungssteuerung verwendet werden.
⚠ACHTUNG! Stromschlaggefahr. Die Montage/Installa-
tion des Geräts an das Stromnetz muss mit Vorsicht von
einer qualizierten Person (Elektriker) durchgeführt werden.
⚠ACHTUNG! Gefahr eines Stromschlags. Die Montage
des Geräts an das Stromnetz muss mit Vorsicht erfolgen.
⚠ACHTUNG! Erlauben Sie Kindern nicht, mit dem an das
Gerät angeschlossenen Knopf/Schalter zu spielen. Halten
IT
GUIDA PER L’UTENTE E LA SICUREZZA
INTERRUTTORE RELÈ WI-FI A 4
CIRCUITI
SHELLY PRO 4PM
OK
15:50
OFF
OFF
OFF
5 . 4W
Leggere prima dell’uso
Questo documento contiene importanti informazioni
tecniche e di sicurezza sul dispositivo e sul suo uso e
installazione in sicurezza.
⚠ATTENZIONE! Prima di iniziare l’installazione leggere
attentamente e completamente la documentazione alle-
gata. La mancata osservanza delle procedure consigliate
potrebbe portare a malfunzionamenti, pericolo per la vita
o violazione della legge. Allterco Robotics EOOD non è re-
sponsabile per eventuali perdite o danni in caso di installa-
zione o funzionamento errati di questo dispositivo.
introduzione al prodotto
Shelly® è una linea di dispositivi innovativi gestiti da
microprocessore, che consentono il controllo remoto di
elettrodomestici tramite telefono cellulare, tablet, PC o
sistema domotico. I dispositivi Shelly® possono funzio-
nare autonomamente in una rete Wi-Fi locale, oppure pos-
sono essere gestiti anche tramite servizi di automazione
domestica cloud. È possibile accedere, controllare e mo-
nitorare i dispositivi Shelly® in remoto da qualsiasi luogo
in cui l’Utente disponga di connettività Internet, purché i
dispositivi siano connessi a un router WiFi e a Internet.
I dispositivi Shelly® dispongono di server web integrati,
attraverso i quali l’utente può regolarli, controllarli e mo-
nitorarli.. La funzione cloud potrebbe essere utilizzata,
se attivata tramite il server web del Dispositivo o le im-
postazioni nell’applicazione mobile Shelly Cloud. L’Utente
può registrarsi e accedere a Shelly Cloud utilizzando l’ap-
plicazione mobile Android o iOS o con qualsiasi browser
Internet all’indirizzo https://my.shelly.cloud/
I dispositivi Shelly® hanno due modalità WiFi: Access
Point (AP) e Client mode (CM). Per operare in modalità
client, un router WiFi deve trovarsi all’interno della portata
del dispositivo. I dispositivi possono comunicare diretta-
mente con altri dispositivi WiFi tramite il protocollo HTTP.
Un’API può essere fornita dal produttore.
L’Utente può registrarsi e accedere a Shelly Cloud, utiliz-
zando applicazioni mobili Android o iOS, o qualsiasi brow-
ser Internet e il sito Web: https://my.shelly.cloud/
Controlla la tua casa con la tua voce
I dispositivi Shelly® sono compatibili con le funzionalità
supportate da Amazon Echo e Google Home. Consulta la
nostra guida passo passo su:
https://shelly.cloud/support/compatibility/
Shelly® Pro Series
La serie Shelly® Pro è una linea di dispositivi adatti per
abitazioni, uci, negozi al dettaglio, impianti di produzio-
ne e altri edici. I dispositivi Shelly® Pro sono montabili
DIN all’interno della scatola dell’interruttore e sono parti-
colarmente adatti per la costruzione di nuovi edici.
La connettività per tutti i dispositivi Shelly® Pro può av-
venire tramite connessione Internet Wi-Fi o LAN e il Blue-
tooth può essere utilizzato per il processo di inclusione.
La serie Shelly Pro offre prodotti PM per misurazioni pre-
cise della potenza in tempo reale.
(Fig. 1)
Leggenda:
• N: Terminale neutro / lo
• L: Terminale/cavo in tensione (110-240 V)
• O1, O2, O3, O4: Uscita 1, 2, 3, 4;
• S1, S2, S3, S4: Interruttore (ingresso) terminale che
controlla O1, O2, O3, O4
• LAN: Connettore RJ 45 per rete locale
* I cavi che collegano i quattro terminali L all’interruttore da
40 A devono essere della stessa lunghezza!
Istruzioni per l’installazione
Il relè intelligente Shelly Pro 4PM di Allterco Robotics è
progettato per essere montato in un quadro elettrico stan-
dard su guida DIN, accanto agli interruttori automatici per
controllare e monitorare l’energia elettrica attraverso di
esso. Shelly può funzionare come dispositivo autonomo
o come accessorio per un controller di automazione do-
mestica.
⚠ATTENZIONE! Pericolo di folgorazione. Il montaggio/
installazione del dispositivo alla rete elettrica deve essere
eseguito con cautela, da una persona qualicata (elettri-
cista).
⚠ATTENZIONE! Pericolo di folgorazione. Il montaggio
del dispositivo alla rete elettrica deve essere eseguito con
cautela.
⚠ATTENZIONE! Non consentire ai bambini di giocare
con il pulsante/interruttore collegato al dispositivo. Tene-
re i Dispositivi per il controllo remoto di Shelly (cellulari,
⚠CAUTION! Danger of electrocution. Even when the De-
vice is turned off, it is possible to have voltage across its
terminals. Every change in the connection of the terminals
has to be done after ensuring all local power is powered
off/disconnected.
⚠CAUTION! Do not connect the Device to appliances ex-
ceeding the given max load!
⚠CAUTION! Use the Device only with a power grid and
appliances which comply with all applicable regulations. A
short circuit in the power grid or any appliance connected
to the Device may damage the Device.
⚠CAUTION! Connect the Device only in the way shown in
these instructions. Any other method could cause damage
and/or injury.
⚠RECOMMENDATION! Тhe Device may be connected to
and may control electric circuits and appliances only if they
comply with the respective standards and safety norms.
⚠RECOMMENDATION! Connect the Device using solid
single-core cables with increased insulation heat resis-
tance not less than PVC T105°C.
Connection to the grid
Shelly Pro 4PM relay switch (4 channel)
Connect the relay to the power grid and install it in the
switchboard as shown in the scheme (g. 1) and follow-
ing the Safety Instructions. Before installing/mounting
the device, ensure that the grid is powered off (turned
down breakers) and in compliance with the Safety Norms.
Before starting, wire check that the breakers are turned
off and there is no voltage on their terminals. This can
be done with a phase meter or multimeter. When you are
sure that there is no voltage, you can start wiring the De-
vice according to g.1. Connect the 4 load circuits to the
O1, O2, O3, O4 terminals and the Neutral wire. Use 4 wires
with the same length to connect the 4 L terminals to the
40 A circuit breaker.
Connect the Neutral wire to the Device N terminal. Finally
connect the 4 switch circuits to the S1, S2, S3, S4 input
terminals and the 40 A circuit breaker.
For inductive appliances, those that cause voltage spikes
during switching on: electrical motors, as fans, vacuum
cleaners and similar ones, RC snubber (0.1µF / 100Ω /
1/2W / 600V AC) should be wired between Output and
Neutral of the circuit.
⚠CAUTION! Do not install the device at a place that is
possible to get wet.
Initial Inclusion
You can choose to use Shelly® with the Shelly Cloud mo-
bile application and Shelly Cloud service. Instructions on
how to connect your device to the Cloud and control it
through the Shelly App can be found in the “App guide”.
You can also familiarize yourself with the instructions for
Management and Control through the embedded Web in-
terface at 192.168.33.1 in the Wi-Fi network, created by
the Device.
Specication
• Power supply: 110-240V; 50/60Hz AC
• Max current per channel: 16A
• Total max. current of all outputs: 40 A
• Ambient temperature: 0°C - 40°C
• Frequency: 2412-2472 МHz; (Max. 2483 MHz)
• Operational range (depending on local construction):
- up to 50 m outdoors,
- up to 30 m indoors
• Dimensions (HxWxL): 57,5x53,4x90 mm
• Electrical consumption: < 4 W
• Mounting - DIN rail
• Wi-Fi - YES
• Bluetooth - v.4.2
• Basic/EDR: YES
• Bluetooth modulation: GFSK, π/4-DQPSK, 8-DPSK
• Bluetooth frequency TX/RX - 2402 - 2480MHz
• RF output Wi-Fi: 13.83 dBm
• RF output Bluetooth: 4.97 dBm
• LAN - YES
• Radio signal power: 1mW
• Radio protocol: Wi-Fi 802.11 b/g/n
• Temperature Protection - YES
• Scripting (mjs) - YES
• MQTT - YES
• CoAP - No
• URL Actions - 20
• Scheduling - 50
• Add-on support - No
• CPU - ESP32
• Flash - 8MB
• Complies with EU standards: RED 2014/53/EU; LVD
2014/35/EU; EMC 2014/30/EU; RoHS2 2011/65/EU
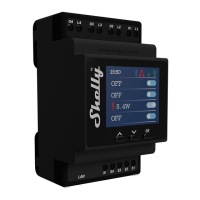
Display
Home Screen – Shows the status of the circuit (on/off),
current power consumption and connection status.
By pressing the “OK” button and holding it for a few sec-
onds you can go to the Menu. From there you can select
with the arrow buttons and pressing the “OK”:
• Main - pressing the “OK” button will return you to the
Home screen
• Network - set on/off :
- Wi-Fi
- Ethernet (LAN)
- Bluetooth
• Status – status of the device
• Maintenance
- Wi-Fi reset
- Factory reset
- Reboot
Technical Information
• Control through Wi-Fi from a mobile phone, PC, auto-
mation system or any other Device supporting HTTP and/
or UDP protocol.
• Microprocessor management.
• Controlled elements: 4 electrical circuits/ appliances.
• Controlling elements: 4 relays.
• Shelly Pro 4PM may be controlled by an external but-
tons/switches.
Declaration of conformity
Hereby, Allterco Robotics EOOD declares that the radio
equipment type Shelly Pro 4PM is in compliance with Di-
rective 2014/53/EU, 2014/35/EU, 2014/30/EU, 2011/65/
EU. The full text of the EU declaration of conformity is
available at the following internet address
https://shelly.cloud/knowledge-base/devices/shelly-pro-4pm/
Manufacturer: Allterco Robotics EOOD
Address: Bulgaria, Soa, 1407, 103 Cherni vrah Blvd.
Tel.: +359 2 988 7435
E-mail: support@shelly.cloud
Web: http://www.shelly.cloud
Changes in the contact data are published by the Manu-
facturer at the ocial website of the Device
http://www.shelly.cloud
All rights to trademark Shelly® and other intellectual
rights associated with this Device belong to Allterco Ro-
botics EOOD.
Sie die Geräte zur Fernsteuerung von Shelly (Mobiltelefone,
Tablets, PCs) von Kindern fern.
⚠ACHTUNG! Stromschlaggefahr. Auch wenn das Gerät
ausgeschaltet ist, kann an seinen Klemmen Spannung
anliegen. Jede Änderung des Anschlusses der Terminals
muss durchgeführt werden, nachdem sichergestellt wurde,
dass die gesamte lokale Stromversorgung ausgeschaltet/
getrennt ist.
⚠ACHTUNG! Schließen Sie das Gerät nicht an Geräte an,
die die angegebene maximale Last überschreiten!
⚠ACHTUNG! Verwenden Sie das Gerät nur mit einem
Stromnetz und Geräten, die allen geltenden Vorschriften
entsprechen. Ein Kurzschluss im Stromnetz oder an dem
Gerät angeschlossenen Geräten kann das Gerät beschädi-
gen.
⚠ACHTUNG! Schließen Sie das Gerät nur auf die in dieser
Anleitung gezeigte Weise an. Jede andere Methode kann
zu Schäden und/oder Verletzungen führen.
⚠EMPFEHLUNG! Das Gerät darf nur an Stromkreise und
Geräte angeschlossen werden und diese steuern, wenn
diese den jeweiligen Normen und Sicherheitsnormen
entsprechen.
⚠EMPFEHLUNG! Das Gerät kann mit massiven einadrigen
Kabeln mit erhöhter Wärmebeständigkeit bis zur Isolierung
von mindestens PVC T105°C angeschlossen werden.
Anschluss an das Stromnetz
Shelly Pro 4PM Relaisschalter (4 Kanäle)
Schließen Sie das Relais an das Stromnetz an und instal-
lieren Sie es in der Schalttafel wie im Schema (Abb. 1)
gezeigt und befolgen Sie die Sicherheitshinweise. Stellen
Sie vor der Installation/Montage des Geräts sicher, dass
das Netz ausgeschaltet ist (ausgeschaltete Leistungss-
chalter) und den Sicherheitsnormen entspricht.
Überprüfen Sie vor dem Start, ob die Leistungsschalter
ausgeschaltet sind und an ihren Klemmen keine Span-
nung anliegt. Dies kann mit einem Phasenmesser oder
Multimeter erfolgen. Wenn Sie sicher sind, dass keine
Spannung anliegt, können Sie mit der Verdrahtung der Ka-
bel gemäß Abb. 1 beginnen. Verbinden Sie die 4 Lasten
zu den O1 - O4 Terminals und der N-Leitung. Verwenden
Sie 4 gleich lange Kabel, um die 4 L-Terminals zu der 40A
Sicherung zu verbinden.
Verbinden Sie die N-Leitung zu dem N-Terminal des
Geräts. Verbinden Sie schließlich die 4 Schaltkreisen zu
den S1 - S4 Eingangsterminals und der 40A Sicherung.
Bei induktiven Geräten, die beim Einschalten Span-
nungsspitzen verursachen: Elektromotoren, wie Lüfter,
Staubsauger und ähnliches, RC-Snubber (0,1µF / 100Ω /
1/2W / 600V AC) zwischen Ausgang und Neutralleiter des
Stromkreises verdrahten .
⚠ACHTUNG! Installieren Sie das Gerät nicht an einem
Ort, der nass werden kann.
Erstaufnahme
Sie können wählen, ob Sie Shelly mit der mobilen Shelly
Cloud-Anwendung und dem Shelly Cloud-Dienst verwen-
den möchten. Eine Anleitung, wie Sie Ihr Gerät mit der
Cloud verbinden und über die Shellly App steuern, nden
Sie in der „App-Anleitung“. Sie können sich auch über
die eingebettete Webschnittstelle mit den Anweisungen
für Management und Kontrolle vertraut machen unter
192.168.33.1 im vom Gerät erstellten Wi-Fi-Netzwerk.
Spezikation
• Stromversorgung: 110-240V; 50/60Hz Wechselstrom
• Max. Strom pro Kanal: 16A
• Gesamt max. Strom aller Ausgänge: 40 A
• Umgebungstemperatur: 0°C - 40°C
• Frequenz: 2412-2472 МHz; (Max. 2483 MHz)
• Einsatzbereich (je nach örtlicher Bebauung):
- bis 50 m im Freien,
- bis 30 m im Innenbereich
• Abmessungen (HxBxL): 57,5x53,4x90 mm
• Stromverbrauch: < 4 W
• Montage - DIN-Schiene
• WLAN - JA
• Bluetooth - v.4.2
• Basic/EDR: YES
• Bluetooth-Modulation: GFSK, π/4-DQPSK, 8-DPSK
• Bluetooth frequenz TX/RX - 2402 - 2480MHz
• RF output WLAN: 13.83 dBm
• RF output Bluetooh: 4.97 dBm
• LAN - JA
• Funksignalleistung: 1mW
• Funkprotokoll: Wi-Fi 802.11 b/g/n
• Temperaturschutz - JA
• Skripting (mjs) - JA
• MQTT - JA
• CoAP - Nein
• URL-Aktionen - 20
• Terminplanung - 50
• Add-on-Unterstützung - Nein
• CPU - ESP32
• Flash - 8 MB
• Entspricht EU-Standards: RED 2014/53/EU; LVD
2014/35/EU; EMV 2014/30/EU; RoHS2 2011/65/EU
Anzeige
Startbildschirm – Zeigt den Status des Stromkreises
(ein/aus), den aktuellen Stromverbrauch und den Verbind-
ungsstatus an.
Durch Drücken der Taste „OK“ und Halten für einige
Sekunden gelangen Sie in das Menü. Von dort aus kön-
nen Sie mit den Pfeiltasten und Drücken der Taste „OK“
auswählen:
• Main - Durch Drücken der Taste „OK“ kehren Sie zum
Startbildschirm zurück
• Netzwerk - ein-/ausschalten:
- W-lan
- Ethernet (LAN)
- Bluetooth
• Status – Status des Geräts
• Instandhaltung
- WLAN-Reset
- Werkseinstellungen zurückgesetzt
- Neustart
Technische Information
• Steuerung über Wi-Fi von einem Mobiltelefon, PC, Au-
tomatisierungssystem oder einem anderen Gerät, das
das HTTP- und/oder UDP-Protokoll unterstützt.
• Mikroprozessorverwaltung.
• Kontrollierte Elemente: 4 Stromkreise/ Geräte.
• Bedienelemente: 4 Relais.
• Shelly kann über einen externen Taster/Schalter ges-
teuert werden.
Konformitätserklärung
Hiermit erklärt Allterco Robotics EOOD, dass der Funk-
anlagentyp Shelly Pro 4PM der Richtlinie 2014/53/EU,
2014/35/EU, 2014/30/EU, 2011/65/EU entspricht. Den
vollständigen Text der EU-Konformitätserklärung nden
Sie unter folgender Internetadresse
https://shelly.cloud/knowledge-base/devices/shelly-pro-4pm/
Hersteller: Allterco Robotics EOOD
Adresse: Bulgarien, Soa, 1407, 103 Cherni vrah Blvd.
Tel.: +359 2 988 7435
E-Mail: support@shelly.cloud
Internet: http://www.shelly.cloud
Änderungen der Kontaktdaten werden vom Hersteller auf
der oziellen Website des Geräts veröffentlicht
http://www.shelly.cloud
Alle Rechte an der Marke Shelly® und anderen geistigen
Eigentumsrechten im Zusammenhang mit diesem Gerät
gehören Allterco Robotics EOOD.
tablet, PC) lontano dalla portata dei bambini.
⚠ATTENZIONE! Pericolo di folgorazione. Anche quando
il dispositivo è spento, è possibile che sia presente tensio-
ne ai suoi terminali. Ogni modica alla connessione dei
terminali deve essere eseguita dopo essersi assicurati che
tutta l’alimentazione locale sia spenta/scollegata.
⚠ATTENZIONE! Non collegare il dispositivo ad apparec-
chi che superano il carico massimo indicato!
⚠ATTENZIONE! Utilizzare il dispositivo solo con una
rete elettrica e apparecchi conformi a tutte le normative
applicabili. Un cortocircuito nella rete elettrica o qualsiasi
apparecchio collegato al dispositivo può danneggiare il
dispositivo.
⚠ATTENZIONE! Collegare il Dispositivo solo nel modo
mostrato in queste istruzioni. Qualsiasi altro metodo po-
trebbe causare danni e/o lesioni.
⚠CONSIGLIO! Il Dispositivo può essere collegato e co-
mandare circuiti ed apparecchi elettrici solo se conformi
alle rispettive norme e norme di sicurezza.
⚠CONSIGLIO! Il Dispositivo può essere collegato con
cavi unipolari solidi con elevata resistenza termica all’iso-
lamento non inferiore a PVC T105°C.
Connessione alla rete
Interruttore relè Shelly Pro 4PM (4 canali)
Collegare il relè alla rete elettrica ed installarlo nel quadro
come indicato nello schema (g. 1) e seguendo le Istru-
zioni di Sicurezza. Prima di installare/montare il dispositi-
vo assicurarsi che la rete sia spenta (interruttori spenti) e
nel rispetto delle Norme di Sicurezza.
Prima di iniziare, vericare che gli interruttori siano spenti
e che non ci sia tensione sui loro terminali. Questo può
essere fatto con un misuratore di fase o un multimetro.
Quando sei sicuro che non c’è tensione, puoi iniziare a
cablare i cavi secondo la g.1. Collegare i 4 circuiti di
carico ai terminali O1, O2, O3, O4 e al lo neutro. Usare
4 li della stessa lunghezza per collegare i 4 terminali L
all’interruttore da 40 A.
Collegare il lo del neutro al terminale N del dispositivo.
Inne, collegare i 4 circuiti di commutazione ai terminali di
ingresso S1, S2, S3, S4 e all’interruttore da 40 A.
Per gli apparecchi induttivi, quelli che causano picchi
di tensione durante l’accensione: motori elettrici, come
ventilatori, aspirapolvere e simili, soppressori RC (0.1µF /
100Ω / 1/2W / 600V AC) devono essere cablati tra Uscita
e Neutro del circuito .
⚠ATTENZIONE! Non installare il dispositivo in un luogo
in cui è possibile bagnarsi.
Inclusione iniziale
Puoi scegliere se desideri utilizzare Shelly con l’applica-
zione mobile Shelly Cloud e il servizio Shelly Cloud. Le
istruzioni su come connettere il proprio dispositivo al
Cloud e controllarlo tramite l’App Shellly si trovano nella
“Guida all’App”. È inoltre possibile acquisire familiarità
con le istruzioni per la gestione e il controllo tramite l’in-
terfaccia Web incorporata a 192.168.33.1 nella rete Wi-Fi,
creata dal Dispositivo.
Speciche
• Alimentazione: 110-240V; 50/60Hz CA
• Corrente massima per canale: 16A
• Totale massimo corrente di tutte le uscite: 40 A
• Temperatura ambiente: 0°C - 40°C
• Frequenza: 2412-2472 Hz; (Massimo 2483 MHz)
• Gamma operativa (a seconda della costruzione locale):
- no a 50 m all’aperto,
- no a 30 m in interni
• Dimensioni (AxPxL): 57,5x53,4x90 mm
• Consumo elettrico: < 4 W
• Montaggio - guida DIN
• Wi-Fi - S
• Bluetooth - v.4.2
• Basic/EDR: YES
• Modulazione Bluetooth: GFSK, π/4-DQPSK, 8-DPSK
• Bluetooth Frequenza: TX/RX - 2402 - 2480MHz
• RF output Wi-Fi: 13.83 dBm
• RF output Bluetooh: 4.97 dBm
• LAN - S
• Potenza del segnale radio: 1 mW
• Protocollo radio: Wi-Fi 802.11 b/g/n
• Protezione della temperatura - S
• Scripting (mjs) - S
• MQTT - S
• CoAP - No
• Azioni URL - 20
• Programmazione - 50
• Supporto aggiuntivo - No
• CPU - ESP32
• Flash - 8 MB
• Conforme alle norme UE: RED 2014/53/UE; LVD
2014/35/UE; CEM 2014/30/UE; RoHS2 2011/65/UE
Schermo
Schermata principale: mostra lo stato del circuito (ac-
ceso/spento), il consumo energetico corrente e lo stato
della connessione.
Premendo il pulsante “OK” e tenendolo premuto per alcu-
ni secondi si accede al Menu. Da lì è possibile selezionare
con i tasti freccia e premendo il tasto “OK”:
• Principale: premendo il pulsante “OK” si torna alla
schermata Home
• Rete - attiva/disattiva:
- Wi
- Ethernet (LAN)
- Bluetooth
• Stato – stato del dispositivo
• Manutenzione
- Ripristino Wi-Fi
- Ripristino delle impostazioni di fabbrica
- Riavviare
Informazioni tecniche
• Controllo tramite Wi-Fi da telefono cellulare, PC, siste-
ma di automazione o qualsiasi altro dispositivo che sup-
porti il protocollo HTTP e/o UDP.
• Gestione del microprocessore.
• Elementi controllati: 4 circuiti elettrici/apparecchi.
• Elementi di comando: 4 relè.
• Shelly può essere controllato da un pulsante/interrut-
tore esterno.
Dichiarazione di conformità
Con la presente, Allterco Robotics EOOD dichiara che il
tipo di apparecchiatura radio Shelly Pro 4PM è confor-
me alla Direttiva 2014/53/UE, 2014/35/UE, 2014/30/
UE, 2011/65/UE. Il testo completo della dichiarazione di
conformità UE è disponibile al seguente indirizzo internet
https://shelly.cloud/knowledge-base/devices/shelly-pro-4pm/
Produttore: Allterco Robotics EOOD
Indirizzo: Bulgaria, Soa, 1407, 103 Cherni vrah Blvd.
Tel.: +359 2 988 7435
E-mail: support@shelly.cloud
Web: http://www.shelly.cloud
Le modiche ai dati di contatto sono pubblicate dal Pro-
duttore sul sito Web uciale del Dispositivo
http://www.shelly.cloud
Tutti i diritti sul marchio Shelly® e altri diritti intellettuali
associati a questo dispositivo appartengono a Allterco
Robotics EOOD.