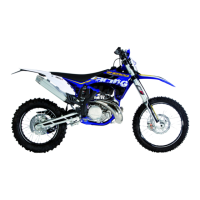
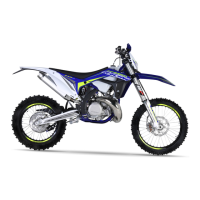
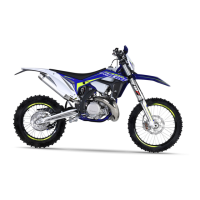
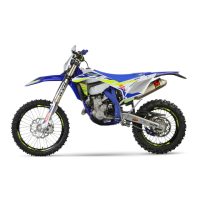
Do you have a question about the SHERCO 250 SE-R and is the answer not in the manual?
Details on engine type, capacity, bore, stroke, cooling, ignition, and oil specifications.
Carburetor type, needle position, jet settings, and air screw adjustments for SE 250 and SE 300.
Specifications for frame, forks, rear suspension, brakes, tires, and fuel tank capacity.
Factory and racing settings for compression, rebound, spring stiffness, and fork oil.
Factory and racing settings for low/high speed compression, rebound, and spring stiffness.
Step-by-step procedure for safely removing the engine from the motorcycle chassis.
Instructions for reinstalling the engine into the frame, including critical tightening torques.
Procedure for draining the gearbox oil by removing drainage plugs.
Steps to remove the gearbox output pinion and the selector mechanism.
Instructions for disassembling the cylinder head, cylinder, and piston assembly.
Procedure for removing the engine's clutch housing.
Steps to remove the clutch pressure plate, springs, and discs.
Instructions for removing the electric starter motor.
Steps involved in dismantling the primary transmission components.
Procedure for removing the torque limiter and the starter drive assembly.
Steps to remove the ignition system components, including the flywheel and magnetic wheel.
Instructions for removing the intake pipe and valve box assembly.
Procedure for separating the engine's crankcase halves.
Steps to remove the gear selection mechanism, including forks and shafts.
Instructions for removing the connecting rod assembly from the crankshaft.
Procedures related to the connecting rod assembly, including bearing replacement.
Procedure for measuring the external dimensions of the balance weights.
Method for measuring the radial play in the connecting rod head.
Procedure for measuring the lateral play (run out) of the crankshaft.
Inspection points for used pistons, including skirt, grooves, and retainers.
How to measure the gap spacing of piston rings using a spacer.
Checking the diameter of the piston pin and the piston pin hole.
Method for measuring cylinder bore wear using a bore comparator.
General functional checks on dismantled engine components.
Procedure for the valve stop learning application after cylinder reassembly.
Inspection of the valve box intake pipe sleeve for wear or damage.
Checking clutch components like stopper, rod, springs, and plates for wear.
Procedures for checking the gearbox components and assembly.
Steps for assembling the engine's right and left half crankcases.
Procedure for reassembling the gear selection mechanism, including pins and levers.
Reassembly steps for the primary transmission, clutch boss, and related components.
Steps for reinstalling clutch discs, pressure plate, springs, and screws.
Procedure for fitting the clutch housing, ensuring correct alignment and lubrication.
Instructions for reinstalling the piston and cylinder, including gasket placement.
A table providing squish measurements based on piston overrun for gasket selection.
Steps for reinstalling the cylinder head, including centering pins and tightening.
Procedure for reassembling the valve box and intake pipe with new gaskets.
Instructions for reinstalling the gearbox output pinion, spacer, and safety washer.
Steps for reassembling the starter drive, including pinions and retaining triangle.
Procedure for installing the ignition rotor, nut, centering sleeves, and cover.
Steps for installing the electric starter, clutch control rod, and drain plugs.
Overview of the Synerject electronic management system.
Details the components and architecture of the Synerject electronic management system.
Overview of the Exxodiag diagnostic tools and their reference number.
Lists all items included in the diagnostic tool kit for system analysis.
Step-by-step guide for installing the diagnostic software and necessary drivers.
Sequence of actions for installing the diagnostic software on a computer.
Configuring communication peripheral, language, and unit system settings.
Procedures for updating and synchronizing the diagnostic software tool.
Instructions for connecting the diagnostic interface cable to the computer's USB port.
Guide to configuring proxy settings for accessing the internet, if required.
General navigation and vehicle selection within the diagnostic software.
Checking vehicle identification details like serial number and calibration.
Reading general engine operational parameters such as RPM and temperature.
Displaying main engine system values including RPM, temperature, and battery voltage.
Procedure to check the system for stored error codes and diagnostic trouble codes.
Viewing detailed information and context for specific default codes found.
Steps to clear stored error codes from the engine control unit.
Performing diagnostic tests on system components like ignition coil, fan, and injectors.
Executing a standard diagnostic test for the cooling fan.
Process for calibrating the exhaust valve system after component replacement.
Guide to updating the Engine Control Unit with new calibration files for performance.
Step-by-step instructions for downloading and applying ECU calibration files.
Utilizing the screen printing feature for capturing and reporting diagnostic information.
Carburetor settings for the SE 250 model across various temperature and altitude conditions.
Carburetor settings for the SE 300 model across various temperature and altitude conditions.
Checking static electrical values of the stator windings.
Checking dynamic electrical values for the voltage regulator and alternator.
Detailed wiring diagram for the motorcycle's main electrical harness.
Wiring diagram specifically for the standard lighting system.
Wiring diagram for the racing-specific lighting system.
Wiring diagram for the motorcycle's accessory electrical connections.
| Brand | SHERCO |
|---|---|
| Model | 250 SE-R |
| Category | Motorcycle |
| Language | English |
