EasyManua.ls Logo

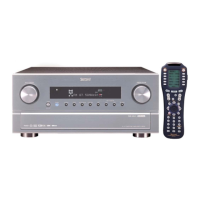
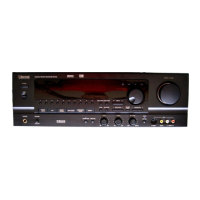
Sherwood NewCastle R-945 User Manual

Sherwood NewCastle R-945
34 pages
To Next Page IconTo Next Page
Page #1 background imageLoading...
Page #1 background image
2
Introduction
Congratulations on Your Purchase!
Your new high fidelity receiver is designed to deliver
maximum enjoyment and years of trouble free service.
Please take a few moments to read this manual
thoroughly. It will explain the features and operation of
your unit and help ensure a trouble free installation.
Please unpack your unit carefully. We recommend that
you save the carton and packing material. They will be
helpful if you ever need to move your unit and may be
required if you ever need to return it for service. Your unit
is designed to be placed in a horizontal position and it is
important to allow at least two inches of space behind
your unit for adequate ventilation and cabling
convenience.
To avoid damage, never place the unit near radiators, in
front of heating vents, in direct sunlight, or in excessively
humid or dusty locations. Connect your complementary
components as illustrated in the following section.
CAUTION : TO REDUCE THE RISK OF
ELECTRIC SHOCK, DO NOT
REMOVE COVER (OR BACK).
NO USER-SERVICEABLE PARTS
INSIDE. REFER SERVICING TO
QUALIFIED SERVICE PERSONNEL.
CAUTION
RISK OF ELECTRIC SHOCK
DO NOT OPEN
This symbol is intended to alert the user to the
presence of uninsulated "dangerous voltage"
within the product's enclosure that may be of
sufficient magnitude to constitute a risk of
electric shock to persons.
This symbol is intended to alert the user to the
presence of important operating and
maintenance (servicing) instructions in the
literature accompanying the appliance.
To reduce the risk of fire or electric shock, do not expose
this appliance to rain or moisture.
Caution : Do not block ventilation openings or stack
other equipment on the top.
FOR U.S.A.
Note to CATV System Installer: This reminder is
provided to call the CATV system installer's attention
to Article 820-40 of the NEC that provides guidelines
for proper grounding and, in particular, specifies that
the cable ground shall be connected to the
grounding system of the building, as close to the
point of cable entry as practical.
FCC INFORMATION
This equipment has been tested and found to
comply with the limits for a Class B digital device,
pursuant to Part 15 of the FCC Rules. These limits
are designed to provide reasonable protection
against harmful interference in a residential
installation. This equipment generates, uses and can
radiate radio frequency energy and, if not installed
and used in accordance with the instructions, may
cause harmful interference to radio communications.
However, there is no guarantee that interference will
not occur in a particular installation. If this equipment
does cause harmful interference to radio or
television reception, which can be determined by
turning the equipment off and on, the user is
encouraged to try to correct the interference by one
or more of the following measures:
Reorient or relocate the receiving antenna.
Increase the separation between the equipment
and receiver.
Connect the equipment into an outlet on a circuit
different from that to which the receiver is
connected.
Consult the dealer or an experienced radio/TV
technician for help.
CAUTION: Any changes or modifications in
construction of this device which are not expressly
approved by the party responsible for compliance
could void the user's authority to operate the
equipment.
WARNING
ENGLISH
UNPACKING AND
Other manuals for Sherwood NewCastle R-945

Questions and Answers:

Sherwood NewCastle R-945 Specifications

Amplifier Section IconAmplifier Section
power output (stereo mode, 8 Ohm, THD 0.2%, 20 Hz~20 kHz)2 x 100 W
total harmonic distortion (8 Ohm, 100 W, 1 kHz)0.09 %
intermodulation distortion (60 Hz* 7 kHz='4:1- SMPTE, 8 Ohm, 100 W)0.1 %
Input Sensitivity IconInput Sensitivity
phono input sensitivity3.5 mV
line input sensitivity (CD, TAPE, VIDEO)200 mV
input sensitivity (47 kOhm)47 kOhm
Output Levels IconOutput Levels
output level (TAPE REG)2.0 V
pre out (front, center, rear, subwoofer)1 kOhm
bass/treble control (100 Hz/10 kHz)+10 dB
Digital Audio Section IconDigital Audio Section
sampling frequency32, 44.1, 48 kHz
digital input level (coaxial)0.5 Vp-p
digital input level (optical)-15~-21 dBm
General IconGeneral
power supplyAC 230 V, 50 Hz
power consumption850 W
dimensions (W x H x D)440 x 140 x 380 mm (17-3/8 x 5-1/2 15 inches)
Weight IconWeight
weight (net)16.3 kg (35.9 lbs)
switched AC outlet100 W max.
total weight16.3 kg

Summary

Product Introduction and Safety

Product Overview and Setup

Describes the receiver, manual, and initial setup procedures.

Unpacking and Placement

Covers unpacking, saving materials, and proper unit placement guidelines.

Safety Warnings and Precautions

Covers electrical shock, ventilation, and general safety warnings.

FCC Compliance Information

Details compliance with FCC rules for digital devices.

Pre-Operation Safety and Voltage Information

Voltage and Plug Safety Guidelines

Safety precautions for different voltage standards and plug types.

System Connectivity and Component Hookup

Connecting Antennas

Instructions for connecting FM and AM antennas.

Connecting Audio Components

Guides for connecting various audio sources like CD players.

Connecting Video Components

Instructions for connecting video sources like VCRs and DVD players.

Connecting Multi-Room Adaptor

Guides for connecting to a multi-room system.

Connecting Digital Inputs

How to connect digital audio sources for better sound quality.

Connecting Speakers

Guidance on properly connecting speaker systems.

Connecting System Control

Instructions for connecting system control components.

Power and Amplifier Connections

Covers main in/out connections, power cord, and switched outlets.

Front Panel Interface Overview

Control Layout and Indicators

Describes the function and location of front panel buttons and displays.

Front Auxiliary Input Jacks

Details the use of front panel input jacks for external components.

Universal Remote Control Operation

Remote Control Modes and Operation

Explains OSD, Sherwood, and non-Sherwood modes of the remote.

Remote Control Button Functions

Describes the functions of various buttons on the remote control.

Remote Control Functionality Details

Numbered Button Functions

Details the functions of numbered buttons for different components.

DIGI LINK Component Control

How DIGI LINK components are controlled via the remote.

Remote Control Usage and Maintenance

Basic Remote Operation

Steps for operating components with the remote.

Replacing Remote Batteries

Instructions for changing batteries in the remote control.

Remote Control Setup Code Entry

Remote Control Setup Procedure

Steps for entering set-up codes for component control.

Basic Operations and Listening Modes

Listening to a Program

Steps for turning on the receiver, speakers, and selecting input sources.

Selecting Audio/Video Sources and Adjustments

Selecting Digital and Analog Inputs

How to select digital or analog input for various sources.

Adjusting Volume and Balance

How to adjust overall volume, balance, and subwoofer levels.

Audio Tone, Mute, and Headphone Settings

Tone and Mute Control

Adjusting bass, treble, and muting the sound.

Headphone Listening

How to listen privately using headphones.

Surround Sound Modes and Delay Time

Surround Mode Overview

Explains the receiver's digital signal processor and surround modes.

Delay Time Adjustment

Explains delay time and its adjustment for acoustics.

Speaker Placement and Surround Mode Selection

Speaker Placement Guidelines

Optimal placement for front, center, rear speakers, and subwoofer.

Selecting Surround Modes

How to select and cycle through different surround modes.

Speaker Configuration and Memory

Center, Rear, and Subwoofer Settings

How to adjust settings for center, rear speakers, and subwoofer.

Memorizing Speaker Settings

How to save the chosen speaker configurations.

Speaker Setting Checks and Delay Adjustments

Checking Speaker Settings

How to check current speaker settings.

Adjusting Speaker and Delay Volume

Adjusting speaker volume levels and delay times.

Delay Time and Audio Downmixing Features

Adjusting and Memorizing Delay Time

Steps to adjust and memorize delay time settings.

Downmixing into 2 Front Channels

How to convert 5.1 channels to 2 front channels for specific sources.

Radio Tuning Modes

Tuner Operation Modes

Explains manual, frequency direct, and auto tuning.

Radio Station Examples

Examples for entering frequencies directly.

Radio Presets and FM Reception Settings

Presetting Radio Stations

How to store and tune to preferred radio stations.

FM Stereo Broadcasts

Adjusting FM mode for stereo or mono reception.

Scanning Preset Stations

How to scan through preset radio stations.

Memory Backup Function

Items that are memorized and how they are lost.

Audio Recording Procedures

Recording with TAPE 1

Steps to record audio onto Tape 1.

Recording with TAPE 2 MONITOR

Steps to record audio using the Tape 2 Monitor function.

Video and Audio Dubbing to VCR1

Dubbing Video to VCR1

Dubbing video sources from LD player to VCR1.

Listening to Audio During Dubbing

How to listen to audio from CD while dubbing.

Dubbing and Playback Options

Enjoying Other Video Inputs During Dubbing

Viewing DVD while dubbing from LDP to VCR1.

Dubbing and Enjoying Signals Separately

Dubbing LD video and CD audio separately.

Advanced Features: Dynamic Range and Sleep Timer

Compressing Dynamic Range (Dolby Digital)

Adjusting dynamic range for Dolby Digital sources.

Operating the Sleep Timer

How to set the sleep timer for automatic shutdown.

Checking Fluorescent Display Brightness

Adjusting the brightness of the receiver's displays.

On-Screen Display (OSD) Functionality

OSD Functionality Overview

Explains the On Screen Display function for setup and information.

Current Status Display Modes

Describes the basic set-ups and status shown on the display.

OSD Menu Navigation and Displays

OSD Display Modes

Shows surround mode and input source display examples.

Menu Screen Operation

How to navigate and operate the menu screen using the remote.

Menu Screen Item Selection and Adjustment

Selecting Menu Items

How to select and change settings within the menu screens.

Troubleshooting Common Issues

Common Problems and Solutions

Lists common issues and their remedies for troubleshooting.

Technical Specifications Overview

Amplifier Section Specifications

Technical specifications for the amplifier section.

Digital Audio Section Specifications

Technical specifications for the digital audio section.

FM Tuner Section Specifications

Technical specifications for the FM tuner.

AM Tuner Section Specifications

Technical specifications for the AM tuner.

General Specifications

General specifications like power supply and dimensions.

Remote Control Setup Code Tables

Audio Component Setup Codes

List of setup codes for receivers, preamplifiers, etc.

CD Player Setup Codes

List of setup codes for CD players and multi-disc changers.

CD Player Setup Codes (Continued)

More setup codes for CD players.

AUX/Home Theater Control Codes

Setup codes for home theater control devices.

VCR Setup Codes

Setup codes for VCRs.

TV Setup Codes

Setup codes for TVs, monitors, and projectors.

VCR Setup Codes (Continued)

More setup codes for VCRs.

Cable Box Setup Codes

Setup codes for cable boxes and set-top boxes.

TV Setup Codes (Continued)

More setup codes for TVs and projectors.

VCR Setup Codes (Continued)

More setup codes for VCRs.

Cable Box Setup Codes (Continued)

More setup codes for cable boxes.

VCR Setup Codes (Continued)

Final VCR setup codes.

Cable Box Setup Codes (Continued)

Final Cable box setup codes.

Related product manuals