Aoralscan 3_Manual_V1.0.0.30 - 34 -
⚫ Hold the scanner steady by resting it on the tooth surface and keep the scanner head
within 15 mm from the teeth.
⚫ When scanning, slowly move the scanner and simultaneously check the scan results on
the screen to ensure that the scanning is of good quality.
⚫ When scanning, the scanner head should be centered over the teeth, and each
movement should align with the cross-hairs, following the lower and upper dental arch shapes.
⚫ A complete scan data of a single area includes the surfaces of occlusal, lingual, buccal,
interproximal contacts of the adjacent teeth, and 2-3 mm buccal gingiva.
⚫ A complete scan data of a single case includes the lower jaw, upper jaw, and bite
registration.
⚫ When scanning, change the scanning angle to 35-55 degrees in order to create overlaps.
It is important to achieve an overlap of at least 30% between each acquisition. If the overlap is
small, it may cause the alignment to fail.
⚫ To scan the occlusal surface of the teeth, hold the scanner at a 90-degree angle; to scan
the buccal and lingual surfaces of the teeth, hold the scanner at a 45-degree angle.
⚫ Inspect the scanned image in the 3D scan view window (IntraoralScan) and pay attention
to warning messages.
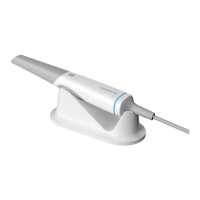
Heating the Scanner Head
To ensure optimal image quality, you should prevent condensation on the scanner mirror
before each scan by heating the scanner head.
Follow the steps below to warm up the scanner before starting an acquisition:
(1) Ensure that the scanner head, scanner body, and pedestal are clean. For details, see Pre-
cleaning, disinfection, and sterilization on chapter 10.
(2) Gently and carefully attach the scanner head to the scanner body, with the mirror facing
downward.
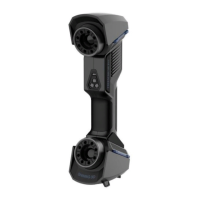
(3) Connect the power supply to the Aoralscan 3. See Connecting the scanner in chapter 4.
(4) Place the scanner in the pedestal to secure it in place.
(5) When the LED ring light on the end of the scanner body lights up green, the heater
automatically turns on and detects the temperature.
It the temperature of the scanner head is lower than the set point for anti-fogging, a
notification message of pre-heating and current temperature appears.