Shure Incorporated
6/26
•
•
•
•
1.
2.
3.
4.
1.
2.
3.
4.
1.
Screwdriver or drill
Braided metal cable or other high-strength wire for secondary attachment point (not included)
Tile bridge for ceiling tile installations (not included)
Pre-construction bracket for other types of ceilings (not included)
Tile Ceilings
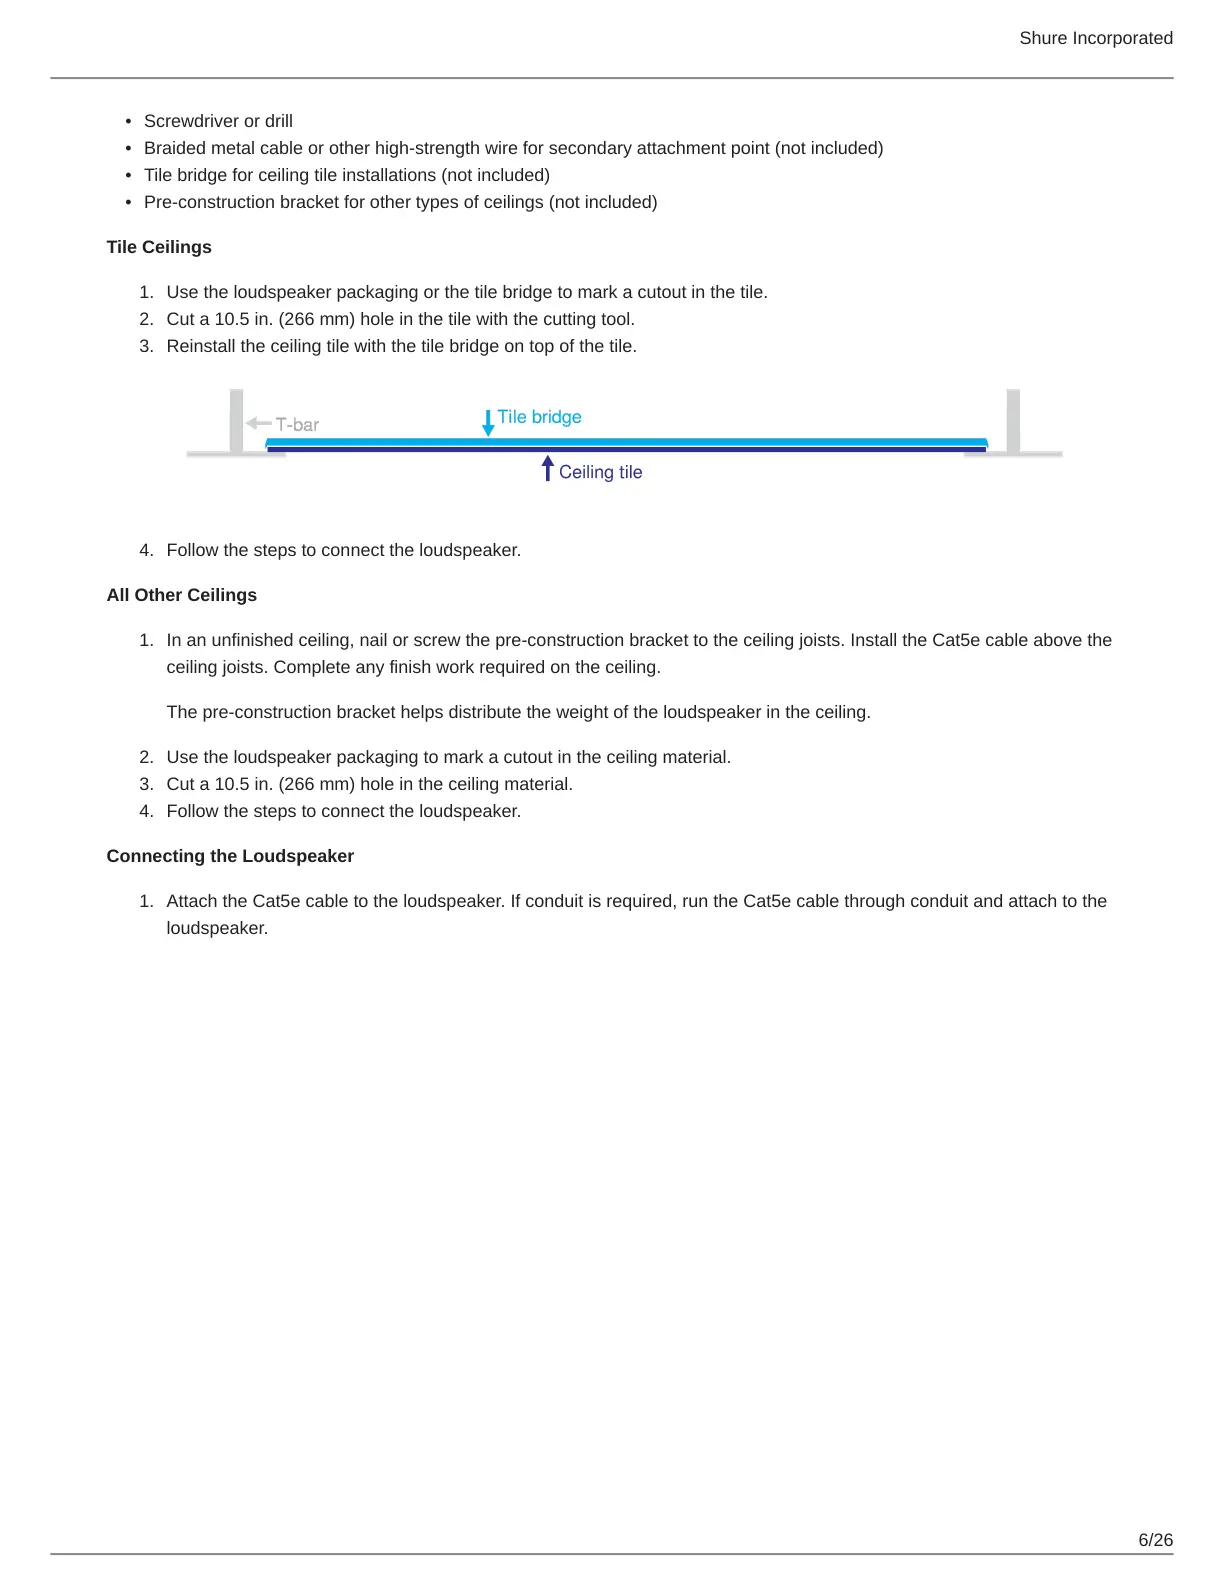
Use the loudspeaker packaging or the tile bridge to mark a cutout in the tile.
Cut a 10.5 in. (266 mm) hole in the tile with the cutting tool.
Reinstall the ceiling tile with the tile bridge on top of the tile.
Follow the steps to connect the loudspeaker.
All Other Ceilings
In an unfinished ceiling, nail or screw the pre-construction bracket to the ceiling joists. Install the Cat5e cable above the
ceiling joists. Complete any finish work required on the ceiling.
The pre-construction bracket helps distribute the weight of the loudspeaker in the ceiling.
Use the loudspeaker packaging to mark a cutout in the ceiling material.
Cut a 10.5 in. (266 mm) hole in the ceiling material.
Follow the steps to connect the loudspeaker.
Connecting the Loudspeaker
Attach the Cat5e cable to the loudspeaker. If conduit is required, run the Cat5e cable through conduit and attach to the
loudspeaker.